BMW K bikes (Bricks)


You are not connected. Please login or register

View previous topic View next topic Go down  Message [Page 1 of 1]


BrickedOut

BrickedOut
active member
active member
Where to begin…

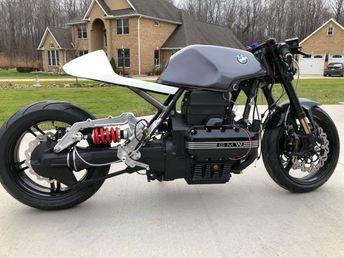
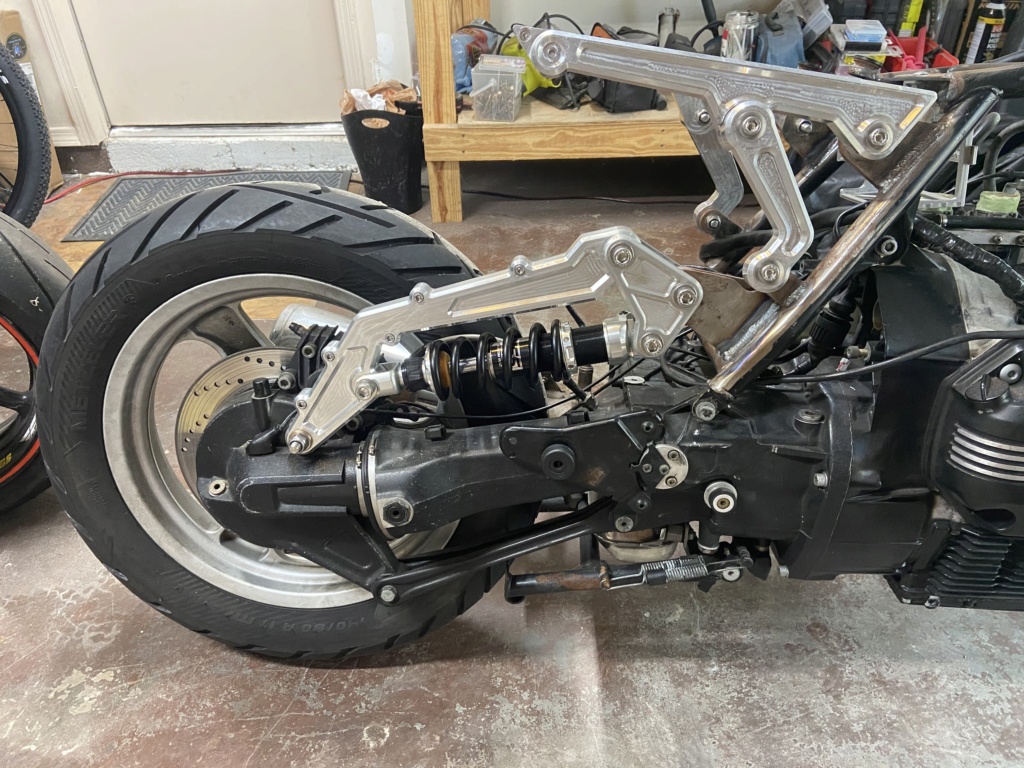
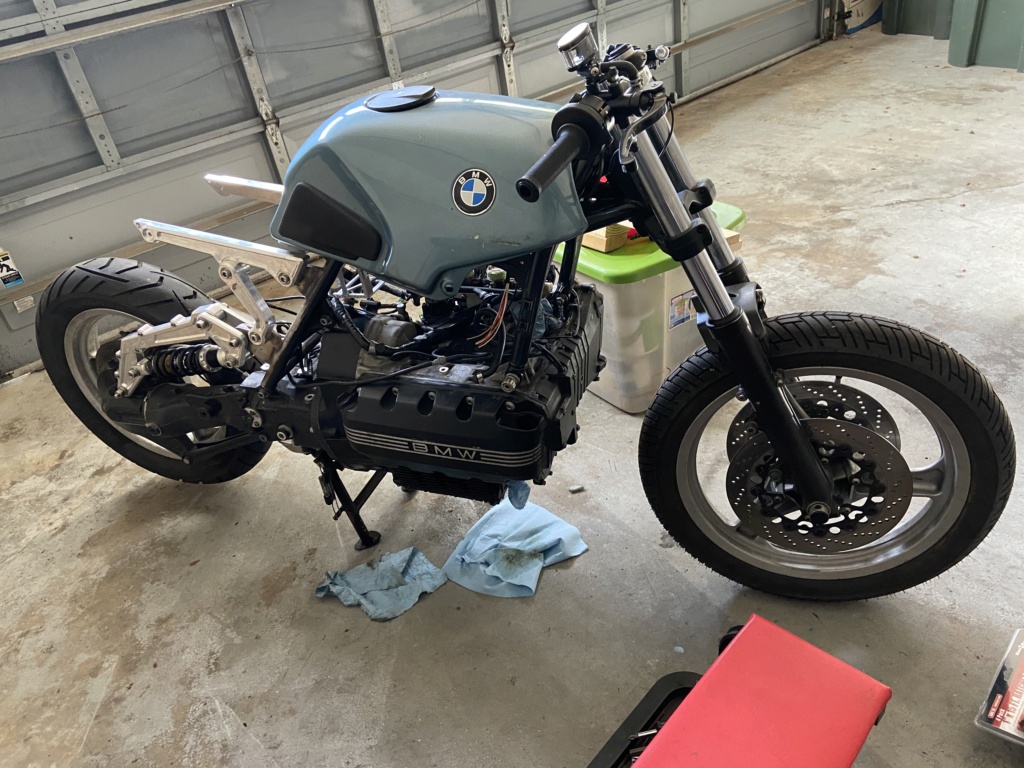
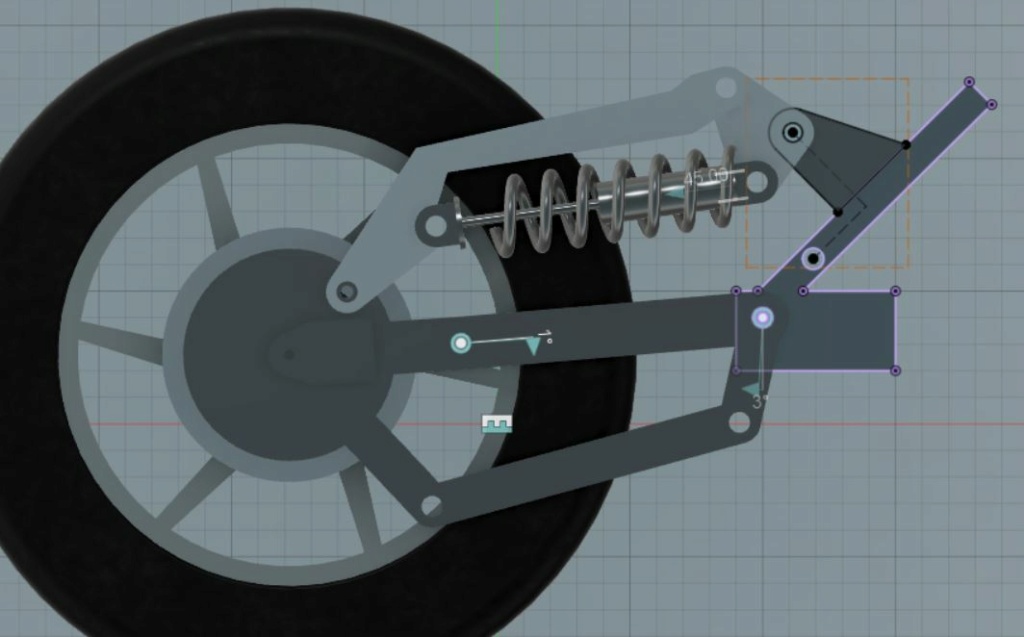
    I decided to use the retrorides suspension on my k1100 build and just got it in a couple weeks ago. Great aesthetics if you ask me. Opens up the back end and allows for a seat with a nice straight line parallel to the tank. That said, after cutting my frame and placing the parts loosely where they’re supposed to go, I noticed a pretty big issue. Despite all of the sites that sell them saying they work for K1100’s in their descriptions, I found a single line in the booklet the designer wrote that states the suspension is only meant for monolever rear ends. And of course I have the paralever on my K1100. I noticed this when the measurements weren’t matching up the way they should have. Turns out the swingarms are actually slightly different lengths, and of course the paralever swingarm has an extra joint in the middle of it. I searched around and found a few other pictures online of K1100’s with the modification but I doubt they went through the trouble of remodeling the whole thing to get the correct leverage ratio. So I decided to model up the suspension based on the original CAD files and my own measurements on the bike to adjust for the different geometry and get a corrected mounting position with a decent leverage ratio for my weight. Skip to the end for my summary if you don’t want to read through the technical details.
     I modeled the monolever suspension first in order to verify the original design and compare. The dimensions did, in fact, work out correctly for the monolever which reaffirmed to me that the paralever rear end is a different length.
    Getting into it, the leverage ratio was an average of about 2.15. Stock LR is about 1.28 on average (calculated based on geometry at full extension). Stock spring rate is 5.5 kg/mm and I believe the typical for progressive shocks is 5 - 6 kg/mm. Using the equation Stock SR/Stock LR = New SR/New LR where SR is spring rate and LR is leverage ratio in order to determine an equivalent new spring rate, we get a new required spring rate of 7.7 kg/mm. The suggested springs for the kit (YSS MA366-352TR-52) have a spring rate of 10 kg/mm which should suffice if you’re fairly heavy and want an extra safety margin, but considering this kit is intended to accommodate only a single rider, it makes more sense to go with a softer suspension than stock which means the leverage ratio needs to be higher.
    Another glaring issue with the design is the regressive leverage ratio. Look anywhere for a similar design on a production motorcycle or bike and you won’t find it because it results in a regressive leverage ratio. The whole point of having a rocker and linkage setup is to be able to modify the leverage ratio curve to something more desirable than can be achieved with the traditional single pivot design. Typically a progressive (decreasing through wheel travel) leverage ratio is best. This results in a ride that is soft in the beginning of its travel and gradually gets harder. This makes small bumps softer while helping to limit travel for larger bumps. With a regressive curve the opposite happens. Small bumps are hard and the suspension gets softer when hitting large bumps which risks bottoming out on the suspension. You can see this in the leverage ratio chart. I suspect this is the reason why a stiffer spring was chosen. I did my best to change things so that it’s a flat curve in my own design. It can be hard to find information on the leverage ratio curves of other motorcycles but typically sport bikes tend to have fairly flat curves and cruisers are more progressive. You can see in the same chart that the stock leverage ratio is progressive, although just slightly. Using a progressive spring with the stock setup ends up making the suspension quite progressive. This is one reason why I was so surprised that the retrorides suspension is regressive and doesn’t use a progressive spring to compensate.
Analysis and modification of stock and retrorides suspension It+HYBMLBwDCsFsjiIojRQGVAZUBlQGVAZKJwyQPuPdyF3QT+cCxcAQ67HQf9LASkgBaSAFJACUkDAoDIgBaSAFJACUkAKlKuAgKFcibSBFJACUkAKSAEp8P8BPQXYe+mzlu8AAAAASUVORK5CYII=
Leverage ratio comparison. Don’t forget the stock ratio is lower than the rest because a softer spring rate is used.


BrickedOut

BrickedOut
active member
active member
Analysis and modification of stock and retrorides suspension X8WK4RhLCZrsQAAAABJRU5ErkJggg==
The Retrorides suspension modeled in Linkage
The fix for this is modifying the rocker arm to look less like a triangle and more like a straight line (picture for example). The chart below shows the leverage ratio somewhat exaggerated to show how the curve becomes much more progressive.
Analysis and modification of stock and retrorides suspension FffP6655ppkkRmOBCQgAQlIQAJZCCjgsmSiiWP58uWx7777xty5c5NFZjgSkIAEJCABCWQhoIDLkokmDipwQ4YMiVmzZiWLzHAkIAEJSEACEshCQAGXJRNNHKtWrYq+vr649dZbk0VmOBKQgAQkIAEJZCGggMuSiSaOjRs3xsqVK2P9+vXJIjMcCUhAAhKQgASyEFDAZcmEcUhAAhKQgAQkIIEuCSjgugTlyyQgAQlIQAISkEAWAgq4LJkwDglIQAISkIAEJNAlAQVcl6B8mQQkIAEJSEACEshCQAGXJRPGIQEJSEACEpCABLokoIDrEpQvk4AEJCABCUhAAlkIKOCyZMI4JCABCUhAAhKQQJcEFHBdgvJlEpCABCQgAQlIIAsBBVyWTBiHBCQgAQlIQAIS6JKAAq5LUL5MAhKQgAQkIAEJZCGggMuSCeOQgAQkIAEJSEACXRJQwHUJypdJQAISkIAEJCCBLAQUcFkyYRwSkIAEJCABCUigSwIKuC5B+TIJSEACEpCABCSQhYACLksmjEMCEpCABCQgAQl0SUAB1yUoXyYBCUhAAhKQgASyEFDAZcmEcUhAAhKQgAQkIIEuCSjgugTlyyQgAQlIQAISkEAWAgq4LJkwDglIQAISkIAEJNAlAQVcl6B8mQQkIAEJSEACEshC4H8mhI620RnddgAAAABJRU5ErkJggg==
Modified Rocker Arm in Linkage


BrickedOut

BrickedOut
active member
active member
Analysis and modification of stock and retrorides suspension 8BiCZtnlnOVaUAAAAASUVORK5CYII=
Modified rocker leverage ratio
    Unfortunately I already bought the kit and I don’t feel like shelling out hundreds of dollars to get a custom CNC’d part. Part of the draw of this kit is that it was made in decent quantities and was already modeled for manufacture so the parts were much cheaper than getting a one-off suspension CNC’d.
    Anyways I have a paralever on my rear end so I’ll get into how that changes things. Basically the steel plate that comes with the kit and attaches the rocker arm to the frame is too short because the swingarm is longer. The only way to get it to work is to lower the suspension overall and place it closer to the axle and frame/transmission bolt. I didn’t even bother modeling that because I knew for a fact it wouldn’t work out. I don’t want to lower my bike excessively and mounting closer would lead to a much higher leverage ratio as well. Closer mounting would also lead to excessive lateral static forces. I’m guessing others who installed the kit on their K1100’s have found the suspension is too soft and rides low.
    So my fix was to leave it roughly the same distance vertically from the frame bolt as was measured for the monolever and then further back horizontally. You can see the result of this in the leverage ratio chart labeled Paralever. This still didn’t give me the more progressive curve I wanted though. I was aiming for an average of 2.5 and a roughly flat curve. This should make the spring slightly softer than stock which is good for me because I weigh about 180 lbs and won’t have a rear rider or any cargo on back. Also, a slight increase in ride height will make the beginning of the curve more progressive and will chop off some of the end of the curve where it starts to become regressive.
    So I moved the rocker slightly further away from the frame and slightly increased ride height to achieve the result in Paralever V2 on the chart. There is a saving grace with the paralever as well. The joint in the swingarm which accommodates for the paralever actually makes the curve slightly more progressive than the monolever. This is due to the suspension mount’s offset from the axle and the way in which paralevers work. Basically a paralever in the suspension reduces the wheel hub’s rotation around the swingarm pivot. See the picture below or give it a search and it will make more sense.


__________________________________________________
1995 K1100 LT
    

BrickedOut

BrickedOut
active member
active member
Analysis and modification of stock and retrorides suspension WFbwvDbn2pvIwAAAABJRU5ErkJggg==
Paralever movement example


BrickedOut

BrickedOut
active member
active member
Analysis and modification of stock and retrorides suspension Zq9m4xov+XOvWvdmo8mvPZ39PtfsQS9z1dZcPv8fBOcSklOWw+MAAAAASUVORK5CYII=
My own modifications for the paralever suspension


BrickedOut

BrickedOut
active member
active member
Lastly, the stress computations. Max force was calculated using an approximation of maximum travel with a stock bike (this assumes the original designers chose a good spring rate and leverage ratio). 80mm travel * 5.5kg/mm / 1.28 leverage ratio = 344 kg max load on the rear. This is about the equivalent of two 250 lbs riders and 50 lbs of gear on the back.


Analysis and modification of stock and retrorides suspension +6EdcW6IgNkgAyQgd7KAAWOAse7LjJABsgAGSADZKCHMUCB62EnrLfeSfB78S6ZDJABMkAGyIB9BihwFDjedZEBMkAGyAAZIAM9jAEKXA87Ybw7sX93wrpiXZEBMkAGyEBvZYACR4HjXRcZIANkgAyQATLQwxj4fyQIx8bgJxScAAAAAElFTkSuQmCC
Example force calculation using 100 kg load on the rear


BrickedOut

BrickedOut
active member
active member
Using a truss force calculator with approximate dimensions I calculated the max force at the ends of the suspension linkage. Plugging in 344kg to the load results in about 900kg force. Keep in mind this is the total force that will be felt where it bolts to the frame and to the swingarm hub, not the force felt by the spring itself. I found this to be one of the greatest pitfalls of this design. The linkage is basically a force multiplier. Hit a deep pothole at speed and those bolts to the frame and swingarm might bend or shear. The original bolt hole on the hub of the swingarm was structurally designed for a shock that runs about 45 degrees from horizontal and this axis passes right through the axle. By moving the suspension horizontally, that force is now directed further back and above the axle which results in a torque around the rear axle. This is particularly problematic for the monolever swingarm which it was originally intended for. The fairly skinny swingarm has to take all of that torque as well as the tension by pulling an equal amount in the opposite direction.

    Interestingly enough, this design actually makes more sense with the paralever rear suspension which it wasn’t designed for. The torque of the suspension linkage around the axle is taken mainly by the paralever because it has a decent length moment arm away from the axle. The swingarm is still in tension though which means the drive links are all in tension and much more than they were designed for. I don’t really know the whole transmission and final drive on this bike or the other factors involved well enough to say how much of a danger this is. I’d like to hear others’ opinions on this.

    In the end I’m still comfortable going ahead with the install because of the number of kits that have been installed on the k1100 by others. Haven’t seen any stories of completely wrecked bikes because of this suspension in all of my searching but it is a good warning to avoid potholes when riding.

    For a larger person weighing 200lbs/90kg a good estimate of load on the rear wheel (sprung weight) would be 400lbs/180kg. This gives a rear wheel travel of 42mm when sitting on the bike. Max travel is about 125mm for the stock bike. This is a good number for a cruiser or sport bike that most likely isn’t going to be going over any rough terrain. A typical starting point is 1/3 of the maximum travel which allows 2/3 travel for any large bumps to be absorbed and 1/3 for rebound damping and this matches that quite well.

    I’ll be making the adjustments and welding in the next few days so I’ll update with how things go. If I determine things work out well I’ll post the particular measurements I changed for my design. I’m hesitant to send anyone the full file though because the original design and specifications are Retroride’s and you have to buy an ebook to get it so I don’t want to mess with his IP.

    If interested in doing any calculations yourself or designing your own suspension, the programs I used which I found to be pretty helpful were Fusion 360, Linkage, which is a kinematic simulator, and SkyCiv, a truss calculator online. These are all free programs to use, but if you have access to solidworks, basically all of the simulations can be done with it alone. Just gotta be a bit more creative using the data in excel to make it work with the free programs.

    Also please correct me if I’m wrong about anything. I’ve done a lot of research into suspension design recently but I’m by no means close to an expert. Personally I don’t want to make a motorcycle into any more of a death trap than it already is and I don’t want anyone else getting incorrect information here either.
    
TLDR:
    The retrorides suspension wasn’t originally designed for bikes with paralever rear ends but it can be modified to work. The original design has some issues as well. The main issue is the regressive leverage ratio and unbalanced forces on the swingarm. And if you buy the kits online that come with a yss spring, the suspension will most likely end up too hard. I modified the steel brace that attaches the suspension linkage to the frame to correct for some of these issues on paralever rear ends. Also if anyone would like to buy the progressive spring I took off my K1100LT, it’s for sale and in good condition.


__________________________________________________
1995 K1100 LT
    

Dai

Dai
Life time member
Life time member
Well, we know what you were doing the in the Florida lockdown! Very Happy Very Happy
 
Seriously though - good work. I do like reading the technical stuff that someone else has needed to work through.


__________________________________________________
1983 K100 naked upgraded to K100LT spec after spending time as an RS and an RT
1987 K100RT
Others...
1978 Moto Guzzi 850-T3, 1979 Moto Guzzi 850-T3 California,1993 Moto Guzzi 1100ie California
2020 Royal Enfield Bullet 500
    

Suzi Q

Suzi Q
Life time member
Life time member
Maybe explains why this thread seems to have stalled...?

I was curious (post #2)...

https://www.k100-forum.com/t15340-k1100rs-by-wooboodoo


__________________________________________________
Sometimes I'm not really Suzi Quatro.
    

BrickedOut

BrickedOut
active member
active member
I saw that post as well. It seemed to me that he probably finished the work although it’s possible it ended up being a poor setup and he realized he chopped up a perfectly good bike. Doesn’t look like he’s active on the forum though.


__________________________________________________
1995 K1100 LT
    

Two Wheels Better

Two Wheels Better
Moderator
Moderator
Analysis and modification of stock and retrorides suspension Retror10
This owner seems to have made it look like it works on a Paralever.
Analysis and modification of stock and retrorides suspension Retror11
And here, too.


__________________________________________________
How we spend our days is, of course, how we spend our lives. - Annie Dillard, author - born 30 Apr 1945
1977 R75/7-100, '93 K11/K12 Big Block, '95 R100 Mystic, '96 K1100RS, '98 K1200RS, '06 K1200R & '09 K1300GT. Projects: 1993 & '96 K1100RS, & 1st '98 K1200RS.
The Mystic, Big Block, 2nd K1200RS, K12R & K13 are running & ridable.
    

Laitch

Laitch
Life time member
Life time member
Two Wheels Better wrote:This owner seems to have made it look like it works on a Paralever.
It looks like it attaches to a Paralever anyway. Laughing


__________________________________________________
1995 K75 90,000 miles
    

Suzi Q

Suzi Q
Life time member
Life time member
I wasn't awestruck by the Retrorides unit - it's eye-catching and artistic alright, but I think your description of it as a 'force multiplier' is a very good way to describe it according to its real main feature. It turns the rear end into a cantilever and, without your impressive ability to analyse and calculate, I'd just say that the loads on the OE swingarm pivot pins must be worryingly greater than standard, as a result.

Another concern is that, whereas it should be possible to choose a spring that's about right, the issue of getting successful damping (in case you want to do a bit more than tootle around) might be much more of a challenge with a short travel/monster spring/weird leverage ratio suspension unit.

Interesting stuff - I've read it all three times now, cheers!


__________________________________________________
Sometimes I'm not really Suzi Quatro.
    

Laitch

Laitch
Life time member
Life time member
Gabi Nicolae created an interesting design for his custom moto's monolever suspension.


__________________________________________________
1995 K75 90,000 miles
    

Tjrad

Tjrad
active member
active member
I joined this forum today as I have been researching the retro rides suspension setup with a paralever, this is far, far, and away the best info on the web. I would love to discuss it with bricked out but cannot send dms.


16Back to top Go down   Analysis and modification of stock and retrorides suspension Empty Retrorides Tue Oct 20, 2020 6:18 pm

kenrams

kenrams
Silver member
Silver member
So I've just read this thread and am not sure what to think about what to do next. I recently bought a basket case of a K75 project which had the rear frame removed by the PO, with the intention of using the Retrorides set up which is for sale on caferacer.eu. I first heard of it a number of years ago and the setup was discussed positively on a caferacer.tv youtube. They mentioned that the design had been thoroughly researched over time and the result was a very smooth riding setup. This is obviously not what is being said on this thread. I have no real choice now but to finish the build and see how it behaves on the road. Otherwise, I am out $700 and a ton of time - not to mention a complete rear-end redesign. 
I would imagine that there are quite a few builders who have used this setup over the past couple of years and would love to hear what they say about their experiences.


__________________________________________________
1981 R100 cafe- 121,000 miles
1985 K100 cafe - 55,000 miles
1987 K75C - 44,000 miles
    

Tjrad

Tjrad
active member
active member
Hey Ken,

This thread has more to do with adapting the setup to a paralever rear end that is
+-50mm longer than the monolever.  I have discussed this setup with multiple people who have it on a monolever.  Consensus is,not as good handling as stock but good enough, it is definitely done for the look.  With a K75 you should not have any of the problems listed in this thread.


kenrams

kenrams
Silver member
Silver member
Thanks a lot, Tjrad, after reading the thread I was pretty disappointed as I am putting a lot of time, effort and cash into this build. I was working on the electrics today but all the time I kept thinking about the back end issues. I was never expecting to have modern handling on the bike and I’ll certainly take “good enough” handling and I must admit, aesthetics are pretty important to me. You’ve at least convinced me to finish it and try it out before making any judgement.
Cheers
Ken


__________________________________________________
1981 R100 cafe- 121,000 miles
1985 K100 cafe - 55,000 miles
1987 K75C - 44,000 miles
    

19Back to top Go down   Analysis and modification of stock and retrorides suspension Empty Finally! Sun Nov 08, 2020 3:48 pm

stevenhannan

stevenhannan
New member
New member
Hi I love your detailed post. I’ve been looking for a while now for this exact piece of work!
You’re a legend.

I have just posted this question elsewhere on another forum.

I’ve just bought a 1992 K1100LT and love the aesthetics of the cleaner rear end with the retrorides but perhaps not at the expense of my early demise mid-corner...

May I ask how you ended up going with your modified installation?

If it went well would you mind posting the specifics in terms of the modified mounting position of the arm etc?

If it didn’t go well, then let’s all just sweep it under the carpet and look at something else...

Thanks in advance!


Two Wheels Better

Two Wheels Better
Moderator
Moderator
stevenhannan wrote:Hi I love your detailed post. I’ve been looking for a while now for this exact piece of work!
You’re a legend.

I have just posted this question elsewhere on another forum.

I’ve just bought a 1992 K1100LT and love the aesthetics of the cleaner rear end with the retrorides but perhaps not at the expense of my early demise mid-corner...

May I ask how you ended up going with your modified installation?

If it went well would you mind posting the specifics in terms of the modified mounting position of the arm etc?

If it didn’t go well, then let’s all just sweep it under the carpet and look at something else...

Thanks in advance!

Please make the required Member's Introduction before continuing to post on the forum. Thank you.


__________________________________________________
How we spend our days is, of course, how we spend our lives. - Annie Dillard, author - born 30 Apr 1945
1977 R75/7-100, '93 K11/K12 Big Block, '95 R100 Mystic, '96 K1100RS, '98 K1200RS, '06 K1200R & '09 K1300GT. Projects: 1993 & '96 K1100RS, & 1st '98 K1200RS.
The Mystic, Big Block, 2nd K1200RS, K12R & K13 are running & ridable.
    

BrickedOut

BrickedOut
active member
active member
It’s been a few months since I’ve been able to work on the bike but I thought I’d post the progress I made getting all the frame together. Don’t have it running yet so I can’t speak to road response but the feel of it is good. Of course this modification is more for looks than anything, the LT’s were never designed to be race bikes anyway so I wasn’t too worried about that aspect. It’s firm enough that I’d be comfortable with a passenger riding on back or someone heavier than me (180 lbs) riding solo. I think there’s room to make things a little bit softer and therefore lower forces throughout if you plan on it being a one seater, but not much. I always favor the more conservative approach. Of course you can tailor it to the roads you’ll be riding on as well, good vs bad pavement and off-road but there should be enough adjustment room in the shock you use to help with this too. A good adjustable preload and rebound and damper settings help a lot. Looks are subjective but I think it looks just a bit off and out of place with the required modifications for the paralever. You can clearly see the shock is further away from the frame because of the longer swingarm and the steel braces I used is rather large and ugly compared to the rest of the design. Had I not already bought the kit, I would have made the CNC part which holds the shock in place longer to fix this. As far has the high forces go, I’m still a bit worried about the wear of parts in the swingarm as chris846 also pointed out. That said, looking around the internet, I also found pictures of others with paralever rears which were not modified accordingly and that gives me hope for two reasons. I would expect to have found someone sounding the alarm on a forum or suing a reseller for claiming the kit works with the k1100 if things had broken. Also from what I could see, each build attempted to attach the lever to the frame in the same location as the monolever/original design. This would result in a far too stiff suspension and much greater forces. So if they didn’t have issues with it in the worst case scenario then that gives me confidence with my setup. That said, the lack of information otherwise does not necessarily mean that it is safe. I would say that if you have a paralever rear end and you’re looking to clean things up or especially improve handling, spend the money on a good adjustable rear shock in the stock setup and just cut off the rest of the seat’s frame from there back to do a custom seat. It’s easy enough to take out abs and the battery and hide the battery away right behind the airbox. I’ll add a link to a video I took actuating the suspension as well. I’ll try to be a bit more active answering questions and when I do get back to the project I’ll post result as I go.
Analysis and modification of stock and retrorides suspension 0eb8dd10
Analysis and modification of stock and retrorides suspension 666bca10
Analysis and modification of stock and retrorides suspension 20934810


__________________________________________________
1995 K1100 LT
    

BrickedOut

BrickedOut
active member
active member


__________________________________________________
1995 K1100 LT
    

BrickedOut

BrickedOut
active member
active member
Analysis and modification of stock and retrorides suspension Overal10

This should help to understand the overall positioning of things when installing with the shock fully extended. The dimensions in the post above must be followed closely because even a small deviation can drastically affect the suspension. Best to tac everything up while its together and remeasure and ensure alignment before doing the final welds.


__________________________________________________
1995 K1100 LT
    

BrickedOut

BrickedOut
active member
active member
Also I forgot to mention I made some small changes to the measurements since my first post that changed the leverage ratio graph so I thought I would post that again. I'm referring to the change in the V2 line. These updates are reflected in the pictures I just posted with dimensions.

Analysis and modification of stock and retrorides suspension Levera10

If interested, I'm happy to send my fusion 360 project files and excel file. Just dm me your email.


__________________________________________________
1995 K1100 LT
    

kenrams

kenrams
Silver member
Silver member
Hey BrickedOut 
Thanks for not disappearing and continuing to post your experience with this suspension setup. Very Happy 

I've fitted the Retrorides setup to my K75 and I love the looks but was wondering if you had any thoughts as to why the coil on the YSS is so short? Yours looks like mine -although mine is of course monolever- and is in the "spring uncompressed" position and any more rotation of the rotation dial results in the spring being completely uncompressed and rattling. I estimate the spring could be maybe another one inch longer. Any ideas as to why it is so short?

Analysis and modification of stock and retrorides suspension Coil10

  Analysis and modification of stock and retrorides suspension Coil110


__________________________________________________
1981 R100 cafe- 121,000 miles
1985 K100 cafe - 55,000 miles
1987 K75C - 44,000 miles
    

BrickedOut

BrickedOut
active member
active member
I believe this is just to do with how the manufacturer makes it. They only make springs in so many variations so it’s probably just made in one length for the particular stiffness. The same goes for the damper, they have a few designs and make them universal enough to go with a wide variety of springs. That’s the reason for the damper having such a long section of threads. It could be paired with another spring to achieve a different eye to eye length for another application. Just the nature of trying to make a large catalog of aftermarket parts for a wide range of motorcycles. So long story short, there’s nothing wrong with it. Just turn it to compress it down to the correct preload setting for your application. You can find loads of videos online on how to do this.


__________________________________________________
1995 K1100 LT
    

BrickedOut

BrickedOut
active member
active member
Analysis and modification of stock and retrorides suspension 8127d410
Project update:
I’ve slowly been putting in the work on the bike, lots of time dismantling and repainting. Currently working on my own design for the seat which I’ll probably post a new topic on. The bike is up and running though which gave me a chance to take it around and hit some bumps to test. Rear suspension felt good, a bit firm, but that’s always better than too soft. Keep in mind I rode around on a plywood board with a blanket because I haven’t made the seat yet. Also based on the overall lines, seating positions and steering feel I think the rear end could be dropped a bit lower.

 The front end is a bit hard to turn and I think it comes down to a few possible things: clip ons, rake angle, and weight balance. The clip ons give much less leverage because they aren’t perpendicular to the triple tree and because they extend outwards less from the steering head than the original bars. So this would make it harder to steer the front end, especially with a heavy bike like this. Weight balance is also a possibility  because I’ve chopped off some of the rear and also put my body position further forward and onto the handlebars instead of the upright position intended for the stock bike. More weight on the front would make the steering more difficult I assume. Weight balance should be fairly easy to test if I can find a real heavy duty bathroom scale and a way to hold the bike still and level while I’m sitting on it. Lastly it’s possible I’ve changed the rake angle slightly because I didn’t keep the rear end angle exactly the same as stock and I’ve also changed the front fork position in the tripe clamps. Less rake angle would make the steering more difficult. I can still adjust this by raising or lowering the front forks so at least I have some room to experiment. 

Going to take a look at all three factors and see which is affecting the steering most. Will probably wait to finish the seat before I go testing.

Also this is part of a reply I made to a member regarding my experience with the suspension after riding around on it:
My recommendations if you decide to go with this project- get all the angles and setup perfect when welding things up. If you can make a frame jig to hold things in place that helps. I welded the seat rails in a bit wider than I would like but I’m stuck with that now. The alignment of all the joints in the rear suspension is critical as well. Any slight warping during the welding process will throw off the alignment and cause friction against the bolts which are made to be a close fit. This will lead to friction in the suspension and give you a hard tail rear end. Not to sway you away but this is really only good for the looks. Overall not a good design engineering-wise. Had I not bought the CNC set before doing my research I would have gone a different route, maybe designed something myself. That said, it does look fantastic when done and I’ve put it through it’s paces on a bumpy road and it does the job. I’ll never push it to the limits racing or getting low and fast in the corners though.


__________________________________________________
1995 K1100 LT
    

View previous topic View next topic Back to top  Message [Page 1 of 1]

Permissions in this forum:
You cannot reply to topics in this forum