BMW K bikes (Bricks)


You are not connected. Please login or register

Go to page : 1, 2, 3  Next

View previous topic View next topic Go down  Message [Page 1 of 3]


1Back to top Go down   Making it my own Empty Making it my own Sun Jun 25, 2017 6:50 am

VinceD

VinceD
Silver member
Silver member
First of all let me start with saying I am a complete noob at fiddling with motorcycles or motors in general.
I do believe however I can learn alot from doing and ye old try n error.

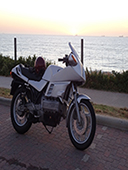
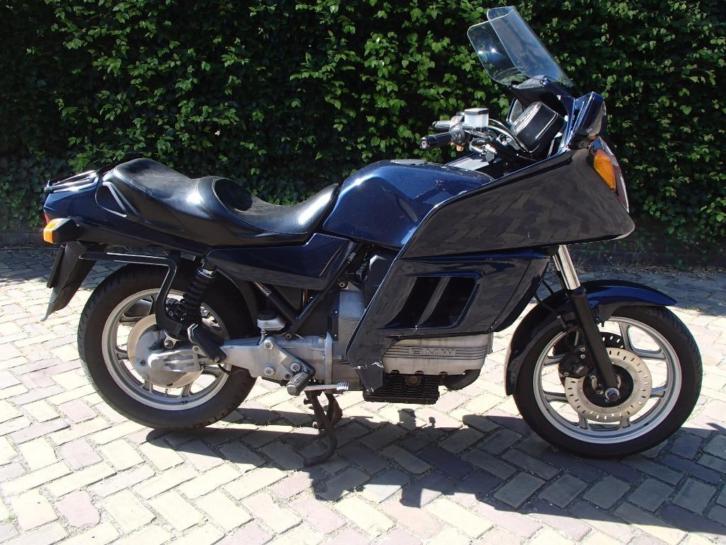
Yesterday I bought my bike in the Netherlands, a '85 K100 RT with a little under 60000km on the counter.
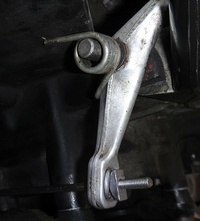
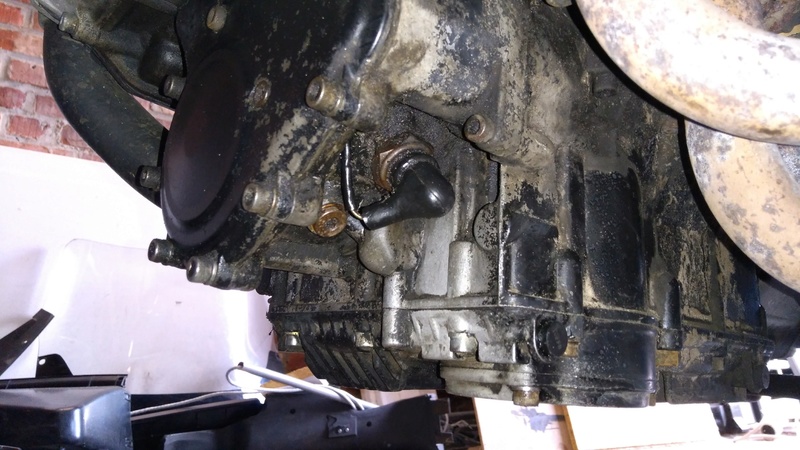
It would't start with the button but with the help of a friend who whas with me and a multimeter (have to learn using one of those too) we quickly narrowed the problem down to the starter relay (or is it solenoid).
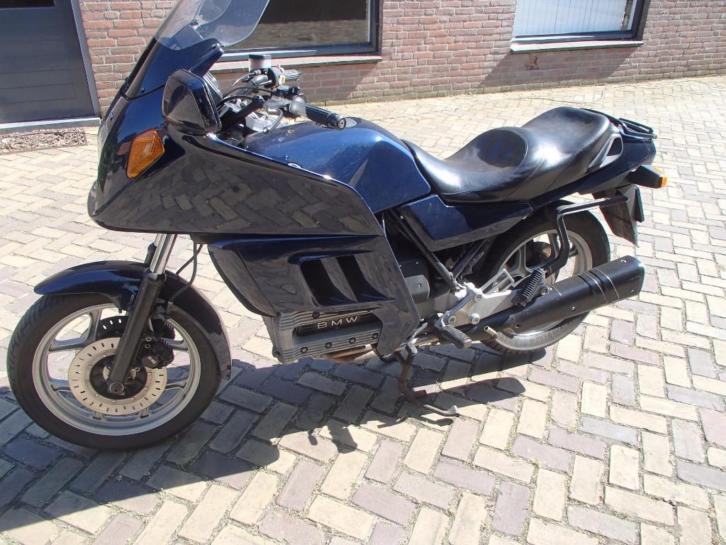
I already intended on removing fairings and windshield but even if I wasn't, I had to because the precious owners accidently(intentionally would be weird) dropped the bike. The right side of the fairing was only scratched to the eye but underneath 2/3 of the bolts snapped of and most of it was just waiting to fall off when I would have cruised the highway.
I regret this because I wanted to give it a try, riding a fairinged(?) bike but it was not meant to be.
If there is someone from around here (Antwerp) who thinks they could use it, pm me.

Feel free to reply if you have tips and tricks for me. 

OK, with that cleared out, here are a few pics of what I've done so far.
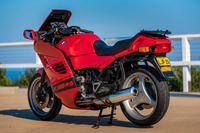
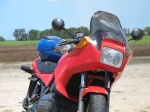
But first the before pics. On the first one you can see a crack (white) in the lower part of the side panel.
It doesn't seem like alot but like I said, most of the right part was loose. Just a few bolts gave it a ferm look and basic feel.

Making it my own 110
Making it my own 210

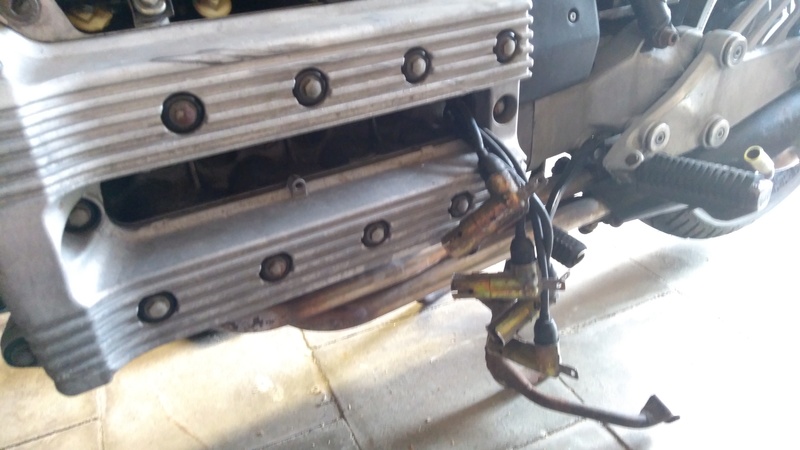
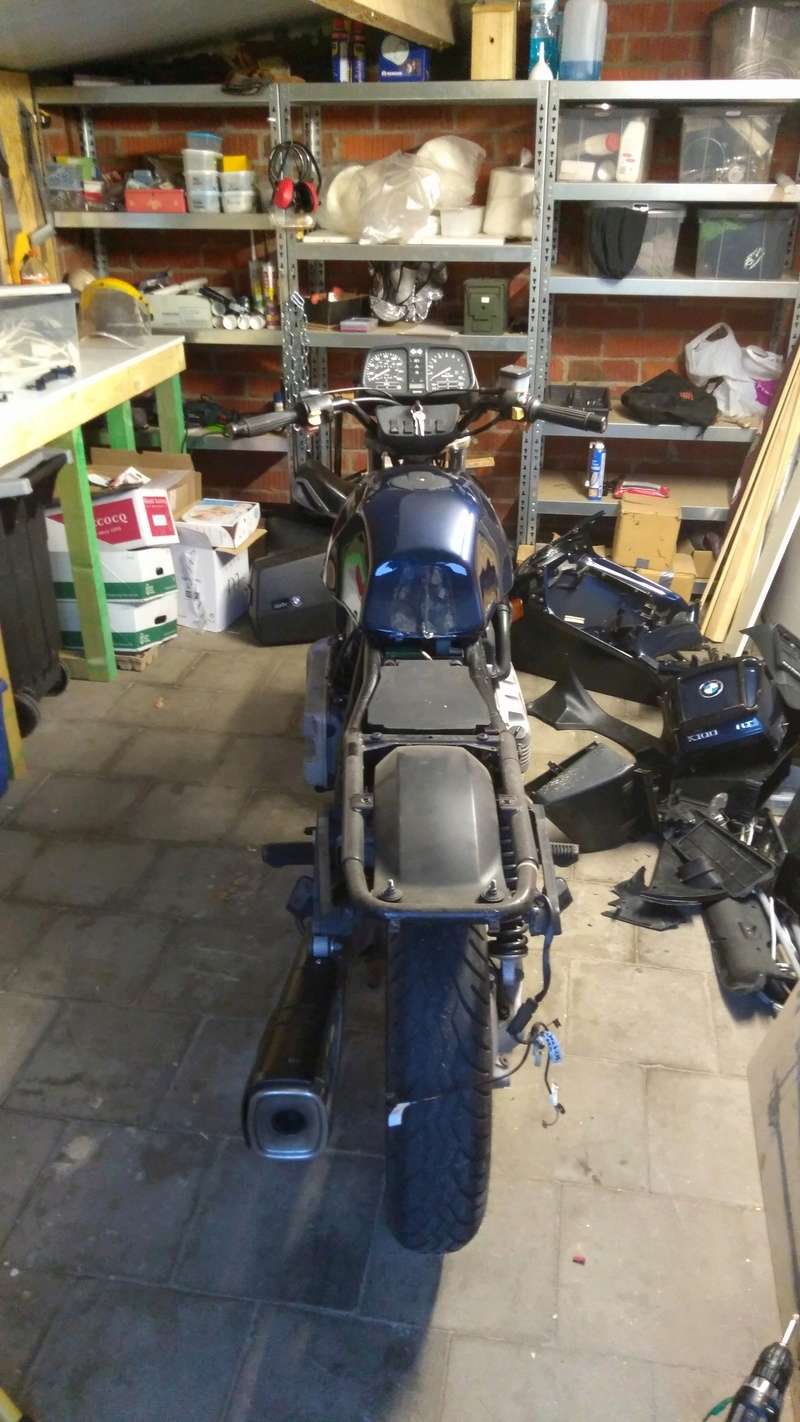
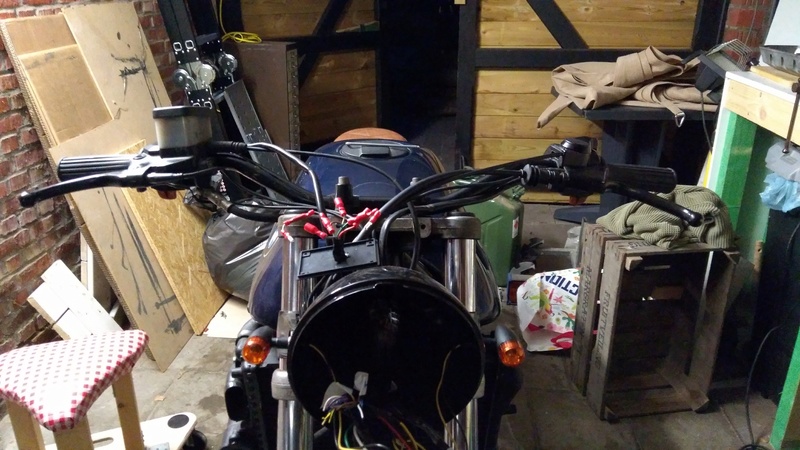
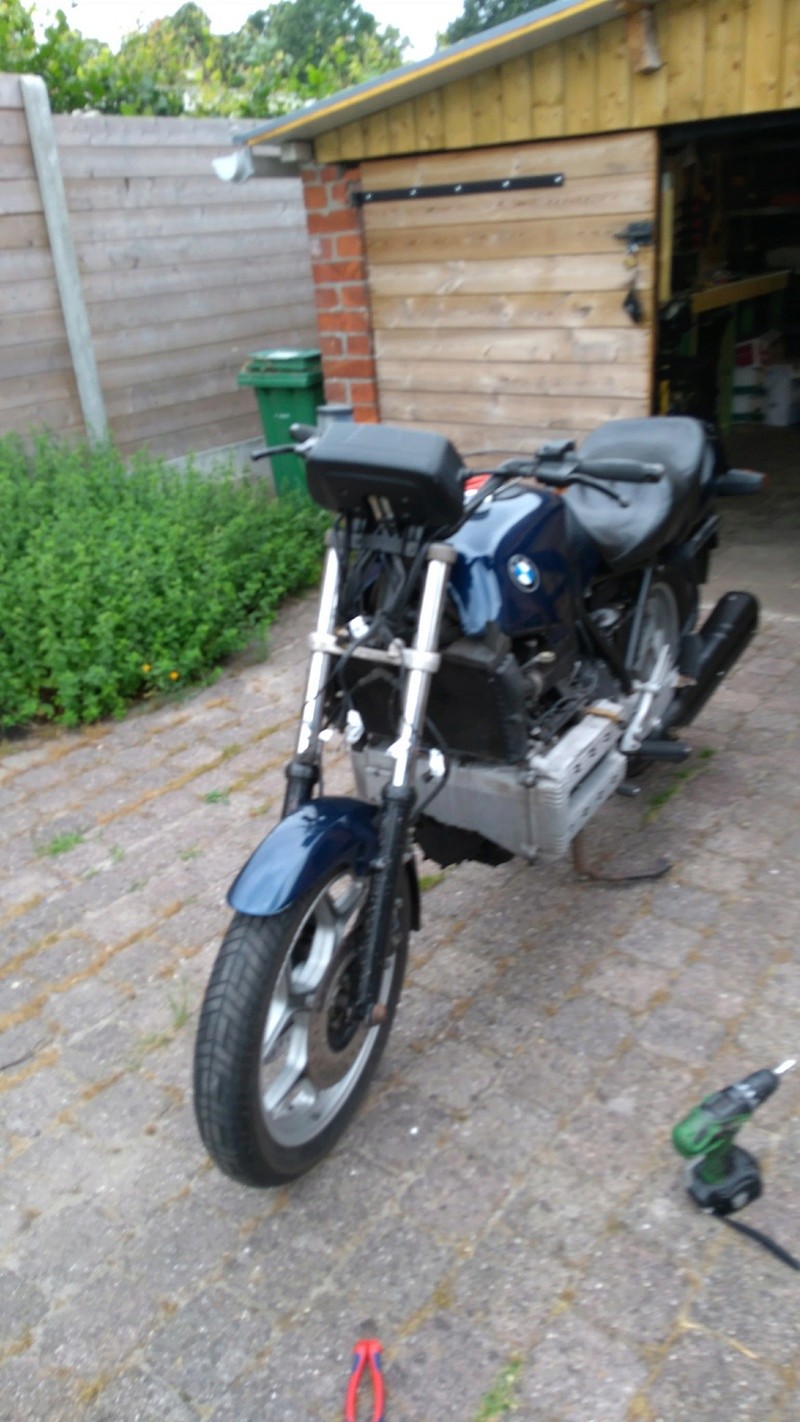
And here is the result of 30 minutes of careful unbolting and unscrewing. I labeled the wires i disconnected too.
There were two wires attached above the headlight, not sure what these do but going to look it up and label properly.

Making it my own Img_2011


Last edited by VinceD on Sun Jun 25, 2017 3:28 pm; edited 2 times in total (Reason for editing : inserting pics)


2Back to top Go down   Making it my own Empty Re: Making it my own Sun Jun 25, 2017 12:16 pm

duck

duck
Life time member
Life time member
Just so you know, the starting system on a K bike does not utilize a solenoid. It utilizes a mechanical one-way sprag.

Making it my own 056

When I want to make a K bike my own I go to the licensing office and transfer title.


__________________________________________________
Current stable:
86 Custom K100 (standard fairing, K75 Belly pan, Ceramic chromed engine covers, paralever)
K75 Frankenbrick (Paralever, K11 front end, hybrid ABS, K1100RS fairing, radial tires)
86 K75C Turbo w/ paralever
94 K1100RS
93 K1100LT
91 K1
93 K75S (K11 front end)
91 K75S (K1 front end)
14 Yamaha WR250R
98 Taxi Cab K1200RS
14 K1600GT
http://www.ClassicKBikes.com
    

3Back to top Go down   Making it my own Empty Re: Making it my own Sun Jun 25, 2017 3:13 pm

VinceD

VinceD
Silver member
Silver member
Ah ok, don't know what a solenoid is, figured it was another word for relay or something.
With making it my own i mean adjust it to my specific taste.
However I still need to make it my official own I guess, still have to get it imported in Belgium on paper. Will do that later this week before work.

After I removed the fairing I lifted up the tank a little. The horseshoe clamps that should be there were removed by a previous owner apparently. I opened the lid and found the starter-relay under it. Thanks to the photograph in another topic around here that was really easy to find. I was also able to use my pliers to bypass the relay and the startermotor turned. The motor itself wouldn't start however. I've put on the choke and gave the trottle a little twist but it didn't start. Yesterday it worked with a pushstart however. I'll figure that one out later this week. For now I am reloading my battery to ensure I don't weld my new relay together after installation.


4Back to top Go down   Making it my own Empty Re: Making it my own Sun Jun 25, 2017 4:38 pm

indian036

indian036
Life time member
Life time member
Solenoid = an iron piece moved by an electric field passing through a coil of wire. If you want to get technical, its just a coil of wire that creates an electromagnetic field.
In some cases, the movement is just to open or close switch contacts, in which case it is often also known as a relay.

There are many starter motors with heavy duty devices attached, where the magnetic field not only closes switch contacts, but also pulls a lever system which engages the starter motor gear to the gear that surrounds the flywheel or elsewhere in the engine. Many people when they say solenoid are thinking of this dual system which switches the current on to the starter motor and also brings the starter gears into mesh.

This is what the K doesn't have, instead using a one way or sprag clutch which engages when it is driven by the starter motor and disengages automatically when the engine exceeds its speed. There is also electrickery that prevents the starter motor from switching on if the engine is already running.

So in a K there is a relay in the box under the back of the tank which contains a solenoid (wire coil) that just switches starter motor current on.

Bill


__________________________________________________
1985 K100RT  VIN 0028991  My original Very Happy ROB the Red Old Bike   (Historic rego)
1985 K100RT  VIN 0029036  BOB the Blue Old Bike  (Historic rego)
1990 K100LT  VIN 0190452  Work in progress
1984 K100RT  VIN 0023022  Work needing lots of progress

1986 K100RT  VIN 0090542  Work needing lots and lots of progress
1993 K1100LT  VIN 0183046  Work in progress
1993 K75S  VIN 0213045  Tom the Triple (now on Historic rego too.)
    

5Back to top Go down   Making it my own Empty Re: Making it my own Sun Jun 25, 2017 6:11 pm

duck

duck
Life time member
Life time member
Generally, in the automotive world, when one is referring to a starter solenoid in the automotive world they are referring to a magneto that mechanically engages the starter gear.

Making it my own Solenoid-operated-starter-has-the-solenoid-mounted-directly-on-top-of-the-motor


__________________________________________________
Current stable:
86 Custom K100 (standard fairing, K75 Belly pan, Ceramic chromed engine covers, paralever)
K75 Frankenbrick (Paralever, K11 front end, hybrid ABS, K1100RS fairing, radial tires)
86 K75C Turbo w/ paralever
94 K1100RS
93 K1100LT
91 K1
93 K75S (K11 front end)
91 K75S (K1 front end)
14 Yamaha WR250R
98 Taxi Cab K1200RS
14 K1600GT
http://www.ClassicKBikes.com
    

6Back to top Go down   Making it my own Empty Re: Making it my own Sun Jun 25, 2017 6:31 pm

indian036

indian036
Life time member
Life time member
I've found that national, cultural and language traditions vary, so what is a common understanding in US or Oz backgrounds doesn't always convey well across those.
I try to allow for such differences using by both scientific (Science degree with physics and maths majors) and automotive (Licensed auto mechanic in Oz) knowledge, combined with teaching experience and also some experience of cross language and cultural backgrounds (multiple exchange student contacts and French son-in-law). In this last part, I'm far behind our revered CF, though.

Duck has chosen an excellent diagram of the system that, as he says, is not on a K.

Bill


__________________________________________________
1985 K100RT  VIN 0028991  My original Very Happy ROB the Red Old Bike   (Historic rego)
1985 K100RT  VIN 0029036  BOB the Blue Old Bike  (Historic rego)
1990 K100LT  VIN 0190452  Work in progress
1984 K100RT  VIN 0023022  Work needing lots of progress

1986 K100RT  VIN 0090542  Work needing lots and lots of progress
1993 K1100LT  VIN 0183046  Work in progress
1993 K75S  VIN 0213045  Tom the Triple (now on Historic rego too.)
    

7Back to top Go down   Making it my own Empty Re: Making it my own Mon Jun 26, 2017 3:51 am

VinceD

VinceD
Silver member
Silver member
So I've reloaded my battery, I tried starting the bike again but the motor wouldn't start bypassing the relay. The rpm-meter did tremble a little but with both choke on and off, it didn't start. I noticed that when I turned the choke off, the startermotor was a little more enthousiasticly turning. I think at one point the motor turned over once.
As someone who doesn't know too much about engines and startermotors I think the starter isn't bringing all of it's turningpower over to the engine and thus will not start it. Correct me if I'm wrong.
The starter is connected by a chain to the motor and I think i have to search in that area for the problem.
Or is it as simple as replacing the relay? I doubt that for the relay being nothing more than a switch here...

I hooked the bike up to the charger again and will see to it after work later today. Maybe see if I can get u pushstart along the driveway. Perhaps I disconnected something accidentily along my fairing debuilding.


8Back to top Go down   Making it my own Empty Re: Making it my own Mon Jun 26, 2017 6:24 am

duck

duck
Life time member
Life time member
The wires attached above the headlight are for the small parking light bulb. (Gray/white is power, brown is ground)

If the bike isn't starting then it may be flooded. Take the spark plugs out and let the bike sit for a while so that any extra gas in the cylinders can evaporate.


__________________________________________________
Current stable:
86 Custom K100 (standard fairing, K75 Belly pan, Ceramic chromed engine covers, paralever)
K75 Frankenbrick (Paralever, K11 front end, hybrid ABS, K1100RS fairing, radial tires)
86 K75C Turbo w/ paralever
94 K1100RS
93 K1100LT
91 K1
93 K75S (K11 front end)
91 K75S (K1 front end)
14 Yamaha WR250R
98 Taxi Cab K1200RS
14 K1600GT
http://www.ClassicKBikes.com
    

9Back to top Go down   Making it my own Empty Perseverance Pays Mon Jun 26, 2017 10:14 am

tagaz

tagaz
Silver member
Silver member
Hello VinceD,

Welcome & I wish to offer my most enthusiastic support for your efforts.

Regards,

Troy


10Back to top Go down   Making it my own Empty Re: Making it my own Tue Jun 27, 2017 7:22 am

VinceD

VinceD
Silver member
Silver member
Thanks for your support already. The pushstart didn't work (my wife tried pushing me but maybe we didn't go fast enough) so I will screw out the sparkplugs then. Should I buy a momentum wrench for when I put them back? I read on various places it's a must-have for all kinds of different jobs on a bike but a friend of mine thinks it's a unnecessary cost. I don't want to risk having to drill out any holes however...

The new starter-relay is ordered and should arrive in a few days. I got the bike imported officially now and tomorrow i'll have the insurance done. Hopefully when the starting issue is dealt with, i will be on the road again. (After headlight, front turnsignals,...).


11Back to top Go down   Making it my own Empty Re: Making it my own Wed Jun 28, 2017 5:41 pm

VinceD

VinceD
Silver member
Silver member
A fast and happy update, after removing the sparkplugs and waiting for about an hour (and reinstall them) the bike ran again with bypassing the relay. cheers  Not for long however. I think the fuelintake got a kink because I was lifting up the tank with a piece of wood. I will see if this remains so when the new relay is installed hopefully this weekend. For better reaching I removed the saddle.
Because waiting around a motorcycle with much to do on was nothing interesting, I decided to inspect what else was hanging loose. The right back turnsignal came off when I touched it. The silicone under it (not standard I dare to guess) that replaced the screw was a little worn. So that came of, I decided to look at the taillight and also this piece got a crack and missed a corner. So that came of too.
Because I was now halfway stripping the backside I decided to take it all of. The nice-looking butt was easily removed and with carefully catalogueging(?) the screws that held it. Also all electrics now have a tag describing what they are. Hopefully this will make reinstalling bits an easy job. Now for some pictures of what I just described :

Making it my own Img_2012
Above was when the sparkplugs were out, this was easier than i thought it'd be.

Under are the pics from when I removed all of the backside I felt comfortable removing for now and the white labels on the elektronics.
Making it my own Img_2013
Making it my own Img_2014


12Back to top Go down   Making it my own Empty Re: Making it my own Mon Jul 03, 2017 3:24 pm

VinceD

VinceD
Silver member
Silver member
Ok, I've vented the cilinders and replaced the relay with a working one. I also fully charged the battery cause it was getting a little drained from all the trying. It's now giving me 13.2 with the bike off.
After reinstalling the spark plugs the bike wouldn't start at first so I vented the cilinders again and for half a day this time.
Now it did start! I was actually seeing if the pump worked so it was a surprise when it came to life.

However... the motor was quickly losing it's power and would only stay on if i pulled the trottle.
When it stopped I couldn't restart it. I heard the relay clicking. The power fell out when i pressed the starter button.
A few tries later the power falls out when I turn the key so I think it's shortcutting somewhere. I check everything I touched and see nothing that looks to me like a possible shortcut. No red wires touching the frame and such.

I am now afraid that I'm slowly killing some vital part with every try. Does anyone have an idea what is causing all this?
Someone with a knowledge of bikes is now probably laughing out loud about my ignorance but as I said, i am a newbie at this... meanwhile I am reading and YouTubing every K-instruction people post and learning stuff I hopefully won't need. study


13Back to top Go down   Making it my own Empty Re: Making it my own Mon Jul 03, 2017 3:39 pm

92KK 84WW Olaf

avatar
Life time member
Life time member
My youngest daughter lives in Antwerp, its a lovely city......

Wonder when I will be over again. She treats me to concerts at the new Elizabetzaal....


__________________________________________________
1992 K100LT 0193214 Bertha Blue 101,000 miles
1984 K100RT 0022575 Brutus Baja Red 578 bought 36,000 now 89,150 miles
1997 K1100LT 0188024 Wotan Mystic Red 689 58,645 now 106,950 miles Deceased.
1983 K100RS 0011157 Fricka 606 Alaska Blue 29,495 miles Damn K Pox Its a Bat outta Hell Now 58,200 miles. 
1996 K1100LT 0233004 Lohengrin Mystic Red 38,000 miles currently 48,061 miles.
1983 K100RS 0004449 Odette R100 colours 58,000 miles. Sprint fairing now 61,190 miles

Past:
1968 Yamaha 80 YG1
1971 Yamaha 125 YAS-1
1968 Honda 125 SS
1970 Honda CD 175
1973 Honda CB500-4
Honda CX 500
    

14Back to top Go down   Making it my own Empty Re: Making it my own Mon Jul 03, 2017 3:49 pm

VinceD

VinceD
Silver member
Silver member
I could smack myself right now. I realized that I disconnected the ground from the battery and reconnected it quickly before work but that the bolt on the backside fell off. I made a small (too small it seems) mental note that I should screw that on before starting the bike but... i should have made it a written note.
It now turns again when I press the button but by using the choke alot an hour ago I am now back to venting...
Oh well, a lesson learned I'd say...

Olaf, feel free to smack me on the head when you're in Antwerp Making it my own 161205   Very Happy


15Back to top Go down   Making it my own Empty Re: Making it my own Mon Jul 03, 2017 8:50 pm

Rick G

Rick G
admin
admin
To clear a flooded engine all you need to do is unplug the tank connection then with throttle wide open hit the starter for about 15 seconds, that gets rid of the raw fuel and dries the spark plug with fresh air then plug the tank connector back in and it should start.


__________________________________________________
"Man sacrifices his health in order to make money.
Then he sacrifices money to recuperate his health.
And then he is so anxious about the future that he does not enjoy the present; the result being that he does not live in the present or the future; he lives as if he is never going to die, and then dies having never really lived."   Dalai Lama


Bikes 1999 K1100 LT with a Big Block 1200
    

16Back to top Go down   Making it my own Empty Re: Making it my own Tue Jul 04, 2017 2:29 pm

VinceD

VinceD
Silver member
Silver member
How do I do that? I just vented the bike (yet again) and replaced the sparkplugs with new NGK's. The same as were in before. I vented it for about 2 hours before i put the new ones in. The bike turned over only once and except for the starter nothing is moving. I can't even pushstart the friggin thing.

Could you please tell me step by step (and which fuelline because there's two of them on the left side) how i can efficiently vent it without having to remove the sparkplugs?
Many thanks beforehand. I really hope this will let the starting issues stop. I'm beginning to think those sellers are laughing their asses of with the thing they sold me... Sad

It might be my fuelpump that's not working. I don't hear it when I push the starter button.
I'm building up the confidence to take it out but if that's done, i don't know how to test it.
I've already unplugged both fuellines (i now know which is output and whish is coming back in) and i've also removed the tank and drained it. There's a little dirt in it so i'm considering to clean it.
Picture of inside of the removed tank:
Making it my own 14991910

I'm ordering new fuellines that start from the tank because the dirt inside the tank is probably little pieces of degraded fuellines i think.


__________________________________________________
I am working to the day of riding my revised : '85 K100 RT' It's only a few months younger than myself.  What a Face
Please comment my progress if you have suggestions, its on the board called 'making it my own'
    

17Back to top Go down   Making it my own Empty Re: Making it my own Tue Jul 04, 2017 6:09 pm

VinceD

VinceD
Silver member
Silver member
Rick I think I now know what you meant: disable the power to the fuelpump? then start it and the excess fuel will be consumed with the trottle open.

I think I have a bad connection somewhere to my fuelpump. I'm still figuring out if it's from the tank to the connector or from the connector to the battery via the relay. (I'm just guessing there's a relay in between here somewhere)
After next weekend I'll use my newly learned multimeterskills to find out all about the failing wire and fix it.

How I came to this conclusion : (feel free to correct me where I go wrong)
After uninstalling the tank and placing it on the table I figured testing the pump would be easiest with the battery of the bike.
So I uninstalled it.
I took two wires and connected them to the battery. The wire coming out the bottom of the tank got a 4-pin connector. I then started combining two pins to the battery-poles until I heard the pump run.
Verrrrry glad I didn't yet removed it from the tank I put the tank back on the bike and connected it using the two connectors (sounds logical). Also reinstalled the battery. I pressed the starter button... nothing, a second time, fuel sprayed out of the lower nipple on the righthandside of the tank. With the bike now covered in fuel i realised i was too hasty and should have used a tube and bucket for further testing.
However this made me come to the conclusion that the pump worked. Why I think there's a bad connection is that the pump doesn't always work when I push the starterbutton or when I did a direct connection to the battery. I hope it's a bad connection at the bottom of the tank or at the connector itself because I think those are easiest to reach.I do think it's one of those connections because I did 'prie' up the tank with a piece of wood and with all the tinkering in the relaybox I might have stretched a wire partially out of a connection.

Like I said, first I'll order new fuellines and after the weekend (helping to organise a festival) I'll have time again to work on it and hopefully I can start doing something else then failing to start it Smile


__________________________________________________
I am working to the day of riding my revised : '85 K100 RT' It's only a few months younger than myself.  What a Face
Please comment my progress if you have suggestions, its on the board called 'making it my own'
    

18Back to top Go down   Making it my own Empty Re: Making it my own Tue Jul 04, 2017 6:13 pm

92KK 84WW Olaf

avatar
Life time member
Life time member
That behaviour points to the plug connector to the tank very possibly being intermittent...I think rule that out before going down other roads.


__________________________________________________
1992 K100LT 0193214 Bertha Blue 101,000 miles
1984 K100RT 0022575 Brutus Baja Red 578 bought 36,000 now 89,150 miles
1997 K1100LT 0188024 Wotan Mystic Red 689 58,645 now 106,950 miles Deceased.
1983 K100RS 0011157 Fricka 606 Alaska Blue 29,495 miles Damn K Pox Its a Bat outta Hell Now 58,200 miles. 
1996 K1100LT 0233004 Lohengrin Mystic Red 38,000 miles currently 48,061 miles.
1983 K100RS 0004449 Odette R100 colours 58,000 miles. Sprint fairing now 61,190 miles

Past:
1968 Yamaha 80 YG1
1971 Yamaha 125 YAS-1
1968 Honda 125 SS
1970 Honda CD 175
1973 Honda CB500-4
Honda CX 500
    

19Back to top Go down   Making it my own Empty Re: Making it my own Tue Jul 04, 2017 8:34 pm

Rick G

Rick G
admin
admin
I put a new connector on every K bike I own it saves a great deal of time. I think what happens is that often that connector is left plugged in when the tank is removed and gets yanked hard and that opens the female part of the plug which is the main problem.


__________________________________________________
"Man sacrifices his health in order to make money.
Then he sacrifices money to recuperate his health.
And then he is so anxious about the future that he does not enjoy the present; the result being that he does not live in the present or the future; he lives as if he is never going to die, and then dies having never really lived."   Dalai Lama


Bikes 1999 K1100 LT with a Big Block 1200
    

20Back to top Go down   Making it my own Empty Re: Making it my own Wed Jul 05, 2017 2:31 am

Holister

Holister
Life time member
Life time member
VinceD wrote:.... I also fully charged the battery cause it was getting a little drained from all the trying. It's now giving me 13.2 with the bike off.
......
13.2v is on the very high side which you could expect out of a battery in really good condition not one that's been flogged a little and been depleted by multiple start attempts. I suspect it might be surface charge if you've measured that straight after you charge the battery. You need to rest the battery for about 12 hours to deplete the surface charge which will always read much higher.
Static (rested) voltage should be above 12.45v, and on a good battery will be around 12.8 to 13.0v


__________________________________________________

1989 K100RT     VIN  0097367 (naked)  
1996 K1100RS   VIN  0451808
 Making it my own Austra12    Fuel:  95 Octane
Engine Oil: Nulon Full Synthetic 15W50
Gear Box Oil:  Nulon Synthetic 75W90
    

21Back to top Go down   Making it my own Empty Re: Making it my own Fri Jul 14, 2017 2:45 pm

VinceD

VinceD
Silver member
Silver member
Today, I was finally able to work on the bike again. I bought new fuellines and temporary connectors for the fuelpump.
The removal of the airfilter was nothing complicated but the upper box was something else. It ended up hanging on the side of the bike so I could reach the two bolts of the lower box. Those were a pain to remove because of all the rust. A bit of WD40 helped but it was still a difficult thing to do. The new cables were put in place rather quickly and after that I cut off the old connector to the fuelpump. I couldn't find a way to open it up and realease the wires without cutting. I soldered the stripped wires and slided on the new connectors and pinched them with my pliers.
After this I refilled my fueltank a bit and after a few attempts the bike started and kept running steadily Very Happy cheers 
I taped the wires of the lights etc to the steeringwheel and rode a few times up and down the driveway. It felt sooo good ...
Thanks alot for the help guys, without you I would still be pouning my head to the wall, hoping it would give me an idea.


I'll still be adding pictures and sharing my progress but first pictures of the works described above.


Making it my own Tempor10


Making it my own New_fu10


I'm thinking about adding a spring or something to the left fuelline to prevent it from pinching. I've read somthing like that around here I think.


Next is deciding what lights and other stuff to buy and try to install them. I don't foresee any troubles here. Only the speedometer is something I worry about.


__________________________________________________
I am working to the day of riding my revised : '85 K100 RT' It's only a few months younger than myself.  What a Face
Please comment my progress if you have suggestions, its on the board called 'making it my own'
    

22Back to top Go down   Making it my own Empty Re: Making it my own Fri Jul 14, 2017 6:18 pm

duck

duck
Life time member
Life time member
Like BMW did, I put the fuel line insulation on the front (return) line since that's closer to the heat coming off of the radiator and what pipes heat back to the tank.


__________________________________________________
Current stable:
86 Custom K100 (standard fairing, K75 Belly pan, Ceramic chromed engine covers, paralever)
K75 Frankenbrick (Paralever, K11 front end, hybrid ABS, K1100RS fairing, radial tires)
86 K75C Turbo w/ paralever
94 K1100RS
93 K1100LT
91 K1
93 K75S (K11 front end)
91 K75S (K1 front end)
14 Yamaha WR250R
98 Taxi Cab K1200RS
14 K1600GT
http://www.ClassicKBikes.com
    

23Back to top Go down   Making it my own Empty Re: Making it my own Sun Jul 23, 2017 6:53 am

VinceD

VinceD
Silver member
Silver member
I've ordered and received my taillight, turnsignals, headlight and brackets, set of wires to reroute some of the wires for turnsignals etc and also the Acewell 2853H-1. 
The Acewell wiring was what I was most afraid of. I found a lot of info about how and what and after studying the wiring diagram of the k100 I learned alot that i'm sure will come in handy someday. 

I wired up the acewell combining the info i found with the diagrams that were with it.
This is what i did: (first colour of acewell wire, after that the corresponding wire from BMW with pinout)
The first few are connector a, second is connector b.

Black   -   connect to frame somewhere, i used a hole from the removed fairing.
Brown   -   red/white (1)
Red     -    green/black (6)
Yellow ending in simple connector    -     black/blue(16), i soldered this on for the time being

Green   -   blue/black (17)
Orange   -   brown/green (11)
Grey   -   i cut off the naked wire, maybe i will line up some relays someday for this.(for neutral light and starting in neutral)
Purple   -   not used . I don't know wich wire i should connect here.
Yellow   -   white(15), there are two white wires. Using the multimeter i found the high beam wire. 
Brown   -   blue/red (19)

Now i must decide on where to install the new hall sensor since i've read the installed one is not compatibel. 
The acewell clock started working right away, giving me hope and when i connected the wires from the keyswitch(i've cut it off) the whole thing came to life. With pulling the clutch the bike also started.

Next week i'm buying a switch with wich i will replace the key. I'll let the connector connect the two grey wires and the red and green. After a while this will be replaced with a m-lock i think. Also the tankcap will be replaced so i won't need any keys at all. I only got one key anyway. No spare and that's too risky i think. Only the steering-lock am i thinking of using. 

Also am i thinking of having a custom seat made for my specific taste.
I will be reusing or copying the existing but removed butt. This will cover up the passengerseat when my wife isn't riding along. I found some diy-instructions on making it with polyester.


__________________________________________________
I am working to the day of riding my revised : '85 K100 RT' It's only a few months younger than myself.  What a Face
Please comment my progress if you have suggestions, its on the board called 'making it my own'
    

24Back to top Go down   Making it my own Empty Re: Making it my own Mon Jul 24, 2017 9:21 am

VinceD

VinceD
Silver member
Silver member
Today was going to be about finishing up the wiring in the front but i rode to the shop and forgot to buy half of the stuff i needed. (Story of my life)

So, after making a list i decided to look at the bottomside of the bike. The oillevel seems good but i do think i might have a leak. A small stain was under it. I started looking at the bottom and however i knew there would be alot of dirt here, i still was a little shocked to see the amount of it. Thats also why i think there is a leak. I took some pictures and cleaned it up a bit. Especially the lower left side was a mess. 
This first pictures is beforeMaking it my own Img_2016

The following is after a small cleanup with brakecleaner. 

Making it my own Img_2017

I did notice blue threads coming from the bottom here and there.  I hope these aren't the packings coming from between the engine-parts. If i do have leak, should i let a pro look at this? Or are there things i can do. I guess the bleedvalve can be checked and see if the seal is still good enough but packings are quite a invasive thing. Are there other parts i could check or am i thinking the worst and is it just dirt?


__________________________________________________
I am working to the day of riding my revised : '85 K100 RT' It's only a few months younger than myself.  What a Face
Please comment my progress if you have suggestions, its on the board called 'making it my own'
    

25Back to top Go down   Making it my own Empty Re: Making it my own Mon Jul 24, 2017 12:40 pm

rawdonball

rawdonball
Gold member
Gold member
Hi VinceD - pleased to meet you.

I can answer one of your questions straight off - don't let a 'PRO' anywhere near your bike. Unless of course, you know of an unusual one who doesn't see teaching you about what he is doing, as something which might do him out of potential paid work. Of course there are exceptions to this RULE!

I think your first step in identifying the source of the oil leak by cleaning the area, is a good one. The cleaner / drier you get it, the more likely you are to be able to see where leaked oil is coming from.

The 'blue threads' are likely to be the dried remains of liquid sealant (gasket maker) which is forced out from between the surfaces to be sealed, when the parts are pressed together by the tightening of the fasteners or cap head screws. 'Packing' is a term which might have been applied to what I call a gasket. This is the compressible material that is usually cut to suit the shape of the sealing surfaces. I suspect you are using the term 'packing' due to translation from your home language (is it French or Flemish?). I would check that none of the cap head screws which hold the bottom cover to the sump casting are loose. This is done by using the right sized allen key /wrench to see if any can be tightened further using normal hand pressure only on the wrench. Be very careful if you choose to use what we call an 'in hex' socket because a set of these is usually supplied with a common 'sliding Tee Bar. if you do not slide the bar through the tee to a point where you a using only a portion of its length for leverage, then you can very easily over tighten the screw by stripping the Aluminium threads in the castings (you don't want to have to be drilling as you said!). The length of lever you use should only be equivalent (equal to) to the leverage you would be able to achieve with a standard flat or ring spanner on the hexagon head of a bolt with the same diameter (of the threaded sections).

Don't bother to remove the drain plug (bleed valve) at this stage. you can check that it is tight as per other fasteners. A leak from this will be coolant (water plus additive) which may account for the brown stein which I think your photo shows in parts of the oil soaked region. If it is water from the engine which is causing a brownish stein, this is more likely to be coming from the drain hole which vents a space in the pump body between oil and water pumps in order to minimize the mixing of respective fluids within the engine in the case of pump shaft seal leakage.


__________________________________________________
'88 K100RT, '86 K75C, '05 Yamaha TTR250
    

26Back to top Go down   Making it my own Empty Re: Making it my own Tue Jul 25, 2017 7:59 am

td5

td5
Platinum member
Platinum member
HI VinceD,
Rawdonball is right, don't let an expert near it as there are plenty of people here with great info. I would suggest you get a torque wrench, I know people can get anal over this type of thing but you are dealing with an elderly bike and BMW do specify settings for nearly everything. I would also check out some of the youtube videos out there from Chris Harris, worth a watch for basic stuff.
Mike


__________________________________________________
Making it my own K_engi10
1988 / K100RS
2013 / R1200GS
2015 / K1300R
2002 / R1100S BCR
    

27Back to top Go down   Making it my own Empty Re: Making it my own Tue Jul 25, 2017 8:28 am

TacKler

TacKler
Life time member
Life time member
Packing is another name for a hydraulic seal or o ring.


__________________________________________________
Red 1991 K75S
    

28Back to top Go down   Making it my own Empty Re: Making it my own Wed Jul 26, 2017 9:49 am

VinceD

VinceD
Silver member
Silver member
I was translating too directly from flemish indeed. Here we say 'pakking' or 'koppakking' (headpacking). I'll use gasket from now on  Smile. For the o-ring we use 'pakking' too.
I'll be sure to check the videos and first of all the bolts of course. (Sorry for the late response, been/am sick)
 Again, thanks alot guys, i'm getting more and more confident i'll actually pull it of to get the bike on the road again and in a decent state.


__________________________________________________
I am working to the day of riding my revised : '85 K100 RT' It's only a few months younger than myself.  What a Face
Please comment my progress if you have suggestions, its on the board called 'making it my own'
    

29Back to top Go down   Making it my own Empty Re: Making it my own Mon Jul 31, 2017 3:44 pm

VinceD

VinceD
Silver member
Silver member
I really do have an oik leak. After running the engine for a few minutes there was a definite oil stain on the floor. Right above it i began inspecting the previously semi-clean engine and found a crack in the side-cover of the block. Right above a bracket to hold the plastic covers there. You can clearly see it on the pic below. The strange thing is that the oil does not leak out of the crack but right under it. I think that the plate is deformed a little when the previous owners dropped the bike and there is now oil leaking at the gasket (right word this time). The crack is shown on the first pic, the oil on the bracket and bolts on the second one. 

Making it my own Img_2020

Making it my own Img_2018

I think the next step is unbolting the side panel (first look up how this is done best) and then check the gasket to see if this was the issue, replace it anyway, buy and bolt on a new panel and then see if the problem is solved... Sad

I think there is no way the previous owners didn't notice the oil leak because they said the bike was ridden by them after it fell and it drove just fine with no problems at all. Maybe i'll contact them to let them now they can stop laughing now cause the joke is over.


__________________________________________________
I am working to the day of riding my revised : '85 K100 RT' It's only a few months younger than myself.  What a Face
Please comment my progress if you have suggestions, its on the board called 'making it my own'
    

30Back to top Go down   Making it my own Empty Re: Making it my own Mon Jul 31, 2017 4:38 pm

Laitch

Laitch
Life time member
Life time member
VinceD wrote:The strange thing is that the oil does not leak out of the crack but right under it. I think that the plate is deformed a little when the previous owners dropped the bike and there is now oil leaking at the gasket . . .
That's the crankcase cover that is leaking oil. 

The crankcase cover gasket can be deformed and leak when the cover takes a hard hit in a fall. A replacement cover and gasket should take care of the problem. Nothing serious here. There are plenty of crankcase covers out and about. You could even repair your damaged cover by welding or epoxy if the spirit moved you then hide your work under a stylish paint job, if oil didn't still leak through the crack. Smile


__________________________________________________
1995 K75 90,000 miles
    

31Back to top Go down   Making it my own Empty selections Sun Aug 13, 2017 7:47 pm

Ohts

Ohts
active member
active member
Vince, I just purchased an 85 similar to yours.  You mentioned new head lamp and front components.  Just curious what you decided to purchase?  I'm just starting my research on aftermarket components.  Any good resources?


32Back to top Go down   Making it my own Empty Re: Making it my own Mon Aug 14, 2017 5:04 am

charlie99

charlie99
VIP
VIP
the crankcase rubber seal will often appear to be defective
but if you check the retaining bolts and rubber isolators , you may find that the rubber isolator - washers  have become hard and lost  a heap of tension in retaining the crank cover to the engine proper

they are easily replaced ,and once done, you may find a fair deal of extra tension available , of course, if they have become hard and shrunk ..it might be worth while replacing the rubber seal crankcase to engine as well

don't forget to do both sides , from memory you may need 22 of them


__________________________________________________
cheezy grin whilst riding, kinda bloke ....oh the joy !!!! ...... ( brick aviator )

'86 K100 RT..#0090401 ..."Gerty" ( Gertrude Von Clickandshift ) --------O%O
'86 k100 rs.. #######..  "Fred " (f(rame) red ) ( Fredrick leichtundschnell ) - -
bits and pieces from many kind friends across the k100 world ...with many thanks ..
1987 k100rs ########   "Red"  - (red sports rs TWB style )
1989 K100rt #009637   "Black Betty"  (naked rt ala Nigel , now sporting an rs main fairing )
    

33Back to top Go down   Making it my own Empty Re: Making it my own Mon Aug 14, 2017 5:30 am

92KK 84WW Olaf

avatar
Life time member
Life time member
Those crankcase covers are also very cheap to buy.... and easy to fit. you just have to drain the coolant and disconnect the radiator hose that passes through it. I thought at first it was a mad design but its so easy to change it.

21st October Elizabetzaal Antwerpen, check it out!!!.....


__________________________________________________
1992 K100LT 0193214 Bertha Blue 101,000 miles
1984 K100RT 0022575 Brutus Baja Red 578 bought 36,000 now 89,150 miles
1997 K1100LT 0188024 Wotan Mystic Red 689 58,645 now 106,950 miles Deceased.
1983 K100RS 0011157 Fricka 606 Alaska Blue 29,495 miles Damn K Pox Its a Bat outta Hell Now 58,200 miles. 
1996 K1100LT 0233004 Lohengrin Mystic Red 38,000 miles currently 48,061 miles.
1983 K100RS 0004449 Odette R100 colours 58,000 miles. Sprint fairing now 61,190 miles

Past:
1968 Yamaha 80 YG1
1971 Yamaha 125 YAS-1
1968 Honda 125 SS
1970 Honda CD 175
1973 Honda CB500-4
Honda CX 500
    

34Back to top Go down   Making it my own Empty Re: Making it my own Mon Aug 14, 2017 5:57 pm

VinceD

VinceD
Silver member
Silver member
Its been a while since i've posted an update. This is mostly because there are no updates yet.
Because I was researching all what has to be done replacing the cover and gathering all the stuff I need.
Because I think i have to drain the oil I decided to replace the filter too.
What I have ordered:
Oil filter
Oil filter wrench
O-ring for the oil pan
Oil drain plug washer (5 so i've got spares for future maintenance)
Crankcase cover gasket
Oil 15w40
Crankcase cover (secondhand for €80, seemed fair price)

Some of the parts are still underway and then I'll spend a few hours to replace it all.
Also am i going to buy coolant and some final drive lube. The last am i still searching for the best one.

@Olaf : I really do hope the radiator hose is as easy to refit as you say, when i picked up the secondhand cover the seller had a hard time removing the hose. And he was used to working with engines. He had three k100 engines lying on a shelf and alot of other bikes standing there.

@Ohts: are you from around here? I've got parts and stuff from a few different websites of 'local' companies. (Local as in BeNeLux) i've decided to buy a 7 inch headlamp and some bullet turnsignals. I do not plan on making yet another caferacer however (a year ago that was the idea)  i don't like the forward seating position. What exactly it's going to be is still undecided mostly 😊
Sites like 'hobbyist'(NL) are great for finding replacement parts. For the 'customizing' i opted for caferacer.nl (they have more than solely caferacerstuff). Tools and such I got from datona. For oil, fuelhoses, clamps, electrics,... i just went to the local stores. I am not that fond of the internet when it comes to purchases. I like talking to people when i buy something so i can go and talk again if it's not what was advertised.

I'm going to update again in a few days, there was more i wanted to share or ask advise on but mg wife is going to bed and tomorrow the baby will be crying for me around 6am (father-doughter day tomorrow) .
See you around nap-time ! Smile


__________________________________________________
I am working to the day of riding my revised : '85 K100 RT' It's only a few months younger than myself.  What a Face
Please comment my progress if you have suggestions, its on the board called 'making it my own'
    

35Back to top Go down   Making it my own Empty Re: Making it my own Mon Aug 14, 2017 7:31 pm

92KK 84WW Olaf

avatar
Life time member
Life time member
For that radiator hose I opened the clip at the radiator and the water pump. Don't open the drain plug at the water pump. When you open the hose at the radiator you can pull it back at the water pump and you can drain and collect the coolant.

You can unbolt the crankcase cover with the hose still in it, just pull it off the radiator as you do. Take it out of the cover after you have taken it off. My hoses were nicely supple and not hard.

Tip, when you are refilling if using new coolant put the coolant in first and top off with distilled water.

Bolt tightening sequence should really be same as a cylinder head sequence, bolt up starting at the centre working out diagonally.


__________________________________________________
1992 K100LT 0193214 Bertha Blue 101,000 miles
1984 K100RT 0022575 Brutus Baja Red 578 bought 36,000 now 89,150 miles
1997 K1100LT 0188024 Wotan Mystic Red 689 58,645 now 106,950 miles Deceased.
1983 K100RS 0011157 Fricka 606 Alaska Blue 29,495 miles Damn K Pox Its a Bat outta Hell Now 58,200 miles. 
1996 K1100LT 0233004 Lohengrin Mystic Red 38,000 miles currently 48,061 miles.
1983 K100RS 0004449 Odette R100 colours 58,000 miles. Sprint fairing now 61,190 miles

Past:
1968 Yamaha 80 YG1
1971 Yamaha 125 YAS-1
1968 Honda 125 SS
1970 Honda CD 175
1973 Honda CB500-4
Honda CX 500
    

36Back to top Go down   Making it my own Empty Re: Making it my own Sun Aug 20, 2017 12:27 pm

VinceD

VinceD
Silver member
Silver member
Just a quick update. I've found myself out of time to replace the crank-cover so that'll be for in a week. (going on a small vacation)

I replaced the fuel filter so I did do something on the bike this week. That was quite simple thanks to the youtube video by 'spideq8'
The old fuel filter had the date of may 1990 on it so I guess it was only once replaced after the callback Chris Harris speaks of in his video.
Also I replaced the small hose between the metal pipe and the filter itself. It was deformed and hard to get it off the pipe. I replaced it with a bit I got over from the fuellines I replaced. I only hope the exterior of this won't dissolve in the fuel or something. I've seen that other hoses had another texture but the old smaller bit seemed the same as what i had. I tightened it fermly with the original clamps and after replacing the gasket I'll check if it's sealed.

I also bought another tank-cap but it looks a little funny on it to my opinion. (forgot to take a picture) The screws that came with it were too long too and the originals were too short... The cap I bought was the 'monza k-series cap' I'ts too fat in my opinion. Maybe i'll try and find a cap like the flatracer aero-bmw-cap. i'ts mor subtle. When the bike is finished I want it key-less. that's why i changed the cap.
The ignition is still a tumble-switch for now but will be replaced with a system like the m-lock by motogadget. Maybe the only key i'll keep on it is for the steering-lock. But i tought i've read that this wasn't the most reliable part and some people had experienced problems with it not unlocking.


__________________________________________________
I am working to the day of riding my revised : '85 K100 RT' It's only a few months younger than myself.  What a Face
Please comment my progress if you have suggestions, its on the board called 'making it my own'
    

37Back to top Go down   Making it my own Empty Re: Making it my own Mon Aug 21, 2017 9:17 am

Laitch

Laitch
Life time member
Life time member
VinceD wrote:Also I replaced the small hose between the metal pipe and the filter itself. It was deformed and hard to get it off the pipe. I replaced it with a bit I got over from the fuellines I replaced. I only hope the exterior of this won't dissolve in the fuel or something.
That small portion of hose needs to be rated as submersible, high-pressure hose—SAE 30R10 or its equivalent—the same type of hose that runs from the fuel pump to the fuel filter. If it is not rated as submersible, it will deteriorate.


__________________________________________________
1995 K75 90,000 miles
    

38Back to top Go down   Making it my own Empty Re: Making it my own Mon Aug 21, 2017 9:22 am

Chocolate

Chocolate
Life time member
Life time member
Hello!

For inside the tank you will need NBR/NBR otherwise you'll have a problem.

Cheers

Making it my own Img_3220


__________________________________________________
Only a few activities make me experience my senses in a way motorcycle riding does, it is like swimming in the nude in a river.
K75 BA/1992 ABS, K75 BA/1991 noABS, Ducati, Mobylette M1/1973
    

39Back to top Go down   Making it my own Empty Re: Making it my own Mon Aug 21, 2017 12:23 pm

VinceD

VinceD
Silver member
Silver member
Thanks alot, when i'm back from vacation I'll take a look at it right away. It's currently not submerged so a week won't give problems i hope.


__________________________________________________
I am working to the day of riding my revised : '85 K100 RT' It's only a few months younger than myself.  What a Face
Please comment my progress if you have suggestions, its on the board called 'making it my own'
    

40Back to top Go down   Making it my own Empty Re: Making it my own Tue Aug 22, 2017 5:17 pm

helensmellen

helensmellen
active member
active member
VinceD wrote:I was translating too directly from flemish indeed. Here we say 'pakking' or 'koppakking' (headpacking). I'll use gasket from now on  Smile. For the o-ring we use 'pakking' too.
I'll be sure to check the videos and first of all the bolts of course. (Sorry for the late response, been/am sick)
 Again, thanks alot guys, i'm getting more and more confident i'll actually pull it of to get the bike on the road again and in a decent state.
Hi VinceD
If the bike was bought from the UK, it is more likely to be Hylemar that someone has used or "bodged". Its a very poor excuse for a repair as it lumps in oil and can clog up any oil ducts. My other half just told me he used this stuff on his Ex wifes Bike (Virago) and one engine later, vowed never to use the stuff again. Hard luck her Very Happy.
He was in the Army and they used to use it for expedient repairs, not for a lifelong repair, so please never consider using it, he says, go for good old gaskets.


41Back to top Go down   Making it my own Empty Re: Making it my own Tue Aug 22, 2017 5:30 pm

helensmellen

helensmellen
active member
active member
Ohts wrote:Vince, I just purchased an 85 similar to yours.  You mentioned new head lamp and front components.  Just curious what you decided to purchase?  I'm just starting my research on aftermarket components.  Any good resources?
try the square Honda headlight, from a CG or a CB.... or track down one from a naked K100 as they have a funky round one with a tiny housing. Dom (my other half) gets his second hand bits from motorworks. If you want their number he will dig it out for you


42Back to top Go down   Making it my own Empty Re: Making it my own Thu Aug 31, 2017 8:09 am

VinceD

VinceD
Silver member
Silver member
I've now replaced the crankcase cover and the gasket. It was indeed easier than I imagined it to be but it still gave me a little more work than it should have.

I started off with draining the coolant by detaching the hose at the pump. After that I released the upper clamp.
I drained the oil and after this i started to unbolt the cover. This came of easy too.
Behind the gasket was blue silicone over the entire surface where the gasket was. I scratched it off with my fingernail because a screwdriver would leave too many scratches. A very boring halfhour later that was done too. Below a pic of the old gasket still held in place by the silicone.

Making it my own Crankc10

But then... I pulled the hose trough the new cover and placed the new gasket on. It was a perfect fit but it just wouldn't stay in place. That gave me a very frustrating 30 minutes (very long for this, i know) After a while i decided to pull out the tube again and clean the groove and the gasket because there was abviously oil in it. After doing this it still took me about 15 minutes to keep it in place while bolting on the cover. Pulling the hose trough the hole again was easy with just a little oil on it. I decided not to use silicone on it however i have some standing here. Is that how you meant it helensmellen? If not, i can always unbolt it again and put some on.

I also replaced the fuel filter with the special oil filter socket. After replacing the rubber o-ring and the metal one from the drainplug i refilled both the oil and coolant and after 3 times the time it was supposed to take, it was done cheers 

For the fuel line I used inside the tank, I called the shop where i bought it and they told me they couldn't assure it to be good for this (there were no nbr/nbr marks on it) so that'ts coming out tonight and first ting to do tomorrow will be finding a good replacement.

I also have the old fairings if anyone's interested. Like a said some posts back, half of it is damaged from the fall. The headlight is still good and also the taillight is usable. It does have a little crack in it however.

The K's butt is something I'm going to keep. I'm still thinking of re-using it since it would look good I think.


__________________________________________________
I am working to the day of riding my revised : '85 K100 RT' It's only a few months younger than myself.  What a Face
Please comment my progress if you have suggestions, its on the board called 'making it my own'
    

43Back to top Go down   Making it my own Empty Re: Making it my own Thu Aug 31, 2017 5:01 pm

MD K100RS

MD K100RS
active member
active member
Nice learning process.  Looking forward to following this one.

Gero


__________________________________________________
1989 K100 RS SE
1974 R75/6
to many bicycles to count...
http://www.ars-natura.com
    

44Back to top Go down   Making it my own Empty Re: Making it my own Tue Sep 12, 2017 4:53 pm

VinceD

VinceD
Silver member
Silver member
Just a quick update. 
There was still a very small leak of oil when the bike sat for a while.
I cleaned the engine's bottom and right side again and placed a piece of cardboard under it.
A day later i came to the insight that the bracket that was bent into the cover was still bolted there. The bolt it's attached with on the right side is also a bolt for the oil pan. Here it was leaking a bit. So removed the bracket, put the bolt back and a day later my (new piece of) cardboard was clean!
I noticed a small hole a little higher up there and I hope it's not going to spill oil from here. (Photo coming soon)

I also decided on what style to go with. I like the scrambler/streettrack look but because my wife still wants to ride along i'm going with a long bratstyle saddle and according look. The saddle is the main lookchanger here i think. A small upswept back might look great. This photo is kind of what direction i'm going to take (i don't like the high mirrors on this one). I'll try to get it running in the spring.

Making it my own 1f9e6b10

I am aware that it won't be immediatly as photogenic as this one but the finishing touches will follow over time. I don't want a fully finished clean bike and when I've been riding it a year or two come to the conclusion it needs changing alot of it.

What I do plan on doing now:
- saddle
- handlebars
- lights
- relocating the horn ( there's some leftover room at the airfilter box)
- getting the speedo working fully (my speed sensor is not in place yet, still hoping to use the original one)
- maybe I'll get the tank painted too. The motor itself and frame will be for the winter of '18-'19. First some more confidence-building for the big tear-apart...

My throttle is stuck i noticed. Probably from when I removed it and put it back on with a bit too much force. This will be dismantled and revised or replaced if needed. I found a realOEM site with all serialnumbers and parts-breakdown pictures of all parts originally on BMW's. Really educating and helpfull to order or search for small parts. If it's a help for someone, here's the link : RealOEM
If everyone allready knows it, the better...

Last but certainly not least... my battery broke i think. I showed the bike to my sister (who's in the country for a few weeks, she's a UK-er since a few years) a few days back and left the power on. Because there are no lights who could have warned me of this, it depleted and sat a few days. I hooked it up to the charger (trickle charger) but after a full night and day it still gave me only a few volts. If there are any tips here, i would be very glad to hear them. The bike didn't make a sound or nothing when i hit the starter-button too (i did pull the clutch). My friend has a battery he's not currently usi g i think, he tore down his honda cx500 so maybe i can loan it a couple of days. That way i can rule out any other problems.

Not that quick of an update it seems Smile


__________________________________________________
I am working to the day of riding my revised : '85 K100 RT' It's only a few months younger than myself.  What a Face
Please comment my progress if you have suggestions, its on the board called 'making it my own'
    

45Back to top Go down   Making it my own Empty Re: Making it my own Wed Sep 13, 2017 9:47 am

Laitch

Laitch
Life time member
Life time member
VinceD wrote: I hooked it up to the charger (trickle charger) but after a full night and day it still gave me only a few volts. If there are any tips here, i would be very glad to hear them.
What type of battery is it?

A motorcycle battery discharged for that length of time is likely to be permanently damaged and probably will rapidly discharge even if it can be recharged.

If you install a fully-charged new battery, just disconnect the transmission ground cable to help preserve its charge. Wrap tape around the cable's transmission terminal if necessary to shield accidental contact with the frame, transmission or any other metallic part. Other options include using a battery tender or installing an isolation switch.


__________________________________________________
1995 K75 90,000 miles
    

46Back to top Go down   Making it my own Empty Re: Making it my own Wed Sep 13, 2017 4:01 pm

MartinW

MartinW
Life time member
Life time member
Once the battery is dead a trickle charger won't have enough output to resurrect it. You will need a proper battery charger.
Regards Martin.


47Back to top Go down   Making it my own Empty Re: Making it my own Thu Sep 21, 2017 3:19 pm

VinceD

VinceD
Silver member
Silver member
I have a VMF-battery. After charging the battery 2 days with the trickle, it was fully charged. I left it alone for a couple of hours after unplugging and it gave me a good 12,6V. I think i turned off the 'masterswitch' that controls both the lights and all electronics in the garage the first time. Would be quite typical for me... Hope it's still good.

I changed the handlebars and sanded down the ends because the fit was too tight. The throttle stayed in position after turning it... Some say cruisecontrol, in this case i say dangerous...

I also made a bracket that makes it possible to house the horn behind the radiator, next to the airfilterbox. For the moment it's really ugly but it will do until i strip the old paint off of it and spray it black.

I also have a plan for the speed sensor. I've found some examples online with mounting it on the front wheel. Rbarrero made something like this too i think, too bad the pictures aren't there anymore.

I ordered a seat that arrived allready and tomorrow, hopefully the subframebar will arrive too. That will need some cutting and measuring and after that, my best friend will teach me welding and help me with this.

I have decided to put a keycontact on the bike again. At least for now. Maybe i'll go keyless after all but my wife needs some time before i make bigger expenses on the bike.  Making it my own 694830
I don't know how i can salvage the old contact, it seems i'm not able to get it out of it's rubber frontplate. In that case i'll just buy a new one, it's low cost and my wife said she's think it's safer since the bike 'came' with only one key...

That's it for now, tomorrow: pictures!


__________________________________________________
I am working to the day of riding my revised : '85 K100 RT' It's only a few months younger than myself.  What a Face
Please comment my progress if you have suggestions, its on the board called 'making it my own'
    

48Back to top Go down   Making it my own Empty Pictures Fri Sep 22, 2017 4:31 pm

VinceD

VinceD
Silver member
Silver member
Like I said, here are some pictures.
Don't mind the mess on the background. It's temporary.

First are the handlebars. I wanted to keep a little of an upright position so this is what I went with:
Making it my own Img_2021

The red tips that are sticking out on the front will be relocated elsewhere and be connected to the keyswitch again. 

Next is the bracket I made. Like I said it's ugly now because i cut it out of an iron plate from the dump that once was a shelf i think. It's not very clear on the photo but the bracket is bent twice so the horn is hidden away behind the airintake's snorkle. The white-ish paint will be stripped and when all the brackets I intend to make are done, they will all be sprayed black. If it's still too ugly then, i will make a new one.
Making it my own Img_2022

Beneath are the pictures of the new subframe-bar and the brat-seat I ordered. The seat is a little smaller than expected so I don't think my wife will be safe to ride along  but we'll see that when it's mounted properly.
The bar will be bent just a little so the seat covers it nicely, for the moment it sticks out on the front of the seat.
It will be welded in place where it touches the frame itself. I intend to cut the frame from where it stops touching, keeping the helmethook on the left side and the same triangular piece on the right side. I think it will be sturdier that way. The rear suspension is attached here too so that's a keeper... Maybe i can attach the back turnsignals there somewhere too.  We'll see...
Making it my own Img_2024

Making it my own Img_2023


__________________________________________________
I am working to the day of riding my revised : '85 K100 RT' It's only a few months younger than myself.  What a Face
Please comment my progress if you have suggestions, its on the board called 'making it my own'
    

49Back to top Go down   Making it my own Empty Long time, no post Thu Nov 02, 2017 4:15 pm

VinceD

VinceD
Silver member
Silver member
It's been a while since I last posted an update about the build. Mostly because there was nothing to update. 
The last few days the bike had most of the stuff done I said in the previous post.

First the welding. The seat-bar was cut to length and welded on. Some extra iron small triangular plates were used to make it a good and sturdy attaching. Hope it shows on the picture. The metal strips welded on there are for attaching the seat. Holes still need to be made but i'm going to take my time for this because I tend to try being fast and stuff goes wrong. (Example a bit further down this post)
Also welded were the small holder of the speed sensor and the one for the magnet that will be attached to the weel.
I've not yet taken pictures of those but they will follow upon installation. (Hopefully coming weekend)

The acewell got a little bracket and is now attached. I'll make it a nicer looking one or another if it proves bad but for now, it's there. The wiring is stuffed behind the headlight and will not come out, mostly due to the pressure that's in there.  Smile

The rear taillight and turn signals are mounted on the dirt slab(?) and plugged in using the original wiring for easy unplugging.

I bought a new battery, after alot of research (alot on this forum) i decided to go with the Odyssey pc680. 
I installed it just before typing this post and it works like a dream, certainly if you compare it to the one i had.

However (here comes the example of fast and faulty)...
When i went to my friend for welding the metal strips i wanted to drive there. Using my jumper cables and the battery of my turned-off car i tried starting it. I did this once before on my previous bike (Yamaha Dragstar 1100) when the lights drained the battery and i wanted to drive home after work. The + was attached to the + and the - was attached as far away as possible on the frame. This time i did the same but it wouldn't start. After a few tries i decided it better to stop and push. My friend only lives 200m down the road so no real problem. What the problem is now is that my pump does not work when i push the starter-button. I think i fried something because the first jumpstart tries it did run, but the last try it didn't and hasn't since... maybe something in the relays, i still have to look into this because i didn't have time for this yet. 

Here are the pics:

Making it my own Img_2011
Making it my own Img_2012

Making it my own Img_2010


__________________________________________________
I am working to the day of riding my revised : '85 K100 RT' It's only a few months younger than myself.  What a Face
Please comment my progress if you have suggestions, its on the board called 'making it my own'
    

50Back to top Go down   Making it my own Empty Re: Making it my own Thu Nov 02, 2017 11:22 pm

Laitch

Laitch
Life time member
Life time member
VinceD wrote:What the problem is now is that my pump does not work when i push the starter-button. I think i fried something because the first jumpstart tries it did run, but the last try it didn't and hasn't since... maybe something in the relays, i still have to look into this because i didn't have time for this yet. 
Check the fuses. Start with fuse #6 just to be contrary. Smile


__________________________________________________
1995 K75 90,000 miles
    

Sponsored content


View previous topic View next topic Back to top  Message [Page 1 of 3]

Go to page : 1, 2, 3  Next

Permissions in this forum:
You cannot reply to topics in this forum