BMW K bikes (Bricks)


You are not connected. Please login or register

Go to page : Previous  1, 2, 3  Next

View previous topic View next topic Go down  Message [Page 2 of 3]


51Back to top Go down   Making it my own - Page 2 Empty Re: Making it my own Thu Nov 02, 2017 11:22 pm

Laitch


Life time member
Life time member
VinceD wrote:What the problem is now is that my pump does not work when i push the starter-button. I think i fried something because the first jumpstart tries it did run, but the last try it didn't and hasn't since... maybe something in the relays, i still have to look into this because i didn't have time for this yet. 
Check the fuses. Start with fuse #6 just to be contrary. Smile


52Back to top Go down   Making it my own - Page 2 Empty Re: Making it my own Fri Nov 03, 2017 3:55 am

VinceD

VinceD
Silver member
Silver member
I actually allready checked the fuse #6. I saw it was for temperature meter and pump. The fuse doesn't look burnt and i even checked it with the multimeter. I'm going to check all the wires with the meter tot see if they got loosened somewhere and maybe the new connector i installed for the tank too. 
If that's all good, i'll see if there is a relay or something that could cause this and try and rule this out too.
The last think i check would be the pump itself i guess. Does anyone have experience with this? I saw the diagram on the portal for diagnostic of this problem so i'll follow this one too.


__________________________________________________
I am working to the day of riding my revised : '85 K100 RT' It's only a few months younger than myself.  What a Face
Please comment my progress if you have suggestions, its on the board called 'making it my own'
    

53Back to top Go down   Making it my own - Page 2 Empty Re: Making it my own Fri Nov 03, 2017 4:13 pm

VinceD

VinceD
Silver member
Silver member
I did some multimetering and can allready conclude the connector i replaced earlier under the tank was sound (i dismantled it but can't be assembled again it seems, didn't like that thing anyway so will be replaced by a better alternative). The relay is working too, i felt it click under my finger when pressing the starter button. 
When removing the relay and measuring the in/outputs I got this:
#86 = +
#87 = -
#30 = +
#87b = - 
The unnumbered one is - too.
At #87 there was nothing measurable

I am an absolute fool when it comes to electronics so if the above and next statement is incorrect, please correct me...
I think the pump is getting power but does not work so it is broken.
I didn't know this was a risk when using the cables on my bike but there it is...

Is there anyway to test the pump without removing it from the tank? Like connecting it directly to the battery or something?


__________________________________________________
I am working to the day of riding my revised : '85 K100 RT' It's only a few months younger than myself.  What a Face
Please comment my progress if you have suggestions, its on the board called 'making it my own'
    

54Back to top Go down   Making it my own - Page 2 Empty Re: Making it my own Fri Nov 03, 2017 5:01 pm

Laitch

Laitch
Life time member
Life time member
VinceD wrote:Is there anyway to test the pump without removing it from the tank? Like connecting it directly to the battery or something?
Do it the same way you described doing it in post #17. Smile


__________________________________________________
1995 K75 90,000 miles
    

55Back to top Go down   Making it my own - Page 2 Empty Re: Making it my own Fri Nov 03, 2017 6:42 pm

VinceD

VinceD
Silver member
Silver member
Right... True... I was too far in the pissed-off zone about my skills of braking stuff that i forgot all about that time I did something right  Embarassed 

Thanks for that Very Happy


__________________________________________________
I am working to the day of riding my revised : '85 K100 RT' It's only a few months younger than myself.  What a Face
Please comment my progress if you have suggestions, its on the board called 'making it my own'
    

56Back to top Go down   Making it my own - Page 2 Empty Re: Making it my own Mon Nov 06, 2017 12:17 pm

VinceD

VinceD
Silver member
Silver member
I've tested my fuelpump directly at the battery. The only 'reaction' i got was a little spark when i connected the green-black to the brown. That reaction was a short buzz inside the tank and a spark at the connection. 
Brown is the ground and the other one is coming from the fuel injector relay i think (diagram seems to say so).
Those should make the pump run i believe.

The buzz i hear is very short so i guess that it could be the fuelpump being stuck or clogged or something. Unless anyone got another idea on how you handle this, i'll be removing it from the tank tomorrow-morning and try to test it outside the tank. If that still gives me a buzz(in the bad way Smile) i'll take it apart following a manual i saw somewhere, clean it out, test again and if it's no good, buy and install a new one. In that case, i'll be asking for good tips on replacements since i saw that BMW-official is very expensive and others can be used to as i read somewhere. Wink


__________________________________________________
I am working to the day of riding my revised : '85 K100 RT' It's only a few months younger than myself.  What a Face
Please comment my progress if you have suggestions, its on the board called 'making it my own'
    

57Back to top Go down   Making it my own - Page 2 Empty Re: Making it my own Mon Nov 06, 2017 1:40 pm

charlie99

charlie99
VIP
VIP
just try reversing the connections to the pump
it might clear the blockage of gunge in the roller cells of the pump

don't forget that the pump relies on fuel flow through it to keep it cool
so short bursts


__________________________________________________
cheezy grin whilst riding, kinda bloke ....oh the joy !!!! ...... ( brick aviator )

'86 K100 RT..#0090401 ..."Gerty" ( Gertrude Von Clickandshift ) --------O%O
'86 k100 rs.. #######..  "Fred " (f(rame) red ) ( Fredrick leichtundschnell ) - -
bits and pieces from many kind friends across the k100 world ...with many thanks ..
1987 k100rs ########   "Red"  - (red sports rs TWB style )
1989 K100rt #009637   "Black Betty"  (naked rt ala Nigel , now sporting an rs main fairing )
    

58Back to top Go down   Making it my own - Page 2 Empty Re: Making it my own Mon Nov 06, 2017 2:48 pm

VinceD

VinceD
Silver member
Silver member
Thanks for that charlie, sadly it didn't work.
I couldn't wait untill tomorrow and popped the pump out just now. It was much easier than i was fearing it to be. With the pump standing on my workbench i hooked it up to my old battery that gave me a 12,4V. The pump buzzed and vibrated a tenth of a second (estamated Wink ), turned a little clockwise and then did nothing. When I switched poles it vibrated again and turned into the other direction. 
So i can conclude i didn't brake it using the cables cheers...

The rubber on the holder was a sticky goo and maybe some of that got sucked into it somehow.
Reversing poles didn't help here so I think i'll open it up and clean the inside. I guess using brakecleaner. 
Tomorrow i'll see if i can open it up, clean it, put back together and make it work again. If so, i'll buy a new rubber and be done with that. If i can't get it to work i'll still have to look for a replacement. If there are any good available tips on where to get them in Europe, i'd be glad to hear it. 
Tips on opening the little troublemaker would be welcome too, in the meanwhile i'm looking for that howto i saw some time ago.


__________________________________________________
I am working to the day of riding my revised : '85 K100 RT' It's only a few months younger than myself.  What a Face
Please comment my progress if you have suggestions, its on the board called 'making it my own'
    

59Back to top Go down   Making it my own - Page 2 Empty Re: Making it my own Mon Nov 06, 2017 2:58 pm

charlie99

charlie99
VIP
VIP
don't open it
just soak it in the cleaner at about 1 cm depth

there is a tricky assembly at the cells rollers , which many folks have tried to repair - clean

but if you must ..investigate and report back ... the pump can be substituted for many Peugeot and other small series car .and quite inexpensive to buy

good luck


__________________________________________________
cheezy grin whilst riding, kinda bloke ....oh the joy !!!! ...... ( brick aviator )

'86 K100 RT..#0090401 ..."Gerty" ( Gertrude Von Clickandshift ) --------O%O
'86 k100 rs.. #######..  "Fred " (f(rame) red ) ( Fredrick leichtundschnell ) - -
bits and pieces from many kind friends across the k100 world ...with many thanks ..
1987 k100rs ########   "Red"  - (red sports rs TWB style )
1989 K100rt #009637   "Black Betty"  (naked rt ala Nigel , now sporting an rs main fairing )
    

60Back to top Go down   Making it my own - Page 2 Empty Re: Making it my own Mon Nov 06, 2017 4:59 pm

MartinW

MartinW
Life time member
Life time member
Try soaking in white vinegar for a week. Then apply short bursts of voltage, and reversing the polarity. A mates pump took 2 weeks of soaking and finally broke free with the application of 18v. I did a lot of research and I'm currently running a Chinese clone bought of Aliexpress. Warning there are a lot of crap Chinese pumps out there, I went for one that actually manufactures them. It flows more volume than the OEM pump and is significantly quieter and is a direct replacement. It has now done 1500 K's, and as a precaution I keep a spare pump in the tail. There are a couple of others running different Chinese pumps.

This is why I went with this supplier
.Beijing Global Auto Parts is one of the leading trade companies in mainland China and a member of the Chinese Commercial Vehicle Parts Market Federation, specializing in commercial vehicle and diesel engine parts. We provide export services to many of our clients worldwide including the Middle East, Europe, Africa, and Southeast Asia. Meanwhile, we have established long-term relationships with over 20 leading diesel engine parts manufacturer in mainland China with effective quality insurance system, like Cummins, Caterpillar, Deutz, Perkins, Komatsu, Isuzu, Steyr and Kamaz.
 Our products include nozzles, elements, delivery valves, injectors, pistons, piston rings, cylinder blocks, cylinder heads, crankshafts, camshafts, turbochargers, fuel injection pumps and feed pumps. At the same time, we have good relationship with automotive companies in mainland China and our supplier, including FAW, DFM, CNHTC (Steyr, Howo), Foton (Auman), Shanxi (SX, Steyr), Yuchai, Weichai and DCEC (Cummins). With their assistance, we can provide pure China-made automotive parts and components. Link http://www.motobrick.com/index.php/topic,10054.msg85798.html#msg85798
Regards Martin


61Back to top Go down   Making it my own - Page 2 Empty Re: Making it my own Mon Nov 06, 2017 7:02 pm

Dai

Dai
Life time member
Life time member
And the site itself, seeing that Martin forgot the link: Very Happy 

http://www.bjglobaltrade.com/

Definately not fly-by-night.


__________________________________________________
1983 K100 naked upgraded to K100LT spec after spending time as an RS and an RT
1987 K100RT
Others...
1978 Moto Guzzi 850-T3, 1979 Moto Guzzi 850-T3 California,1993 Moto Guzzi 1100ie California
2020 Royal Enfield Bullet 500
    

62Back to top Go down   Making it my own - Page 2 Empty Re: Making it my own Tue Nov 07, 2017 9:18 am

VinceD

VinceD
Silver member
Silver member
Today i put the pump in a plastic box and added about 2cm of white (alcohol) vinegar. After an hour i was able to sumply wipe away all the gunk that was on the outside and in a few days i'll give the pump another test.

I also bolted on the homemade brackets for the acewell speed sensor. 
Here are some pictures of it. The second pic shows the distance of 2mm between sensor and magnet. Making it my own - Page 2 Img_2013
Making it my own - Page 2 Img_2014

The brackets are still a bit rough but wil be sanded and painted later on.

Also did i try to drill the holes for the seat in the iron strips. After allmost ruining one of the strips i decided to do it like you see on the picture below. The seat can't slip off because the rim on the front bottom of the seat rests against the iron frame. The strips may have lost a bit strenght this way but they're just for keeping the seat in place, the weight comes on the frame-bar. They will do just fine i think.

Making it my own - Page 2 Img_2015

I used some sandpaper on the bare metal parts as well and in a few days i wil give it a primer and coat of paint. Plan is to do a full paintjob of the frame next winter. I'm still deciding if i will paint the engine, i do like the look of the engine as it is now so maybe i won't, just the black parts that are losing some paint maybe (oil pan etc).

When the pump is running again the bike will be ready for a first little testrun... to do tirestore because the tires seem to be from somewhere in 2003.


__________________________________________________
I am working to the day of riding my revised : '85 K100 RT' It's only a few months younger than myself.  What a Face
Please comment my progress if you have suggestions, its on the board called 'making it my own'
    

63Back to top Go down   Making it my own - Page 2 Empty Fuel pump Tue Nov 14, 2017 4:11 pm

VinceD

VinceD
Silver member
Silver member
After a week of soaking the old pump remains jammed. So i ordered a new one from aliexpress, it was only $23 so it might not be the best out there but i've heard of several people who are very happy with stuff from that. We'll see, if it breaks down in a year, no big loss. 
I also ordered a new rubber that should arrive friday along with a submersible fuel hose. Those were from a good shop that sells original and aftermarket BMW parts. The rubber costs €45 so double of the pump Smile

Since the old pump was/is not working anymore i disassembled it. It was quite easy, the only problem is that the housing now is ruined at the top. The folded metal has broken off. Since i probably won't be using it anymore that's not a really big problem. After taking it apart it showed the metal rollers were jammed. There seems to be a scratch with rough edges causing the jam. I'm going to see if i can sand it down and assemble it again and make it work. If so, i will see about fixing the housing.
Here are some pictures of the inside of the pump:
Making it my own - Page 2 Img_2016
Making it my own - Page 2 Img_2017

The second photo shows the turning bottom part with the 5 holes for the rollers. I don't know if it shows on the photo's but the inside of where the rollers touch the sides are blue. Somewhere there is the scratch.


__________________________________________________
I am working to the day of riding my revised : '85 K100 RT' It's only a few months younger than myself.  What a Face
Please comment my progress if you have suggestions, its on the board called 'making it my own'
    

64Back to top Go down   Making it my own - Page 2 Empty Re: Making it my own Tue Nov 14, 2017 4:42 pm

MartinW

MartinW
Life time member
Life time member
There are good Chinese pumps and bad Chinese pumps. I did a lot of looking before I ordered mine from the manufacturer. In the interests of fellow inmates could you post who you purchased yours from.
Regards Martin.


65Back to top Go down   Making it my own - Page 2 Empty Re: Making it my own Wed Nov 15, 2017 2:26 am

VinceD

VinceD
Silver member
Silver member
Sure, here is the name of the online store i bought it fom.
For the pump on AliExpress:
tuning and high performance store
China

And for the rubber and fuelhose:
Hobbyist.nl


Last edited by VinceD on Wed Nov 15, 2017 2:51 am; edited 1 time in total


__________________________________________________
I am working to the day of riding my revised : '85 K100 RT' It's only a few months younger than myself.  What a Face
Please comment my progress if you have suggestions, its on the board called 'making it my own'


67Back to top Go down   Making it my own - Page 2 Empty Pump update Mon Dec 18, 2017 1:22 pm

VinceD

VinceD
Silver member
Silver member
So the pump arrived earlier this week and is now installed using the new rubber. When placing the pump i noticed the little old cilindrical filter at the bottom was teared a little and was also full of rubbergoo. The smaller rubber hose starting here and leading to a nipple next to the tankcap was also deteriorated. It split open when i tried to place it back over the nipple. I went and ordered new ones from hobbyist.nl and two days later they were delivered. After the weeks long waiting at Ali-deliveries this was a fantastic experience. So yesterday all was installed and the bike was taken for a careful lap around the block. The tires are very slippy so i was glad to have been so careful. When shifting down to second the rear slipped.

Anyway, next on the wishlist are the new tires. They have been ordered in a near tiregarage and will be mounted probably this friday.(if i can get a daytime babysit for my doughter) next week they'll be on leave and i shall have to wait till 2018. 

While waiting on Ali i kept a bit busy making some covers for a better look. I also spraypainted them and placed them using bolts and/or zipties. The ignition switch was relocated to the side and the button to turn on the four turnsignals at once got a place too. This last is waiting to be installed. Will be done tomorrow or so.

Also tomorrow will be an attempt to remove glue left behind on the tank from the rubber at the 'crotch-touching-side'.
At first i planned on finding a adhesive remover wheel i saw here and there around the web but that wasn't found in any local DIY-shop. After looking it up online it seemed a bit too expensice too(€32) for something i would probably only use once. 
Another 'trick' i saw online was using WD-40 or gasoline on a cloth. Since i have both i'll give it a shot too.

The acewell turned out very easy to configure and after the new tires have been installed i'll check the accuracy of the speed-indicator. Guessing my speed now it seems correct.

Next week i'll clean up my project and take some pictures to post them here (and under the pictures topic)
I've said it in my first post, say it again now and also when i post the pictures: i am not an experienced handy-worker and some of it all may/will look a bit too DIY for many tastes. Also on the planning is a paintjob next winter ('18-'19) so this might look a bit off too for some. I however do like a bit 'scrapyard-look' for the time beeing. Some might even say i have slain my K100 but that's an opinion I don't share or care about. Everyone it's own. As i see it, I adjusted a very fine machine to my own taste. A taste that i do realise is shared by many others nowadays. All i care about to say is i like it, learned a lot allready and had/have fun and some pride in doing it. 

Next week photo's...


__________________________________________________
I am working to the day of riding my revised : '85 K100 RT' It's only a few months younger than myself.  What a Face
Please comment my progress if you have suggestions, its on the board called 'making it my own'
    

68Back to top Go down   Making it my own - Page 2 Empty Re: Making it my own Tue Dec 19, 2017 3:47 am

charlie99

charlie99
VIP
VIP
keep at it vince

sounds like its all coming together now

cheers !!!


__________________________________________________
cheezy grin whilst riding, kinda bloke ....oh the joy !!!! ...... ( brick aviator )

'86 K100 RT..#0090401 ..."Gerty" ( Gertrude Von Clickandshift ) --------O%O
'86 k100 rs.. #######..  "Fred " (f(rame) red ) ( Fredrick leichtundschnell ) - -
bits and pieces from many kind friends across the k100 world ...with many thanks ..
1987 k100rs ########   "Red"  - (red sports rs TWB style )
1989 K100rt #009637   "Black Betty"  (naked rt ala Nigel , now sporting an rs main fairing )
    

69Back to top Go down   Making it my own - Page 2 Empty Re: Making it my own Tue Dec 19, 2017 7:40 am

Dai

Dai
Life time member
Life time member
What Charlie sez Very Happy


__________________________________________________
1983 K100 naked upgraded to K100LT spec after spending time as an RS and an RT
1987 K100RT
Others...
1978 Moto Guzzi 850-T3, 1979 Moto Guzzi 850-T3 California,1993 Moto Guzzi 1100ie California
2020 Royal Enfield Bullet 500
    

70Back to top Go down   Making it my own - Page 2 Empty Re: Making it my own Wed Dec 20, 2017 5:46 pm

VinceD

VinceD
Silver member
Silver member
Another quick update.
I started the bike again and noticed a loud metal-ratteling sound. First time i panicked and turned the bike off. After checking on poorly bolted parts I found nothing. I started her up again and after a short while it returned. I kept it running and started listening around the bike. I couldn't find the part where it actually rattles but it was definitely from the front left near the tank but not inside the tank. So... i started looking online what it could be and where did I find the answer? On this very forum... Here is a link to that topic : Return valve topic link.
I am quite confident this is the problem I'm having too. I guess it's something that can wait for a week or so because I won't have time for this before the tire changing on friday. It will raise some eyebrows when I show up there with a bike that rattles like a can of bolts and looks like it too but let's just think of it as funny for now.

A quick thing I 'fixed' was the throttle. When i pulled it, it just stayed as i released it. (Involuntary cruisecontrol) So I removed it yet again and instead of sanding the handlebar for the 5th time or so, i decided to go with the flap disc. Taking a very slight bit all around it was allready a lot better. A bit of grease on the handlebar later it returned to '0' out of itself. 

I also hooked the battery up to the charger to bring it back to full capacity.

I thank the forum and all it's contributors again for the help. Best decision ever to start posting here and browsing the topics allready present.


__________________________________________________
I am working to the day of riding my revised : '85 K100 RT' It's only a few months younger than myself.  What a Face
Please comment my progress if you have suggestions, its on the board called 'making it my own'
    

71Back to top Go down   Making it my own - Page 2 Empty Re: Making it my own Wed Dec 20, 2017 9:09 pm

Dai

Dai
Life time member
Life time member
I think BMW were just trying to be smart with that return valve. On the Cali 1100-series motors (probably others too) Moto Guzzi make do with a long pipe that curves up and dumps the return fuel just forward of the filler cap neck. No problem in taking a full tank off and an instant visual 'is-the-pump-working' display.

I do have to add that getting a spanner on the hose nut is a complete bastard because there's hardly any room to get the spanner in...


__________________________________________________
1983 K100 naked upgraded to K100LT spec after spending time as an RS and an RT
1987 K100RT
Others...
1978 Moto Guzzi 850-T3, 1979 Moto Guzzi 850-T3 California,1993 Moto Guzzi 1100ie California
2020 Royal Enfield Bullet 500
    

72Back to top Go down   Making it my own - Page 2 Empty Re: Making it my own Thu Dec 21, 2017 2:57 am

charlie99

charlie99
VIP
VIP
good onya vince

yep ive suffered that rattle issue ...but seems very quiet these days ..ill be guessing the return spring has somewhat relaxed over the years  and now not so quite strong enough to fight against the pressure returning to the tank ...or the pump is on the way out !! (quite likely )

giggles

a few rattles is character mate ...just like smoking on startup ...after landing the brick on the sidestand  immediately after stopping

enjoy mate


__________________________________________________
cheezy grin whilst riding, kinda bloke ....oh the joy !!!! ...... ( brick aviator )

'86 K100 RT..#0090401 ..."Gerty" ( Gertrude Von Clickandshift ) --------O%O
'86 k100 rs.. #######..  "Fred " (f(rame) red ) ( Fredrick leichtundschnell ) - -
bits and pieces from many kind friends across the k100 world ...with many thanks ..
1987 k100rs ########   "Red"  - (red sports rs TWB style )
1989 K100rt #009637   "Black Betty"  (naked rt ala Nigel , now sporting an rs main fairing )
    

73Back to top Go down   Making it my own - Page 2 Empty Re: Making it my own Tue Dec 26, 2017 3:00 am

VinceD

VinceD
Silver member
Silver member
I've been to the tireshop and got myself some new michelin tires. They were preroughened(?) so i got the chance to do a full on testdrive trough the town and surroundings. A few things i noticed were the power-pauze when i pulled the throttle quickly in first gear and how high in rpm i went in 5th on the higher speeds.
I also changed the tire-size in the acewell because i entered it wrong. I put in about 1430 mm and it actually was supposed to be 1980... i tested the speed by driving behind responsible looking cardrivers. Close enough gor now. 
My father in law (GS-driver) told me it is also normal to go higher in rpm than with a chopper-style motorcycle (my previous was a yamaha dragstar 1100) but i'm still thinking of setting the rpm onnthe acewell right or buy a rpm-gauge to put on there. 
When going fast in fifth i cycled down to first and back up to make shure i wasn't missing my fifth gear (stuck or something) but it didn't appear so... probably something i have to get used to.q


__________________________________________________
I am working to the day of riding my revised : '85 K100 RT' It's only a few months younger than myself.  What a Face
Please comment my progress if you have suggestions, its on the board called 'making it my own'
    

74Back to top Go down   Making it my own - Page 2 Empty Re: Making it my own Tue Dec 26, 2017 3:46 am

Dai

Dai
Life time member
Life time member
You'll get used to it. A lot of people that are new to K's keep looking for a sixth gear. I did.


__________________________________________________
1983 K100 naked upgraded to K100LT spec after spending time as an RS and an RT
1987 K100RT
Others...
1978 Moto Guzzi 850-T3, 1979 Moto Guzzi 850-T3 California,1993 Moto Guzzi 1100ie California
2020 Royal Enfield Bullet 500
    

75Back to top Go down   Making it my own - Page 2 Empty Re: Making it my own Tue Dec 26, 2017 9:24 am

Laitch

Laitch
Life time member
Life time member
VinceD wrote: ... i tested the speed by driving behind responsible looking cardrivers.
Making it my own - Page 2 610153


__________________________________________________
1995 K75 90,000 miles
    

76Back to top Go down   Making it my own - Page 2 Empty Re: Making it my own Tue Dec 26, 2017 9:45 am

Point-Seven-five

Point-Seven-five
Life time member
Life time member
Laitch wrote:
VinceD wrote: ... i tested the speed by driving behind responsible looking cardrivers.
Making it my own - Page 2 610153
Thank goodness for responsible drivers.

Yes, sure sign of a new brick rider is the constant searching for 6th gear.  I'm pretty sure most of us went through that phase.  I know I did.


__________________________________________________
Present: 1991 K100RS "Moby Brick Too"
 
Past:
1994 K75RT "Ilsa, She Wolf of the SS"
1988 K100RS SE "Special Ed"
1994 K75S "Cheetos"
1992 K100RS "Moby Brick" R.I.P.
1982 Honda FT500
1979 Honda XR185
1977 Honda XL125
1974 Honda XL125
1972 OSSA Pioneer 250
1968 Kawasaki 175
    

77Back to top Go down   Making it my own - Page 2 Empty Re: Making it my own Wed Jan 03, 2018 3:45 pm

VinceD

VinceD
Silver member
Silver member
I realise it sounds weird saying that i drove behind responsible looking drivers  Very Happy.
What i meant was that i checked the speed by proximity. I know it isn't exact to drive behind someone and conclude it to be correct. I plan on going for a ride when the weather is somewhat better. My friend will be driving in his car and setting cruise to 70 km/h (with the gps as speedometer) and see by how much it differs. For now I won't be put aside by the police for driving way too fast, thinking i was fine.

Anyway, what i did today:
Took some pics (see bottom of post) 
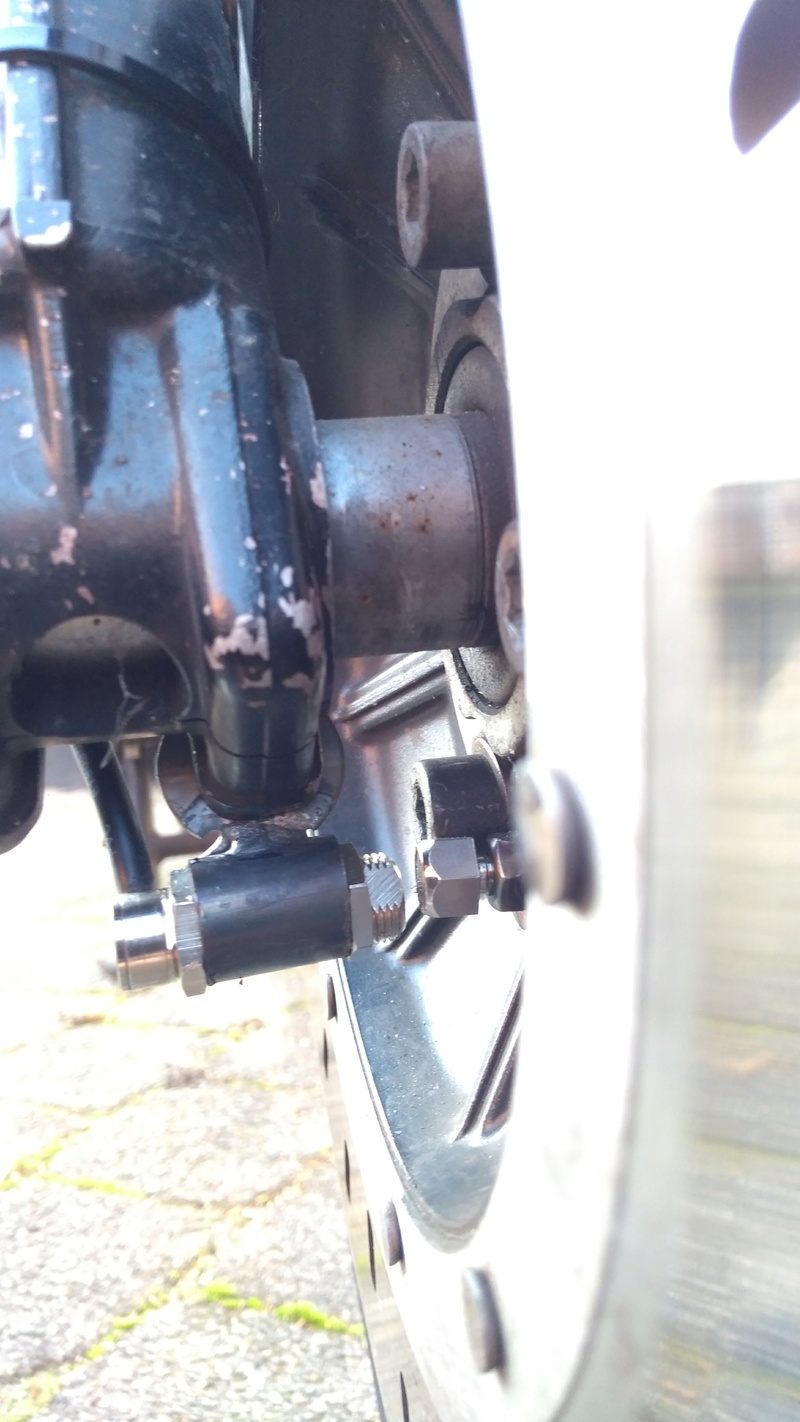
Removed the helmet-lock from the right side, this way i get a hole to hang my bike-lock in. I took it out after the photo's so you won't see that for now. The lock i allready owned fitted on the brakedisc of my yamaha but here it doesn't. I have a abus granit 68 victory x-plus lock. This way i can re-use it. I also picked up a abus cobra 2M cable. Allready thinking it's too short for some situations however... thinking of picking up a brakelock with alarm i saw somewhere on the internet.

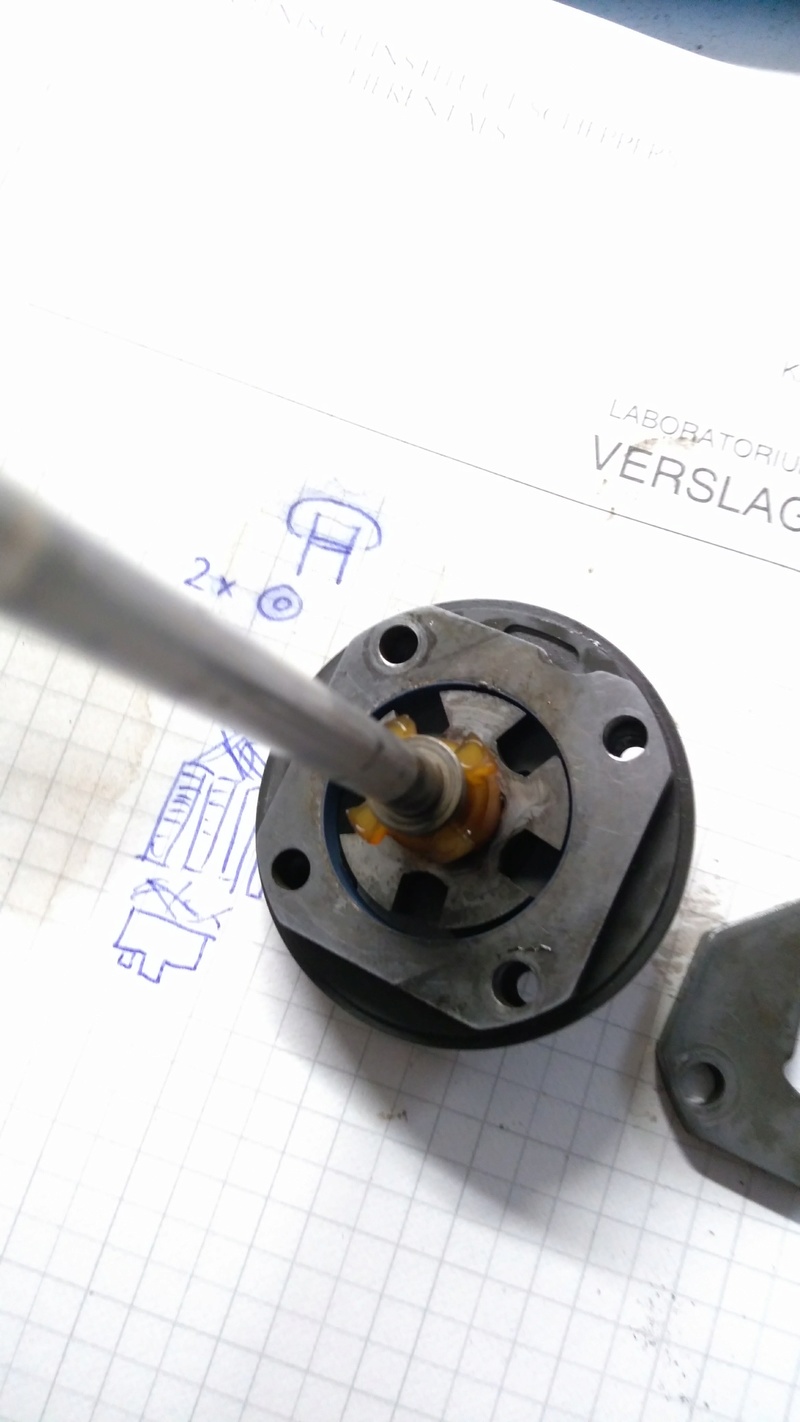
Checked gear-oil level, that was ok. I made a dipstick from an old screwdriver i cut to the min-oil-lvl length, made a carve on the max-lvl. (126 & 116mm)
Checked the final drive oil too. Instructions told me to put on centerstand, see if oil level came just below plugthread. I couldn't see the oil. So i started pooring new one in and had to add 100cc! (80W90 hypoid gear-oil) I hope there is nothing inside that suffered from the low oil level. I didn't drive it alot yet, maybe 20km in total.

I am now quite sure the bike was not maintenanced very well by the previous owner. Despite he said it was.
The final drive oil level is one thing but the tires... the tireshop-guy told me the front tire was from 1994 and rear was from 98. That's way too old. Probably the second set the bike has ever seen. I do believe the milage on the counter now however. 
 
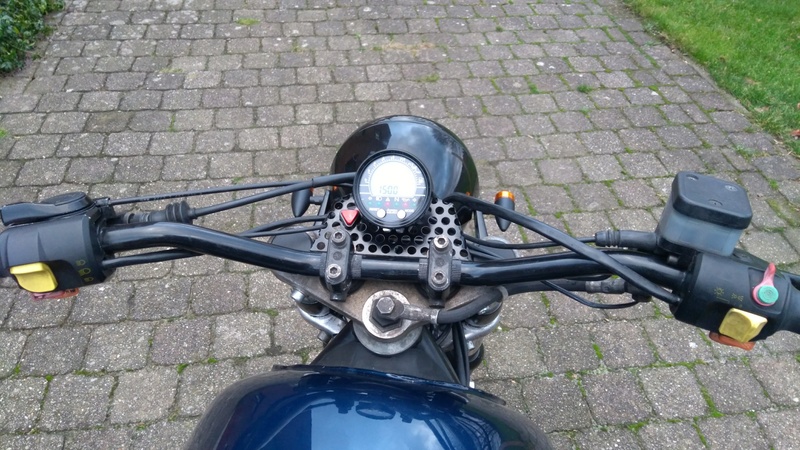
I also made a little dash and placed a little button near the speedo to turn on/off the 4 blinkers. 
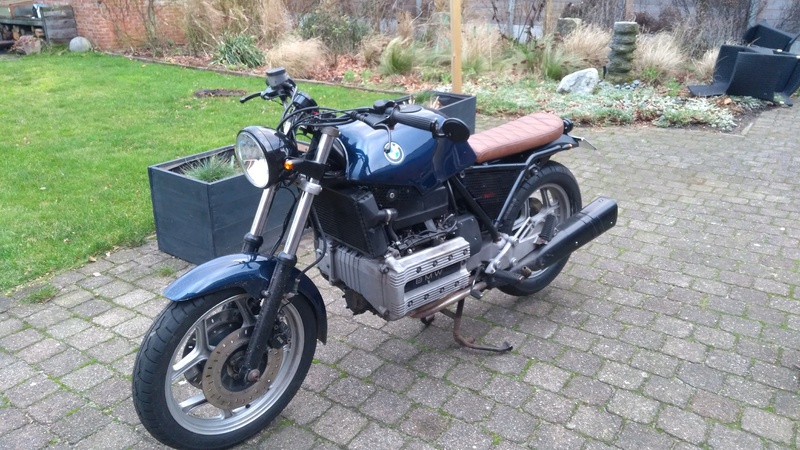
There is only one mirror installed, i dropped the right one upon installing and it broke. For now the right side of the handlebar got a plastic plug in it. The left one is the most important anyway. I even think that the left is the only one that the law sets as a must here too. Going to check that after posting this. 

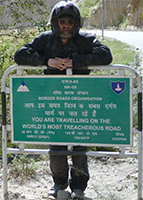
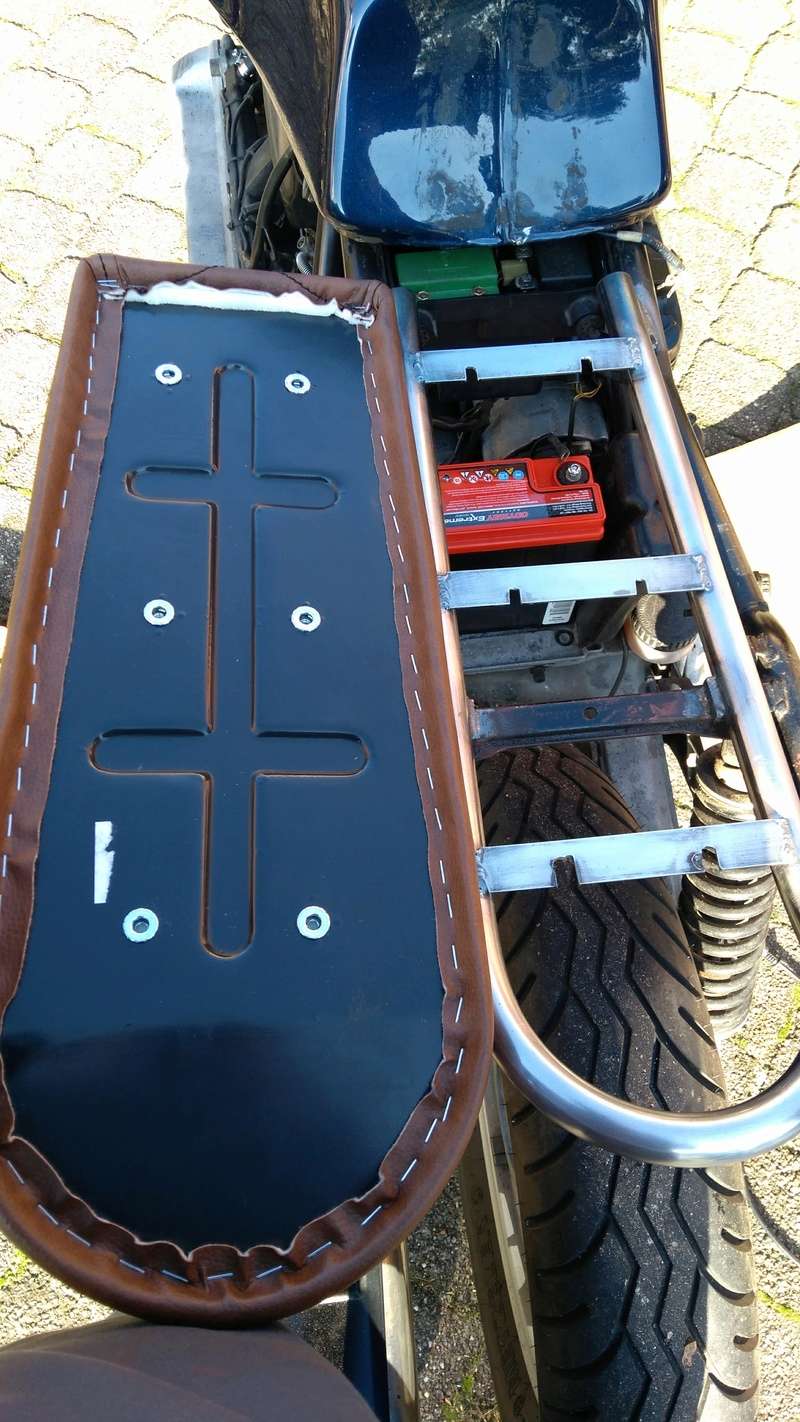
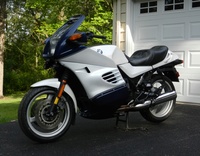
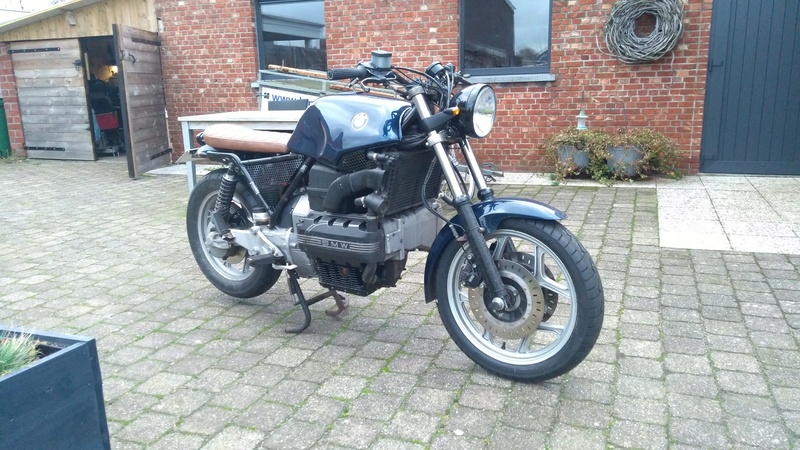
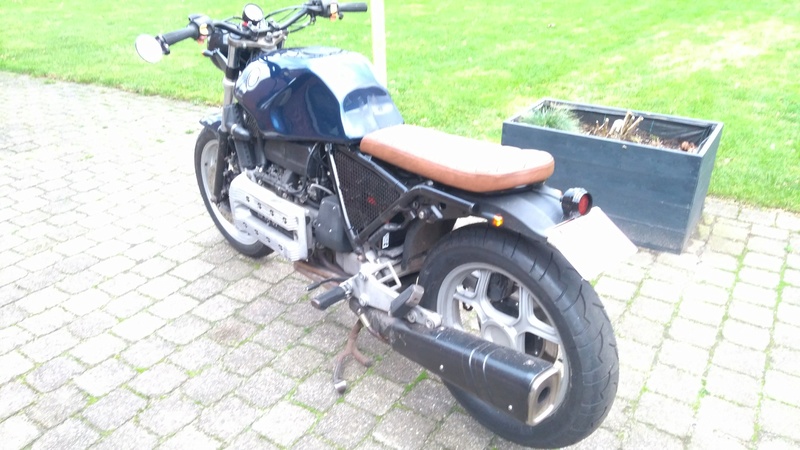
So here are some pics of the bike now. Remember it's not been painted yet (if it ever will), a thorough cleaning is still scheduled and i am not a handyman. For now it looks quite decent in my opinion. You'll notice the carvings on the left and right side from where the fairings touched. I hope they will be less noticeable once the aluminium on the left is clean and the black paint on the right is stripped.
Comments are very welcome but please be kind  Smile

Making it my own - Page 2 Img_2018
Making it my own - Page 2 Img_2019
Making it my own - Page 2 Img_2020
Making it my own - Page 2 Img_2021


__________________________________________________
I am working to the day of riding my revised : '85 K100 RT' It's only a few months younger than myself.  What a Face
Please comment my progress if you have suggestions, its on the board called 'making it my own'
    

78Back to top Go down   Making it my own - Page 2 Empty Re: Making it my own Tue Jan 09, 2018 12:11 pm

VinceD

VinceD
Silver member
Silver member
So I went on a little trip yesterday.
If I can believe my acewell the rpm is around 6500 when driving 90km/h. That seemed high for 5th gear. I also found a list with the rpm-kmh-mph listed.

Making it my own - Page 2 20180110
(I hope this pic works, I'm using the app to post this)

I'll start with cleaning up the signal for the rpm because like many others have stated, it bounces around alot with the acewell.
I don't dare driving over 100 kmh until I am sure the rpm's are good. I hope I misread it, the rpm is kind of less bouncy at higher speeds.

Sent from Topic'it App


__________________________________________________
I am working to the day of riding my revised : '85 K100 RT' It's only a few months younger than myself.  What a Face
Please comment my progress if you have suggestions, its on the board called 'making it my own'
    

79Back to top Go down   Making it my own - Page 2 Empty Re: Making it my own Tue Jan 09, 2018 5:28 pm

Point-Seven-five

Point-Seven-five
Life time member
Life time member
Off the top of my head, it sounds like your tachometer is off by a factor of 2.  My K75's are turning about 5000rpm at 120kph give or take.  Depending on the final drive ratio, you should be turning about 3700rpm at 90kph.


__________________________________________________
Present: 1991 K100RS "Moby Brick Too"
 
Past:
1994 K75RT "Ilsa, She Wolf of the SS"
1988 K100RS SE "Special Ed"
1994 K75S "Cheetos"
1992 K100RS "Moby Brick" R.I.P.
1982 Honda FT500
1979 Honda XR185
1977 Honda XL125
1974 Honda XL125
1972 OSSA Pioneer 250
1968 Kawasaki 175
    

80Back to top Go down   Making it my own - Page 2 Empty Re: Making it my own Tue Jan 09, 2018 6:20 pm

robmack

robmack
Life time member
Life time member
You can use this Speed Calculator to determine the correct engine to road speed for your combination of gearing and tire size.

You might also want to build the Tachometer Signal Conditioning circuit I designed to tame your RPM signal to the Acewell.


__________________________________________________
Robert
1987 K75 @k75retro.blogspot.ca
http://k75retro.blogspot.ca/
    

81Back to top Go down   Making it my own - Page 2 Empty Re: Making it my own Wed Jan 10, 2018 4:57 pm

VinceD

VinceD
Silver member
Silver member
Thanks alot robmack for the circuit. After work i passed by the partsstore and got everything to make it like you described. They did not have the TA42 however. What they did have were mpsa44. The guy behind the counter said it would do the same with the only difference it could deal with higher frequencys or something like that? I hope it will be allright. Anyway, tonight i made my first ever circuitboard. Except for some ugly handywork here and there i'm quit content with the turnout. I still have to test it offcourse, i ran out of time and daylight (my garage needs better lighting) to plug it in and test it. So here are the pics of the board. Next to it you can see wich is wich. The second photo is the soldering i did on the backside. You'll notice straight away my ground-wire to the right. I did not know how else to do it and it seemed fine like this. Here and there are some plastic drops to strenghten the fragile connections that were caused by me being new at this.  Smile  
The connection from the amp's '4' to ground was not made here yet. I saw that when i was typing this but it's there now.
Making it my own - Page 2 Img_2022
Making it my own - Page 2 Img_2023
Making it my own - Page 2 Img_2024


__________________________________________________
I am working to the day of riding my revised : '85 K100 RT' It's only a few months younger than myself.  What a Face
Please comment my progress if you have suggestions, its on the board called 'making it my own'
    

82Back to top Go down   Making it my own - Page 2 Empty Re: Making it my own Wed Jan 10, 2018 6:29 pm

robmack

robmack
Life time member
Life time member
Hi Vince,

Yes, the MPSA44's will work fine in this circuit over the TA42's.  The transistors are driven to saturation so they are acting as switches.  The switching frequency is not critical.  The Vce has to be large enough to handle 80 volts potentially and these transistors have Vce of about 600V.  They should be OK.

The construction of the circuit looks good.  The ground wire is completely fine; I've done this type of construction in the past with no ill effects.  Double check your connections before powering up, especially the transistor leads and the IC leads.  It's easy to get those backwards when you are working on the reverse side of the board.

Hope it all goes well.  PM me if you have questions.

P.S. In contrast to your circuit, I've miniaturized it by using surface mount components and double-sided printed circuit card, to where it looks like this:

Making it my own - Page 2 Znlvet

This board contains both the tachometer conditioning circuit and the speedometer conditioning circuit all on one board.


__________________________________________________
Robert
1987 K75 @k75retro.blogspot.ca
http://k75retro.blogspot.ca/
    

83Back to top Go down   Making it my own - Page 2 Empty Re: Making it my own Wed Jan 10, 2018 8:06 pm

blaKey

avatar
Life time member
Life time member
"Yes, the MPSA44's will work fine in this circuit over the TA42's.  The transistors are driven to saturation so they are acting as switches.  The switching frequency is not critical.  The Vce has to be large enough to handle 80 volts potentially and these transistors have Vce of about 600V.  They should be OK."

I agree with what Rob said, but he beat me to it.

Good grief, seriously? I have no idea what you guys are talking about... Making it my own - Page 2 161205  Sleep


__________________________________________________
Neil
K100RS 1986 RED!

Dress for the ride and the potential slide.
    

84Back to top Go down   Making it my own - Page 2 Empty Re: Making it my own Wed Jan 10, 2018 8:31 pm

charlie99

charlie99
VIP
VIP
good work vince

'superb feedback rob !!!  great to see

nice to see some one attempting new things , hope it works for you

cheers


__________________________________________________
cheezy grin whilst riding, kinda bloke ....oh the joy !!!! ...... ( brick aviator )

'86 K100 RT..#0090401 ..."Gerty" ( Gertrude Von Clickandshift ) --------O%O
'86 k100 rs.. #######..  "Fred " (f(rame) red ) ( Fredrick leichtundschnell ) - -
bits and pieces from many kind friends across the k100 world ...with many thanks ..
1987 k100rs ########   "Red"  - (red sports rs TWB style )
1989 K100rt #009637   "Black Betty"  (naked rt ala Nigel , now sporting an rs main fairing )
    

85Back to top Go down   Making it my own - Page 2 Empty Re: Making it my own Sun Jan 14, 2018 9:13 am

VinceD

VinceD
Silver member
Silver member
A quick update, i am still working on the circuit, loads of thanks to robmack for this. Still have to test my ugly looking version of that. Hopefully i have no bad connections on there (or too many unwanted connections...).

I found a little time today and was thinking about my battery and how low starting power it has even after a good trip a few days back. Only one option here i guess: the alternator or a bad connection to it. Might also explain my previous dead battery. 

So after reading some online and a helpfull oldtimer-car-mechanic/enthousiast i hooked up my multimeter to it and started it up with the battery's last juice. And what i feared and suspected came true, no changes on the reading of the multimeter... when pulling the throttle it even went down. So i took the backside apart again, hooked up the battery to a charger/trickle and had to lock up the shed for a birthdayparty...

Later this week i'll test the connections of the alternator and hopefully find the problem here.


__________________________________________________
I am working to the day of riding my revised : '85 K100 RT' It's only a few months younger than myself.  What a Face
Please comment my progress if you have suggestions, its on the board called 'making it my own'
    

86Back to top Go down   Making it my own - Page 2 Empty Re: Making it my own Sun Jan 14, 2018 10:20 am

robmack

robmack
Life time member
Life time member
Have you hooked up the Blue exciter lead for the alternator to a source of switched battery voltage through a charging light? Alternatively you can use 2 resistors like this:

Making it my own - Page 2 6nkvvOw0hkYJjOFp_aRJhPI-JIAWgbXkVLFsX8OqMwZZPDskanCnd99Mm9IH47MA3OxB6b3ETUVc9a_7971u1MwJIdpw_XYp-TihEdaxE9DiCibdalfuRq8AtSiF-r96Uh1NSwJWorN_dWFkd_zSQqOq_cBW3Ug1SjDuHt6UH2nsq2u5MyY1kNmAy2tM9d4Gr0KM0aeaZBoxfW7vaj_-Do3cOddXZFoi73A51f0c1d4B4imtqob9wJqiMKA4B1xfFx_rlL4ifr5icbPr3_B5q6S4pA-5M8kbfOqXOFnxcelbiy0S-HKUSa2YHydwIrsuxSi1n4o8C5i0fW1R0sn6U9oV4Fu_lMqzJeNGdkE3yBIz49Hiw2XL4H4gpUFtsR9A1LdTJA8N0voVcEFR2ABuTtU62UeZ8joI0kVQOZFNyb2XzBpIaoeI6z7KV81LLkTBT3MQwSWInu9UHdEVvx2tHUqrskJUphrD6uedhBC22U3mH1JNQkoQHX6XvAaz5RuJUzN-vBOyeak_dr0pWynXrfoWF2cABr_MPCPnc_wHkhXzHx5Ks5c1gIQPzdwTu-vVOIRzlfWXUbSkqBFk-MUcP5pL_3V1cQ251t6bfMo=w2480-h574-no


__________________________________________________
Robert
1987 K75 @k75retro.blogspot.ca
http://k75retro.blogspot.ca/
    

87Back to top Go down   Making it my own - Page 2 Empty Re: Making it my own Tue Jan 16, 2018 2:43 am

VinceD

VinceD
Silver member
Silver member
I didn't hook that up at the alternator. I'll have to check if I have connected it's blue lead at the speedometer somewhere (is this where you meant?) Maybe I didn't close the circuit when changing the speedometer... 
I checked the connection at the alternator with my multimeter and got a connection from red to battery. Blue to ground I didn't get. Should this be directly connected? The battery was removed for better access and the bike wasn't running when I checked, ignition was off too.


__________________________________________________
I am working to the day of riding my revised : '85 K100 RT' It's only a few months younger than myself.  What a Face
Please comment my progress if you have suggestions, its on the board called 'making it my own'
    

88Back to top Go down   Making it my own - Page 2 Empty Re: Making it my own Tue Jan 16, 2018 9:59 am

robmack

robmack
Life time member
Life time member
Blue should not show continuity to ground. Blue needs to be fed switched 12V through a 2-3W load (usually a dash indicator lamp).  The indicator is showing the rate of battery charge (or lack of it); it's normally the charge indicator with the battery symbol on the OEM dash.  Most aftermarket gauges lack this indicator.  You'll have to "roll your own" indicator or use a simulated load like what I posted earlier.  In either case, it is a MANDATORY REQUIREMENT to connect the Blue wire to make the alternator charge the battery.

There's a real temptation to use a LED as a charge indicator, thinking you're saving load on the charging system. Generally a bad idea although it works. However, you have to keep the engine RPMs above 2500 to get the alternator to work, which for stop and go traffic in the city is fraught with problems. Just use a normal everyday 12V 3W incandescent bulb as a charge indicator and save yourself grief.


__________________________________________________
Robert
1987 K75 @k75retro.blogspot.ca
http://k75retro.blogspot.ca/
    

89Back to top Go down   Making it my own - Page 2 Empty What i've done today Wed Jan 17, 2018 1:56 pm

VinceD

VinceD
Silver member
Silver member
Today i soldered in the resistors like robmack had drawn out for me. Thank you alot for this, the alternator is now charging while i drive. I measured it when the bike was running and when pulling the throttle the voltage came up to somewhere in the 13V. (Forgot to note just how much it was). A true relief. I did use 5W resistors because they only had the 1W and 5W 56ohm ones in stock.

I also looked at the brake vs rearlight. The difference is just too little. I'm thinking of adding a ledstrip as a brakelight. Either as an extra or to replace the braking light itself. The rearlight i've got now will stay on however, I don't like the ledstriplighting-look as you see them on many bikes. I also have 2 red seperate leds lying around so i might use them instead. They could be less noticable when off (looks better if so)

The third on the bike's joblist was the circuit installing. (Again, thanks robmack!) I soldered on the connections and tested it. I did something wrong however and popped the fuse for the clock. So i unplugged the 12v input and the ground and weirdly enough ... it worked... so it's now installed in a temporal box, taped to the handlebar. The testdrive told me two things. The first is that the speed is still not really correctly indicated. The second that my rpms are good.i'm 
I got 3900rpm at 100 km/h. At idle it was first around 600-700. After the ride, it was steadily around 850. After reading a bit around the web it seems low but i don't think it's a real problem. The only downside i see is that it needs the choke on a bit longer on startup. I'll turn her on before putting on my helmet then...

So after replacing the fuse and the short ride i had a very good feeling about it all. I hope the weather turns for the better again quickly because all the rain and hail are costing me precious drivingtime.


__________________________________________________
I am working to the day of riding my revised : '85 K100 RT' It's only a few months younger than myself.  What a Face
Please comment my progress if you have suggestions, its on the board called 'making it my own'
    

90Back to top Go down   Making it my own - Page 2 Empty Re: Making it my own Wed Jan 17, 2018 5:58 pm

indian036

indian036
Life time member
Life time member
VinceD wrote:I also looked at the brake vs rearlight. The difference is just too little. 

First thing to check is whether the bulbs are the correct rating. While most vehicles have a 5 watt rear light, the K specifies a 10 watt. The brake light is 21 watt, so you should see a significant difference. 
If the bulbs are correct, next check for poor connections in the rear connector or the bulb mounts.

Bill


__________________________________________________
1985 K100RT  VIN 0028991  My original Very Happy ROB the Red Old Bike   (Historic rego)
1985 K100RT  VIN 0029036  BOB the Blue Old Bike  (Historic rego)
1990 K100LT  VIN 0190452  Work in progress
1984 K100RT  VIN 0023022  Work needing lots of progress

1986 K100RT  VIN 0090542  Work needing lots and lots of progress
1993 K1100LT  VIN 0183046  Work in progress
1993 K75S  VIN 0213045  Tom the Triple (now on Historic rego too.)
    

91Back to top Go down   Making it my own - Page 2 Empty Re: Making it my own Fri Jan 19, 2018 1:36 pm

VinceD

VinceD
Silver member
Silver member
Thanks Bill for the tip, I replaced the bulb to a 5w 20w bulb. I couldn't find a 10w 20w one. The wiring of the new taillight came loose and so i decided on redoing it all. The wires were quit thin so replaced those with thicker ones too.
I found the 5w turned on bright enough for just rearlight. The brake is now very very bright. I'll be noticed when stopping Surprised


__________________________________________________
I am working to the day of riding my revised : '85 K100 RT' It's only a few months younger than myself.  What a Face
Please comment my progress if you have suggestions, its on the board called 'making it my own'
    

92Back to top Go down   Making it my own - Page 2 Empty Re: Making it my own Fri Jan 19, 2018 4:09 pm

Laitch

Laitch
Life time member
Life time member
VinceD wrote:I replaced the bulb to a 5w 20w bulb. I couldn't find a 10w 20w one..
I found the 5w turned on bright enough for just rearlight.
The tail light bulb is usually described as 12V 10W, the brake light bulb as 12V 21W.

You might consider the 5W bulb "bright enough" for a tail light but the driver in the car coming up behind you in fog or twilight might not see it that way. The more effective choice would be the 10W bulb.


__________________________________________________
1995 K75 90,000 miles
    

93Back to top Go down   Making it my own - Page 2 Empty Re: Making it my own Fri Jan 19, 2018 5:48 pm

Gaz

Gaz
Life time member
Life time member
The tail light bulb is usually described as 12V 10W, the brake light bulb as 12V 21W.

Which is correct for the BMW K bike rear light assembly using two separate bulbs for the Tail and Brake functions, however with the mods Vince is making his aftermarket rear light assembly will likely have a single dual filament 5/21 watt bulb.

I went through the same search when I was customising my K75 and could not find a dual filament 10/21 watt bulb. My solution to improving the "apparent" light output for the Tail Light function was to paint the interior surfaces of the light fitting glossy white. This did improve the visibility from the rear.

Here in Oz most general auto parts stores don't stock the 10 watt single filament Tail Light bulbs that we should use in our standard K bike rear lights and I have seen many K bikes on the road with a very dim Tail Light which probably shows the rider has a 5 watt bulb installed.

Cheers


__________________________________________________
Gaz
1990 K75 6427509; 1987 R80G/S PD 6292136; 2010 G650GS ZW13381; 95 K1100LT 0232224
    

94Back to top Go down   Making it my own - Page 2 Empty Re: Making it my own Fri Jan 19, 2018 6:17 pm

Laitch

Laitch
Life time member
Life time member
Gaz wrote:Which is correct for the BMW K bike rear light assembly using two separate bulbs for the Tail and Brake functions, however with the mods Vince is making his aftermarket rear light assembly will likely have a single dual filament 5/21 watt bulb.
Yep. I should have considered his customization constraints. Opting for a weaker tail light isn't something I'd consider though, as I wend my way among the bedazzled flatland tourists up here. Smile


__________________________________________________
1995 K75 90,000 miles
    

95Back to top Go down   Making it my own - Page 2 Empty Re: Making it my own Sat Jan 20, 2018 2:36 pm

VinceD

VinceD
Silver member
Silver member
I did think about that for a moment. The thing is however that the rear, non-brake light on this light was 5W and that most bikes do have a 5W rearlight.
I also bought two small halogen 10W and 20W bulbs. I could solder them together and make a little holder in the housing. The housing was clearly not designed to be taken apart and it was quite the struggle to not brake it in the process. That will have to wait for a little while...


__________________________________________________
I am working to the day of riding my revised : '85 K100 RT' It's only a few months younger than myself.  What a Face
Please comment my progress if you have suggestions, its on the board called 'making it my own'
    

96Back to top Go down   Making it my own - Page 2 Empty Re: Making it my own Sun Jan 21, 2018 2:16 pm

VinceD

VinceD
Silver member
Silver member
Holding my baby in my arms I decided changing the bulbs again was just a little thing to do for much needed safety. So I opened up the armature again and after braking the first set of lights, the second pair worked when everything was installed. I am glad that is done. The difference between the two 'reds' is a little smaller again but more noticeable than before. The halogen lights have a small downside too. The light isn't suddenly brighter or less bright, it kind of dims or fades. Quit fast but still... I have the other interior for the light safely packed in a little box so maybe I'll switch them again later.
Anyway, for now, the light is done. 
I ordered some small white pinhead lights that should lit the license plate. It's mandatory for Belgium and I guess other countries that are much stricter too. (Germany, Netherlands) and since those countries have nicer routes to drive, I really need them.
They are something like this:
Making it my own - Page 2 78-90010

I should also attach a red rear reflector and have 10cm diameter mirrors on both sides to be completely road-legal but that's for when I happen to come across those.


__________________________________________________
I am working to the day of riding my revised : '85 K100 RT' It's only a few months younger than myself.  What a Face
Please comment my progress if you have suggestions, its on the board called 'making it my own'
    

97Back to top Go down   Making it my own - Page 2 Empty Re: Making it my own Sun Jan 21, 2018 2:56 pm

robmack

robmack
Life time member
Life time member
I put those on one of my motorcycles.  My advice to you is attach very tiny 2-way inline connectors onto the ends of those wires.  The connectors need to be thin enough pass through the hole in the license plate and the license plate holder.

Making it my own - Page 2 Ic242p

If you don't do that and decide to solder the wires into the harness, you cannot remove the license plate in the future unless you cut the wires.  You might get away with using very tiny wire nuts instead of a 2-way inline connector.

Making it my own - Page 2 Wire-nuts-1

You can also try crimp-on bullet connectors. The bullet connectors need to be tiny to allow them to fit through the bolt hoe along with the wire itself.

Making it my own - Page 2 IMG_009


__________________________________________________
Robert
1987 K75 @k75retro.blogspot.ca
http://k75retro.blogspot.ca/
    

98Back to top Go down   Making it my own - Page 2 Empty Re: Making it my own Sun Feb 04, 2018 8:07 am

VinceD

VinceD
Silver member
Silver member
Because the loghted bolts turned out even bigger than i tought, i decided to place them directly above the plate. This way they can stay in place in case of plate-removal. I did use bullet connectors but couldn't find the tiny ones. It appeared the small red ones could just make it trough the nut. I connected them to the taillight so theyre allways on.

In the process of mounting the mudslab on again, i heard something rattling in the taillight... i tested it and it appeared that the taillight-bulbs glass broke. So i decided to change it back to the first 5w-20w bulb. If i come across a 10w20w bulb I'll replace it once more but i had enough of it all for now. 

Because i kept placing and removing the computer and i ran out of plastic straps to keep it in there, i used a plastic-cotton strap starting and ending at the long battery-holder bolts. Now i can remove it as many times i want easily. 
Because the mudflap was hanging lower, due to the plateholder and lights i think, i made some extra holes and bolted it to the seatbottom. Those last two seat-screws were allmost unreachable anyway with the mudflap in place. 
The two original bolts that hold the flap in place, i replaced with wingnuts and a lockingring. They were difficult to reach with tools too.

And the last thing i did was place a double USB-port below the seat. This way i can reload my phone or intercom if i forgot reloading it before driving off (tends to happen). There is a switch and fuse on the '+' wire. It is directly connected to the battery and because it has a LED in it, i placed a switch. On the pic you can see the rubber cap to waterproof it too.

Making it my own - Page 2 Img_2025


__________________________________________________
I am working to the day of riding my revised : '85 K100 RT' It's only a few months younger than myself.  What a Face
Please comment my progress if you have suggestions, its on the board called 'making it my own'
    

99Back to top Go down   Making it my own - Page 2 Empty Re: Making it my own Sun Apr 08, 2018 8:16 am

VinceD

VinceD
Silver member
Silver member
Been a while since i posted here but thats mainly because i stopped working on the bike and drove it 😊

Now i am back at it again, taking care of the one thing that's annoying me.
The fuel sensor with my Acewell 2853.

I have a sensor present in the tank but is it a true sensor or just to tell me when i have low fuel?
I connected white from the bike to blue from the acewell and black from acewell to ground. The fuel bars on the Acewell counted down straight away with a full tank and showed one blinking bar. With the tank nearly empty the bars popped up again. I conclude from this that if i do the adjustments like robmack posted on 'messing with the in-tank fuel sender' i should get a blinking bar when allmost empty and all bars when not nearly empty. Isn't there an option to get a true fuel gauge readout? The sensor is in there so i should think there is...

In two weeks i'm probably making a big trip so a more or less accurate readout would be cool.


__________________________________________________
I am working to the day of riding my revised : '85 K100 RT' It's only a few months younger than myself.  What a Face
Please comment my progress if you have suggestions, its on the board called 'making it my own'
    

100Back to top Go down   Making it my own - Page 2 Empty Re: Making it my own Sun Apr 08, 2018 9:41 am

robmack

robmack
Life time member
Life time member
Vince, the fuel sender in your 1985 K100 is not a sender that outputs a signal proportional to the quantity of fuel in the tank. Rather, it is a device with a couple of thermistors that will only give indication that the fuel level in the tank has transitioned past a point. The 1983-1985 sender requires an additional electronic circuit to work properly, and even with that circuit its output is binary in nature (i.e. On or Off). In other words, it is not compatible with the fuel readout on your Acewell gauge. The fact that you are getting a reaction on the gauge is coincidental.

For accurate fuel indication in your case, I'd re-purpose the fuel sender circuit from the OEM gauge and hook its output up to a LED to indicate reserve.


__________________________________________________
Robert
1987 K75 @k75retro.blogspot.ca
http://k75retro.blogspot.ca/
    

101Back to top Go down   Making it my own - Page 2 Empty Re: Making it my own Sun Apr 08, 2018 11:33 am

VinceD

VinceD
Silver member
Silver member
Thanks robmack, I searched around the forums for some gauge disassembly-pics and found a topic by nitrogen 'fixing my instrument cluster'. There are some pics describing what is what but it isn't the same as what I have...
Could you help me out here? By rough shape comparison the 'bent' board would be the fuel-indicator part, but it was on the other side of the unit than the indicator light. The flat one was located there... furthermore there are some other pieces in there but they seem to be for the speed indicator since they are sandwiched between the indicator-plate and the indicator--mechanism.

If I could take a guess I would say that it's the bent one with bottom left the ground and positive and 'G'-labeled the input. Top right 'A' would be where I attach the led with the other end to ground. It's all guessing however...


__________________________________________________
I am working to the day of riding my revised : '85 K100 RT' It's only a few months younger than myself.  What a Face
Please comment my progress if you have suggestions, its on the board called 'making it my own'
    

Sponsored content


View previous topic View next topic Back to top  Message [Page 2 of 3]

Go to page : Previous  1, 2, 3  Next

Permissions in this forum:
You cannot reply to topics in this forum