BMW K bikes (Bricks)


You are not connected. Please login or register

Go to page : Previous  1, 2, 3, 4, 5, 6  Next

View previous topic View next topic Go down  Message [Page 2 of 6]


klompy the grey brick


VIP
VIP
look good the bottom half black......heaps of choices


Ed

Ed
Life time member
Life time member
didn't Stan say he had some 'Special Orange " left over , would blend in with the blinkers!


__________________________________________________
1993 K1100RS  0194321         Colour #690 Silk Blue  aka " Smurfette"
2018 Kart upgrade.
'89 K100LT >>> K100 CUSTOM CONVERSION - Page 2 10_x_110
    

Be made

Be made
Life time member
Life time member
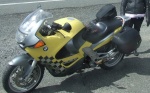
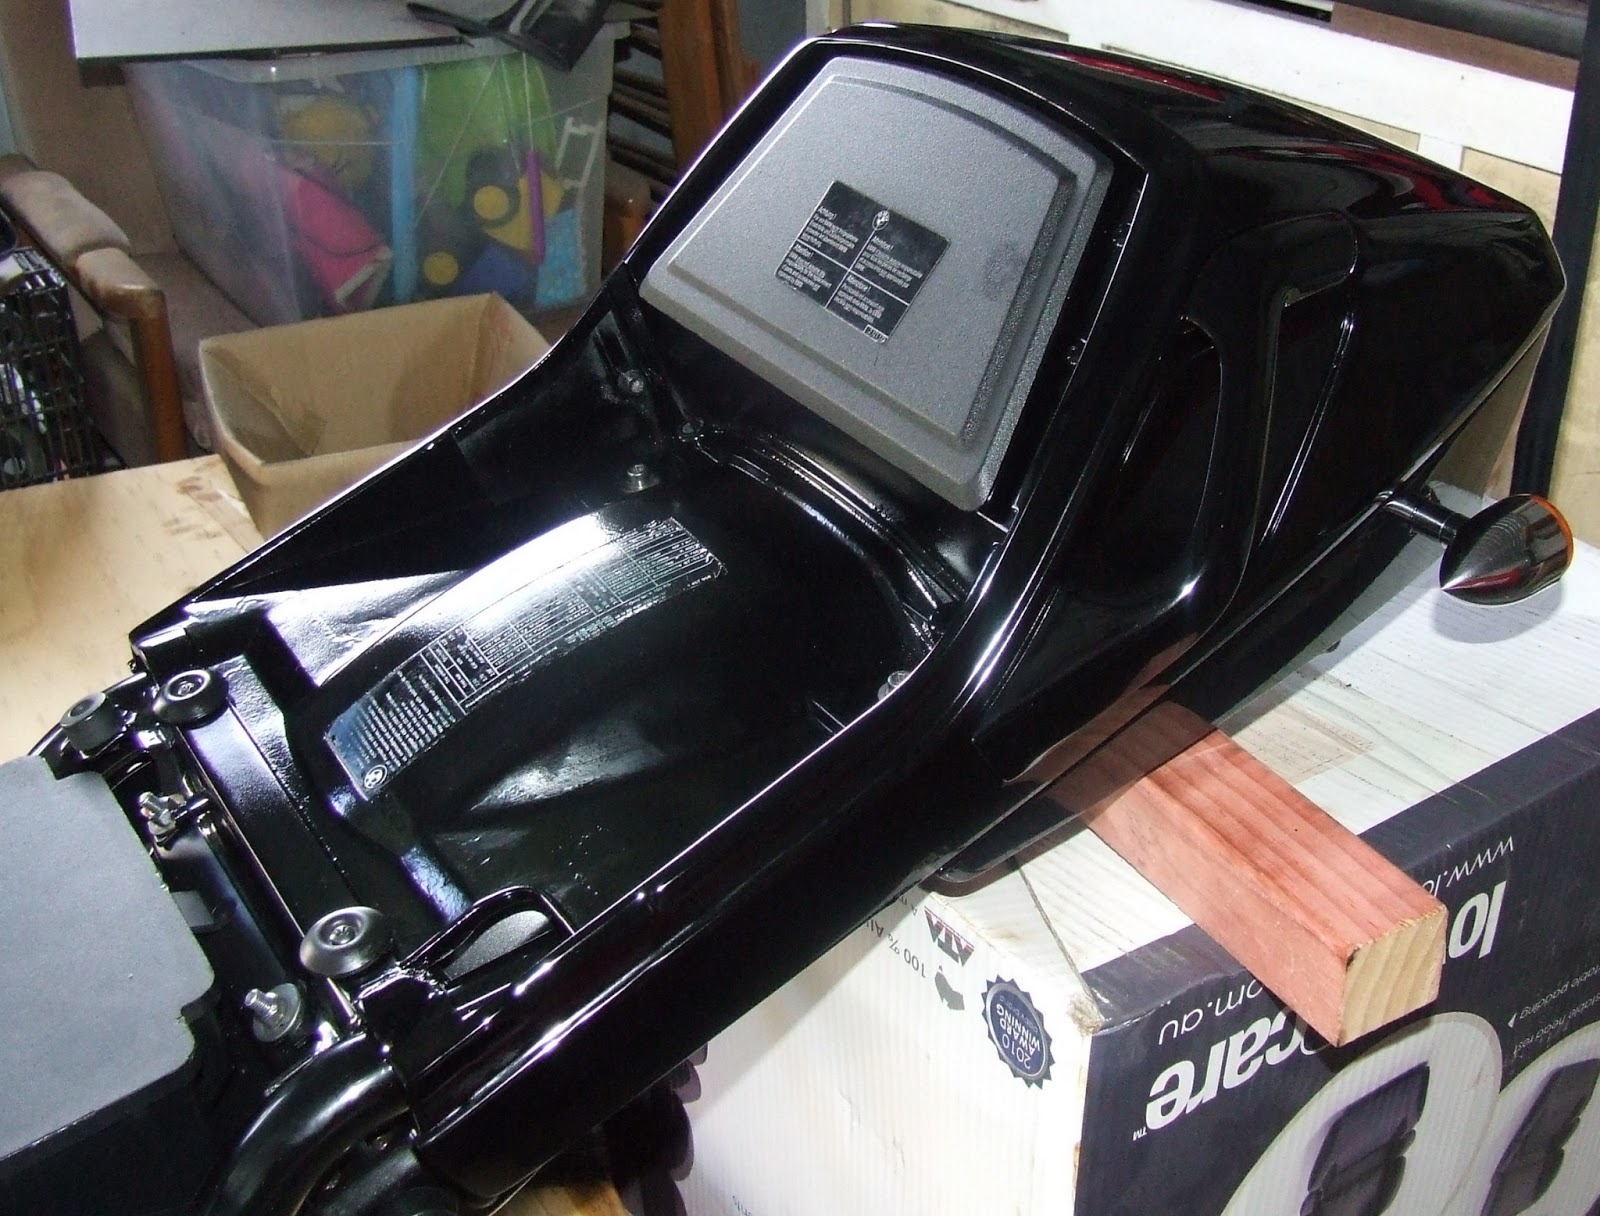
Comberjohn wrote:I picked it up on eBay for £17. Its made by a company called Puig.
It was supposed to be from a Suzuki SV650/1000. Only mods were swoping over the mounting brackets and flattening them slightly.
Thinking about what you are going to do with it, what about spraying it same colour as the bike? Would look like a cowling then.

Good advices . . thanks . . will consider carefully


Be made

Be made
Life time member
Life time member
Now, After getting this far and having ridden daily since 22 December 2012 ( purchase date) with today being 04 March 2013 the beast has been without rego for 9 days.

It is finally time to lay her up and begin the mission of complete overhaul and customisation to my specs.

Heres the list of things yet to be done:

Panel and paint ( Black with gold pinstripes / trim)
Braided brake lines
Overhaul brake system

Handlebars
Highway pegs
Recondition engine
Chrome sump and head covers
Enlarge side-covers
Modify the engine bars to fit (ex 84 model)
Attempt clock replacement / ??

Polish casings
Polish forks / disgard gators

Polish rear drive housings etc
Rewire
Replace fuel lines
Relocate horns
Radiator Screen

Fit various decals
Re-register + WOF
Road test

Estimated cost including purchase: $5000 - $6000.00 max.
Christen with a Maiden voyage:
Destination : To be advised
Date new machine is due up: Labour Weekend 2013
Giving me approx 33 weeks to get my shit together and finish what I have begun :-)

Lets see what the comparison ends up like :-)

I will attempt to document as much as I can but between work commitments and restoration commitments I may not be able to post too much:

'89 K100LT >>> K100 CUSTOM CONVERSION - Page 2 130227-1502


Bigsax

Bigsax
Gold member
Gold member
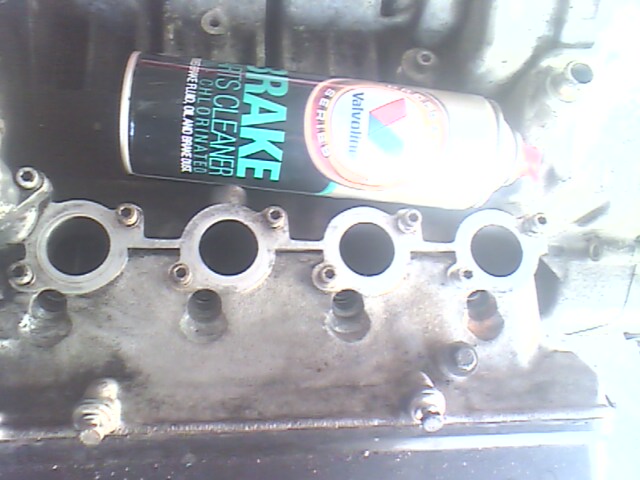
bemade wrote:Will be adding a nitrous oxide kit once its finished

Wizards of NOS SB75 4 cylinder direct port bike nitrous Kit

The unique concept behind the
Street-Blaster 75 makes it the simplest yet most effective direct port
system on the market and it is specifically designed for all 4 cylinder
motorcycles with or without the original air box fitted. The
distinctive feature of a Street-Blaster 75 system is the compact Venom
injectors, which are much easier to fit than US Fogger ‘type’ nozzles.
Venom’s can be fitted in numerous locations whereas Fogger type nozzles
are only suitable for being fitted into the head ports, which usually
requires the head to be removed for machining and is therefore more
expensive.Independent results have proven that when adding up to 75bhp, a
Street-Blaster 75 can out perform any other direct port kit in all
respects, whilst also being more user friendly.

No other system has such a desirable combination of low price, ease of fitting, user friendliness and superior performance. Despite
the low price, this system still benefits from the same list of unique
high standard features as our Street-Blaster 150Bi. The Street-Blaster
75 has been designed to fit a stock street bike without any major
modifications and as a result can often be fitted without removing more
than the fuel tank, in less than half the time of other kits.

The
WON team have put a great deal of thought into the ease of fitting,
performance and cost when developing this unique system, to make sure it
ticks all the right boxes, for you and your bike. If you’re looking
for up to an extra 75 hp
, why search further, only to find a more
difficult to fit, more expensive and less effective system, when you’ve
already found the best?

from here:

http://www.noswizard.com/bike-nitrous-kits-2/street-bike-nitrous-kits/sb75-direct-port-bike-nitrous-kit.html

There is a clip on youtube of a guy with a turbo fitted to his K. Maybe worth having a look


__________________________________________________
'89 K100LT >>> K100 CUSTOM CONVERSION - Page 2 Brick110
I stole this image, let me know if you want it back.
    

Be made

Be made
Life time member
Life time member
[quote="Bigsax"]
bemade wrote:

There is a clip on youtube of a guy with a turbo fitted to his K. Maybe worth having a look

Yep thanks for that. I had a look and well worth investigating :-)


Comberjohn

Comberjohn
Life time member
Life time member
Okay, I'm going to ask the question that everyone else is too polite to ask.
Given that you are going to go the ape hanger, highway pegs, customising, etc. route (no problem with that, whatever rings your bell) why the hell do you need 160bhp?
On a bike with skinny bias ply tyres, modest braking and an engine/transmission over 20 years old, as a local expression here goes, you need your head felt!
I'm all for modifying a bike, but it just seems to send out such a mixed message.
I find that with the stock 90bhp I'm more than capable of scaring myself.

http://www.johnsdrivingschool.co
    

Rick G

Rick G
admin
admin
Good Ol NOS hey best way of blowing your piston crowns out the exhaust in bits I have ever come across.


__________________________________________________
"Man sacrifices his health in order to make money.
Then he sacrifices money to recuperate his health.
And then he is so anxious about the future that he does not enjoy the present; the result being that he does not live in the present or the future; he lives as if he is never going to die, and then dies having never really lived."   Dalai Lama


Bikes 1999 K1100 LT with a Big Block 1200
    

Be made

Be made
Life time member
Life time member
Comberjohn wrote:Okay, I'm going to ask the question that everyone else is too polite to ask.
Given that you are going to go the ape hanger, highway pegs, customising, etc. route (no problem with that, whatever rings your bell) why the hell do you need 160bhp?
On a bike with skinny bias ply tyres, modest braking and an engine/transmission over 20 years old, as a local expression here goes, you need your head felt!
I'm all for modifying a bike, but it just seems to send out such a mixed message.
I find that with the stock 90bhp I'm more than capable of scaring myself.


yeah . . have been considering many options and may end up doing either something or nothing. No decisions forthcoming for at least 6 months until the initial rebuild is finished. I am a high speed fanatic though . .:-) . . and, yes, I probably DO need my head felt, same as anyone who chooses to travel at speeds in excess of 160 . . hee heeee


Last edited by bemade on Tue Mar 05, 2013 1:42 am; edited 1 time in total


Be made

Be made
Life time member
Life time member
And down she comes . . .

'89 K100LT >>> K100 CUSTOM CONVERSION - Page 2 DSCF2423


Be made

Be made
Life time member
Life time member
Now she's a 2 piece . . .( well, probably about 200 pieces but . .motor separated from frame at the mo)

'89 K100LT >>> K100 CUSTOM CONVERSION - Page 2 DSCF2426


'89 K100LT >>> K100 CUSTOM CONVERSION - Page 2 DSCF2427

Obvious things to disconnect are:

Throttle / choke clutch cables
Ignition coil wiring
Various wiring plugs (just trace the loom until a connector appears)
Radiator hoses
engine bolts x 4

I have to say this is one of the easiest, if not THE easiest engines to remove I have ever worked on

others were honda cbx
honda 750/4
KZ1000
Honda cb500/4
Suzuki water bucket
beema r100's / r65's
yamaha xs11 etc

on;y pain in the butt I found was the wiring from the front of the engine up through the plate below the tank, with a LARGE plug and a grommet. took several minutes. The rest was a piece of cake

Suggest advice for this part of the rebuild is to label all wiring as you disconnect it from each plug, replace as many bolts and nuts as you can as soon as you can back in to their original holes, and clean up as you go

Thing is, and I have seen this happen a few times, is guys like me go in to this with full intention of doing everything as a continuous process and then, sometimes what happens is we get way-laid, sometimes by heart attack / problems, back injury, broken legs or whatever. Then we have to put everything on hold. when we go to pick it all up again the disassembly process has slipped out of our minds, making re-assembly a real make piece and 'work it ut as you go' affair - not pleasant under any circs unless you love puzzles


Be made

Be made
Life time member
Life time member
Mill ready for open heart surgery

'89 K100LT >>> K100 CUSTOM CONVERSION - Page 2 130310-1542(001)

'89 K100LT >>> K100 CUSTOM CONVERSION - Page 2 130310-1542

I have left the box on for now as it is also acting as the stand to which the main and centre stands are attached

Next step is to either sandblast (VERY carefully) or speedbrush the casings, I have sandblasted a lot before with extremely good results and no problems afterward. The trick is to SEAL WELL all inlets and do the blasting from a distance, practice quite a bit first if using the tool for the first time until you can see the results and can better gauge what is going to happen. It is all about DISTANCE, from the object being blasted and you have to be able to move the nozzle of the blaster in increments of centimeters at times to get the perfect result.

The beauty of blasting is the thoroughness of the job and the speed with which results get achieved. In a day (8 hours) you can have the heads of every single bolt and the surfaces of all casings and the frame better than new and ready for painting with no other prep needed

Rocker and sump covers get chromed

Very easy removal of injectors, alternator, starter, ignition coils etc


Be made

Be made
Life time member
Life time member
Blow every hole needing blocking with brakecleen prior to sealing with masking tape.

The areosol Brakecllen from valvoline has enough pressure to act as a mini dirt blaster so no other cleaning is
needed before applying tape because the brake cleen evaporates :-)

'89 K100LT >>> K100 CUSTOM CONVERSION - Page 2 130310-1710

'89 K100LT >>> K100 CUSTOM CONVERSION - Page 2 130310-1709(001)


'89 K100LT >>> K100 CUSTOM CONVERSION - Page 2 130310-1709


'89 K100LT >>> K100 CUSTOM CONVERSION - Page 2 130310-1708


Last edited by bemade on Fri Mar 15, 2013 1:42 am; edited 2 times in total


AJ.Valente

AJ.Valente
Life time member
Life time member
Really enjoy this thread Bemade, have learned a lot here.


Be made

Be made
Life time member
Life time member
Have located a BEAD blaster . . much better than sand :_)


Be made

Be made
Life time member
Life time member
Beginning the blast

The bead blaster was miles away so I decided to invest in a sandblasting set up and begun work today
Obviously all ports are double masked to prevent the intrusive sand from finding its way into undesirable places

'89 K100LT >>> K100 CUSTOM CONVERSION - Page 2 DSCF2428

'89 K100LT >>> K100 CUSTOM CONVERSION - Page 2 DSCF2429

'89 K100LT >>> K100 CUSTOM CONVERSION - Page 2 DSCF2430


And painting as I go along, doing two coats VHT Aluminum and 2 coats VHT Satin Clear

I don't need to touch the rocker cover or sump plate as they are being chromed

The finish will possibly be better than Factory


Be made

Be made
Life time member
Life time member
Engine Has been completely sandblasted and de-bolted / painted. Next step is removal of Rocker cover, timing chain cover and sump plates for chroming along with the bolts

Mucked around on Windows Paint tonight and got a mock up of the side cover decals, coloured from an original image

Have gone with the pre - 80 boxer type design

The color will obviously be the same as the gold / black trim, not the kacky yellow you see here (my bad . . :-) and the size will be decided in relation to the size of the side cover ( much smaller than the R series)

'89 K100LT >>> K100 CUSTOM CONVERSION - Page 2 D

Not too bothered about the fact that the engine is only 987 cc.
The original flat twins that sported these decals were only 980 cc :-)


Be made

Be made
Life time member
Life time member
Bigsax wrote:There is a clip on youtube of a guy with a turbo fitted to his K. Maybe worth having a look

I have looked in to this. Kits start at $4000 - 6500. not in my realm :-( . . maybe if I won lotto then . . maybe. But if that happened then I'd be customising the latest model :-)


rosskko

rosskko
VIP
VIP
RJTrucker had a turbo.
Desertbeemer was interested but I do not know if he bought it.

Might be worth a pm to RJ


__________________________________________________
1986 K100RT VIN 0093801K100RT with summer fairing for a northern visitor

Basic/2 6308802K100CJ  05/1988

K1100RS 0194321
    

Be made

Be made
Life time member
Life time member
I now have it down to its bones

You can see lots of rust needing attention.


'89 K100LT >>> K100 CUSTOM CONVERSION - Page 2 DSCF2475

'89 K100LT >>> K100 CUSTOM CONVERSION - Page 2 DSCF2476


'89 K100LT >>> K100 CUSTOM CONVERSION - Page 2 DSCF2477

'89 K100LT >>> K100 CUSTOM CONVERSION - Page 2 DSCF2473

'89 K100LT >>> K100 CUSTOM CONVERSION - Page 2 DSCF2472

'89 K100LT >>> K100 CUSTOM CONVERSION - Page 2 DSCF2474


'89 K100LT >>> K100 CUSTOM CONVERSION - Page 2 DSCF2471

'89 K100LT >>> K100 CUSTOM CONVERSION - Page 2 DSCF2470


Glad I bought that sandblasting unit now

This is the next step. Sandblast the frame, powder coat it, replace the steering head bearings and set the frame up in prep for re-assembly


Be made

Be made
Life time member
Life time member
Sandblasting of frame complete:


'89 K100LT >>> K100 CUSTOM CONVERSION - Page 2 DSCF2481


Off to the Powder-coaters tomorrow :-)

For those who want to do this the cost, to sandblast the gearbox and engine cases, main and side stands and frame was 75kgs ($65.00 nz) of high grade garnett and approximately 6 hours labour

The pressure required to run an airgun capable of dragging the sand is 125psi
The work is close up and inch by inch stuff
You recycle the sand up to 7 times before it turns in to powder

I did mine on a lawn mowing trailer which has high sides to contain the sand and simply swept the deck after the bucket emptied, sieved the sand and reused it
The only extra gear required is a head cover and ear muffs
Hook an airgun with a double intake up to a compressor producing 125psi @ 11.5cfm
Plug one end (the front intake) into a bucket of sand and the other into the compressor and your away laughing

The reason I did mine personally instead of paying someone $150.00 or more to do it for me is that I am a bit of a perfectionist when it comes to doing things and I am also great believer that if you want something done properly do it yourself (wherever possible).

As I am setting this bike up for life, for me, I am going to entrust as little as possible to other people and do as much as I can myself
Unfortunately I cannot do powder coating so I have to outsource that but I AM looking in to nickel coating at the mo' for nuts and bolts etc :-)


Last edited by bemade on Mon Apr 01, 2013 4:21 am; edited 1 time in total


charlie99

charlie99
VIP
VIP
woohoo ...like a new one ....or will be !


__________________________________________________
cheezy grin whilst riding, kinda bloke ....oh the joy !!!! ...... ( brick aviator )

'86 K100 RT..#0090401 ..."Gerty" ( Gertrude Von Clickandshift ) --------O%O
'86 k100 rs.. #######..  "Fred " (f(rame) red ) ( Fredrick leichtundschnell ) - -
bits and pieces from many kind friends across the k100 world ...with many thanks ..
1987 k100rs ########   "Red"  - (red sports rs TWB style )
1989 K100rt #009637   "Black Betty"  (naked rt ala Nigel , now sporting an rs main fairing )
    

Be made

Be made
Life time member
Life time member
charlie99 wrote:woohoo ...like a new one ....or will be !
Yep . . .but preferably better :-)


92KK 84WW Olaf

avatar
Life time member
Life time member
A fantastic job indeed and an inspiration to more of us. Good luck with the rest of it too.

I also read Comberjohn's comment about the power upgrade. I would admit to loving high average speeds and long distances and have to say the K in stock form is more than capable. The top speed may not be as some more powerful Japanese bikes but the comfortable top speed is definitely way ahead and its like the K really starts to find its own when you hit 120kph..........

92KK


Last edited by 92KK K100LT 193214 on Mon Apr 01, 2013 12:21 pm; edited 1 time in total


__________________________________________________
1992 K100LT 0193214 Bertha Blue 101,000 miles
1984 K100RT 0022575 Brutus Baja Red 578 bought 36,000 now 89,150 miles
1997 K1100LT 0188024 Wotan Mystic Red 689 58,645 now 106,950 miles Deceased.
1983 K100RS 0011157 Fricka 606 Alaska Blue 29,495 miles Damn K Pox Its a Bat outta Hell Now 58,200 miles. 
1996 K1100LT 0233004 Lohengrin Mystic Red 38,000 miles currently 48,061 miles.
1983 K100RS 0004449 Odette R100 colours 58,000 miles. Sprint fairing now 61,190 miles

Past:
1968 Yamaha 80 YG1
1971 Yamaha 125 YAS-1
1968 Honda 125 SS
1970 Honda CD 175
1973 Honda CB500-4
Honda CX 500
    

AJ.Valente

AJ.Valente
Life time member
Life time member
My frame had accumulated some rust over the years, particularly in the rear quarter, and is the reason I now avoid riding in the rain. '89 K100LT >>> K100 CUSTOM CONVERSION - Page 2 178468


Be made

Be made
Life time member
Life time member
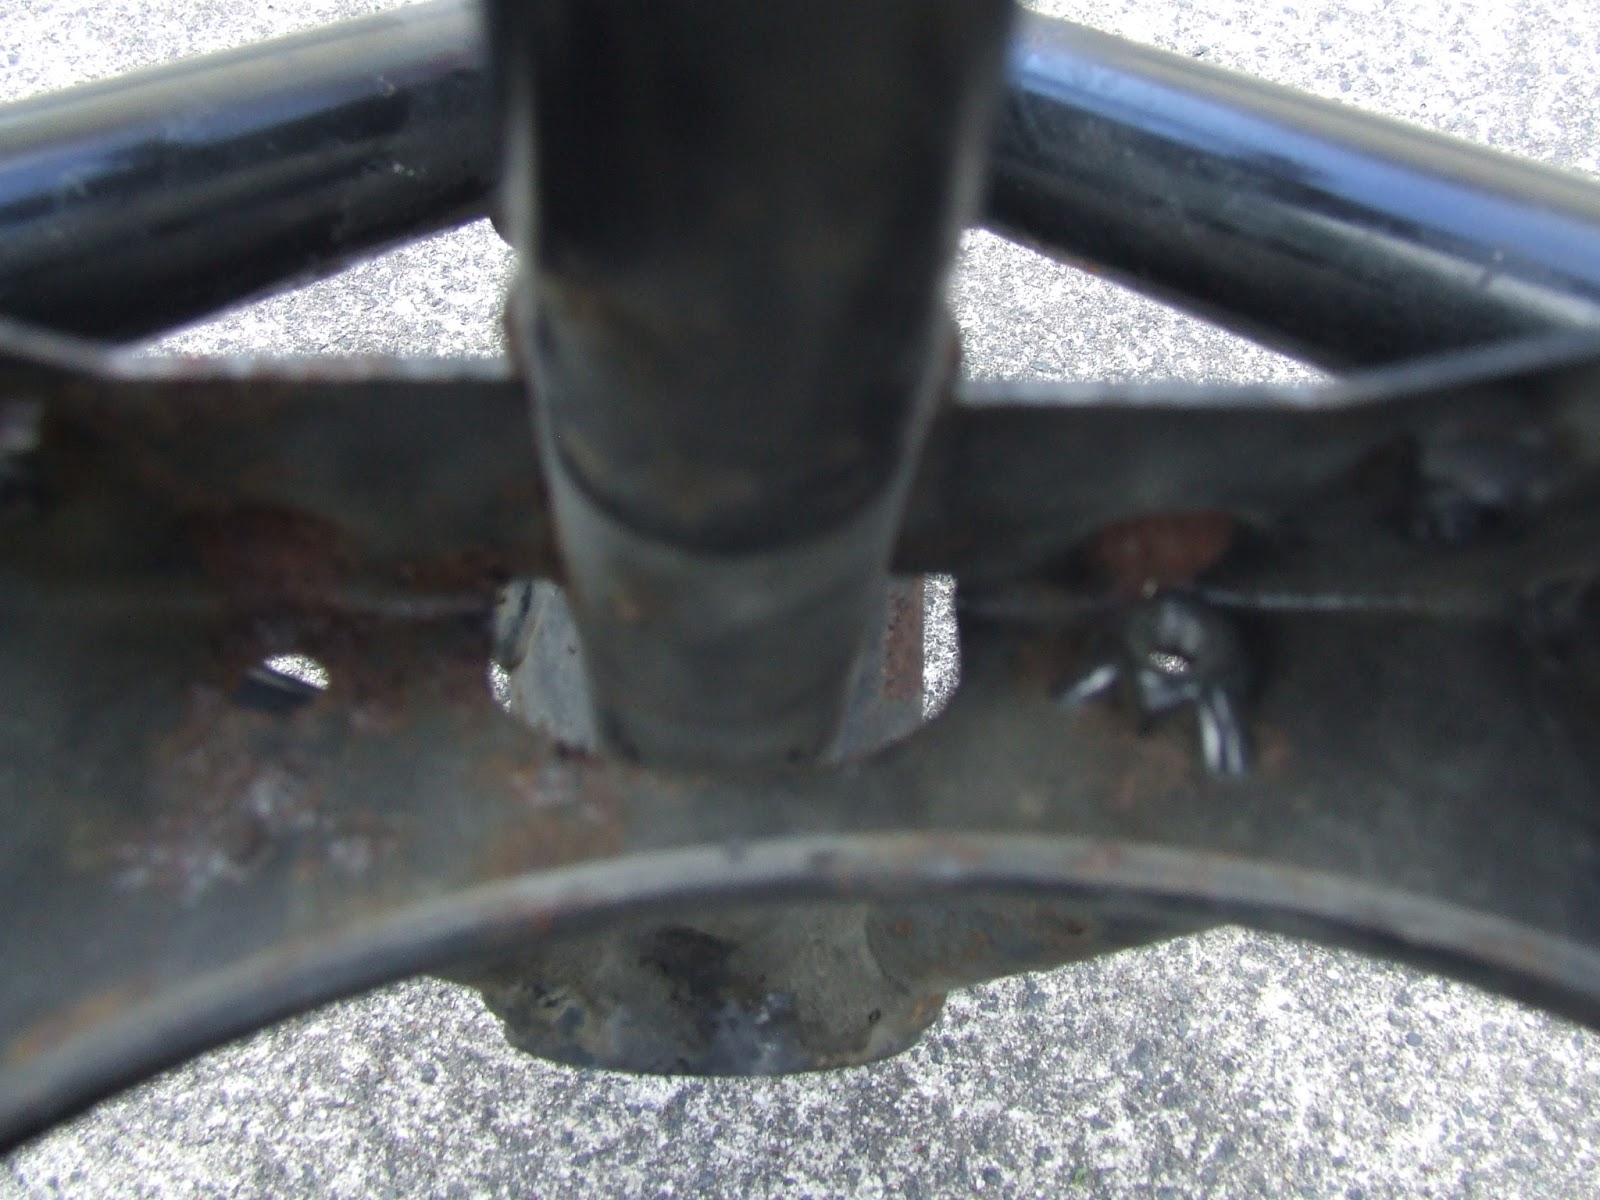
AJ.Valente wrote:My frame had accumulated some rust over the years, particularly in the rear quarter, and is the reason I now avoid riding in the rain. '89 K100LT >>> K100 CUSTOM CONVERSION - Page 2 178468

I fully understand . . :-) That is precisely why I am powdercoating the frame, triple coating everything else and then double coating everything else except the frame in VHT Clear, including every exterior single nut and bolt.

Here, below, the Top Yoke gets wire brushed and VHT Clear applied, the bolt heads have 3 coats gold and 2 x Clear. Pretty much bullet proof rustproofing.

'89 K100LT >>> K100 CUSTOM CONVERSION - Page 2 DSCF2482

Virtually every component on the bike has either some paint damage / deterioation or some rust, hence the need for a complete rebuild. I suspect most machines 20 years or older, around 100 k or more on the clock will suffer the same fate but I suspect also that most owners probably just prefer to ride and park and do the basic minimum maintainence to get by on an as needed basis

The way I see this project though is that if it is set up properly , from the very beginning the bike, in 30 years time, will probably be good for another 20 years (for someone else's pleasure (by then I shall be 79 years old)


Be made

Be made
Life time member
Life time member
Top yoke now fully reconditioned complete with fugly instrument cluster bracket (which will probably be disposed of in favor of a preferential setup - custom one I have in mind)

'89 K100LT >>> K100 CUSTOM CONVERSION - Page 2 DSCF2483


'89 K100LT >>> K100 CUSTOM CONVERSION - Page 2 DSCF2484


Every thread gets wire brushed and then I apply LITHIUM GREASE, prior to insertion, as opposed to nickel paste or anything else ( I used to use nickel paste but I found over the years it petrified). This is of course just my preference to use the lithium, no recommendation here and not doing so under any advisement, simply personal experience

Obviously you will do all nuts up to specified torque settings and a re-tightening process will be needed once the reconditioned bike has traveled a few thousand k's

Some may notice the crack in the instrument cluster bracket. This bike has had a rather serious fall at some point.


Comberjohn

Comberjohn
Life time member
Life time member
Things progressing well.
Your account of coating the frame reminded me of a TV program I watched last week, Wheeler Dealers.
They were replacing the tubular chassis on a TVR which was about 15 years old.
Wouldn't have passed the MOT because of the serious corrosion in the chassis and they were able to buy it cheap for that reason.
It seems that the factory only powder coated it at the time. The replacement chassis was zinc coated before the powder coating and reckoned to last much longer.
Just a thought.


__________________________________________________
Life is not a rehearsal.
2010 VFR 1200F DCT 
2010 R1200GS(gone)
1986 K100 Silver(gone)
2012 K1600GT(gone)
1984 K100RT Madison Silver(gone)
1989 K100LT Stratus Grey(gone)
1984 K100 Red(gone)
http://www.johnsdrivingschool.co
    

Be made

Be made
Life time member
Life time member
Yep . . the powder coater guy told me they zinc coat first even before I asked him about the process. He said its standard process for them so I am wrapped with that - all for the same inclusive price of $80.00 + gst = $92.00 or thereabouts

Steering head bearings arrived today :-)


Be made

Be made
Life time member
Life time member
Powdercoated now

Cost $92.00

There is no way I could have obtained these results for this price on my own.

Just go to any industrial powdercoater / spraypainters

'89 K100LT >>> K100 CUSTOM CONVERSION - Page 2 DSCF2485
'89 K100LT >>> K100 CUSTOM CONVERSION - Page 2 DSCF2486

Tip: record the FRAME NUMBER prior to powder coating as it gets wiped / becomes unreadable afterwards

Rebuild proper can now start


Be made

Be made
Life time member
Life time member
I put the Timing chain cover, the Crankshaft cover and the Rocker cover and Headlamp brackets into the electro-platers today

I was advised that Chrome is no good for the crevaces and would only be able to go to a certain depth around the lines and bolt holes. The advise was to polish the covers and chrome the brackets so that's what is happening. Quote approx $520.00

They are due back about 2 weeks time.

Over this period the wiring loom will be overhauled, the paintwork on the body parts will be done and I will begin the reconditioning on the engine. What will slow me down there will be the ordering of the parts. I won't know what I need until I get the thing down. The only certainties at this point is timing chain kit and head gasket so I have ordered those, oil filter, spark plugs and lubricants etc


Be made

Be made
Life time member
Life time member
On replacing the steering head bearings you will need to order a DUST COVER for the bottom one as it gets munted when you grind the old bearing off the shaft. Cost me $8.40. A small price to pay for what it does :-)


Rick G

Rick G
admin
admin
Just a word of caution here. I realize that you don't intend doing it at the moment but DON'T powder coat any engine parts like the covers. The powder coat is a plastic and insulates well so the heat doesn't get out that way and can cause overheating in hot weather. With liquid cooled not quite so much but air cooled motors can be affected very badly and even cook and seize.
Even a liquid cooled engine gets rid of a lot of heat through the covers and engine cases.


__________________________________________________
"Man sacrifices his health in order to make money.
Then he sacrifices money to recuperate his health.
And then he is so anxious about the future that he does not enjoy the present; the result being that he does not live in the present or the future; he lives as if he is never going to die, and then dies having never really lived."   Dalai Lama


Bikes 1999 K1100 LT with a Big Block 1200
    

Be made

Be made
Life time member
Life time member
Thanks for that. Appreciate your post :-)

No, I don't intend to powdercoat anything else, just the frame


Last edited by bemade on Sun Apr 14, 2013 3:51 am; edited 1 time in total (Reason for editing : spell powdercoat ??)


Be made

Be made
Life time member
Life time member
Got the front legs done today, sandblasted and painted (resurfaced only - will overhaul upon re-assembly)

Have decided to keep the gaitors on once the bike is finished

Forks are bloody expensive and stonechips in the upper parts cause fork seals to wear out fast

'89 K100LT >>> K100 CUSTOM CONVERSION - Page 2 DSCF2490


Be made

Be made
Life time member
Life time member
The rust discovery continues:

This is the base of the clocks.

Even though I am prossibly going to discard them I don't like leaving things half done. I may well use them until I get the right alternative sorted. As can be seen the wire brush on the drill did the revealing but it needs sandblasting to remove the rust

'89 K100LT >>> K100 CUSTOM CONVERSION - Page 2 DSCF2492


Be made

Be made
Life time member
Life time member
The big clocks are back on ( for now) The only thing I really like about them is the plug / all in one wiring lead for them, just like in the BMW cars.

I repainted the base after de-rusting it but really want to get rid of them altogether. Am open to suggestions for a speedo and rev counter alternative. The only purpose a rev counter has served me in the past is to gauge legal speed when the speedo has kicked in and out, as we know the K's do (if you don't do the fix :-)

'89 K100LT >>> K100 CUSTOM CONVERSION - Page 2 DSCF2496


Rick G

Rick G
admin
admin


__________________________________________________
"Man sacrifices his health in order to make money.
Then he sacrifices money to recuperate his health.
And then he is so anxious about the future that he does not enjoy the present; the result being that he does not live in the present or the future; he lives as if he is never going to die, and then dies having never really lived."   Dalai Lama


Bikes 1999 K1100 LT with a Big Block 1200
    

Comberjohn

Comberjohn
Life time member
Life time member
Part suppliers to Australia must wear masks!
I'm pretty certain that I have seen similar, if not identical for less than £100.
Found it about a month ago on eBay UK. From memory, it was £69+p&p.
Keep looking.


__________________________________________________
Life is not a rehearsal.
2010 VFR 1200F DCT 
2010 R1200GS(gone)
1986 K100 Silver(gone)
2012 K1600GT(gone)
1984 K100RT Madison Silver(gone)
1989 K100LT Stratus Grey(gone)
1984 K100 Red(gone)
http://www.johnsdrivingschool.co
    

Be made

Be made
Life time member
Life time member
Thanks guys. Much appreciated. Will look until I find the right one. I am looking closely at the daytona range at the 'mo, like this one:

http://daytona-global.com/products/?page=Products_Product&mfrID=9&categID=14&subcategID=49&productID=86267

really wanting to stick to a needle speedo if i can


Rick G

Rick G
admin
admin
You will find that the Ks have a very weak sensor signal and you may need to have an amplifier made or one other option would be to use a speedo healer.
http://www.healtech-electronics.com/


__________________________________________________
"Man sacrifices his health in order to make money.
Then he sacrifices money to recuperate his health.
And then he is so anxious about the future that he does not enjoy the present; the result being that he does not live in the present or the future; he lives as if he is never going to die, and then dies having never really lived."   Dalai Lama


Bikes 1999 K1100 LT with a Big Block 1200
    

Be made

Be made
Life time member
Life time member
RicK G wrote:You will find that the Ks have a very weak sensor signal and you may need to have an amplifier made or one other option would be to use a speedo healer.
http://www.healtech-electronics.com/

Nice!. . . thank you very much :-)


Be made

Be made
Life time member
Life time member
The new paint on the body work is hard enough now to allow it to be worked with (3 days wait. . groan!) and I managed to get the rear cowling fitted up today and overhauled the wiring loom and refitted it as well as wiring up and fitting the new rear indicators:

'89 K100LT >>> K100 CUSTOM CONVERSION - Page 2 DSCF2499

'89 K100LT >>> K100 CUSTOM CONVERSION - Page 2 DSCF2498

'89 K100LT >>> K100 CUSTOM CONVERSION - Page 2 DSCF2497


'89 K100LT >>> K100 CUSTOM CONVERSION - Page 2 DSCF2500


Be made

Be made
Life time member
Life time member
For sale:

One pair of Rear Indicators K100 originals in excellent condition :-)


Be made

Be made
Life time member
Life time member
The polishing is finished on the cases :-) and the headlamp brackets have been re-chromed

'89 K100LT >>> K100 CUSTOM CONVERSION - Page 2 DSCF2521

'89 K100LT >>> K100 CUSTOM CONVERSION - Page 2 DSCF2520

'89 K100LT >>> K100 CUSTOM CONVERSION - Page 2 DSCF2519


The lines will be painted black and then VHT clear-coated with Diamondshine from http://www.kbs-coatings.com/


Rick G

Rick G
admin
admin
Arggggg my eyes too bright too bright does look good should be a real show stopper.


__________________________________________________
"Man sacrifices his health in order to make money.
Then he sacrifices money to recuperate his health.
And then he is so anxious about the future that he does not enjoy the present; the result being that he does not live in the present or the future; he lives as if he is never going to die, and then dies having never really lived."   Dalai Lama


Bikes 1999 K1100 LT with a Big Block 1200
    

97Back to top Go down   '89 K100LT >>> K100 CUSTOM CONVERSION - Page 2 Empty Those are VERY Tue Apr 30, 2013 1:12 pm

ibjman

ibjman
Life time member
Life time member
Those are VERY NICE! Did you hire that work out or did you do them at home? If self done, how many "special" buffer tools were required & how many hours????


Be made

Be made
Life time member
Life time member
ibjman wrote:Those are VERY NICE! Did you hire that work out or did you do them at home? If self done, how many "special" buffer tools were required & how many hours????

No, I cannot take credit for these although in the past I have produced results the same as this on R100 cases

The tools I used to use was a finishing sander, 80 grit, then 180 grit and then 270 grit sandpaper to start with and then a cotton buffing wheel on the end of an electric drill and I cannot count the amount of hours I spent polishing using Autosol to get a mirror finish. That is why I paid for the service this time. I simply have not got the time to do everything myself

These cost me a pretty penny though

$514.00 included the chroming of the headlamp brackets


frogy

frogy
Silver member
Silver member
Ya beat me to it.Dang that's bright.


Be made

Be made
Life time member
Life time member
Side cover Decals came today :-)

After 3 attempts they finally matched the Gold color right even though it looks dark unless the light is shining directly on them, then they are a perfect match :-).

'89 K100LT >>> K100 CUSTOM CONVERSION - Page 2 DSCF2523

Unfortunately, if I want these done properly, there is a bit of a rig-a-mar-roll involved.

They need to be perfectly positioned on the covers so in order for that to happen the bike needs to be fully assembled. Then the bike and the decals need to make it back to my painters shop where he will 3000 grit sand where the decals will go to get a perfect thickness and flush surface across the edges of the decals and the paint. See . . hes a fussy bugger . . . but then so am I so thats ok :-) . . . .whilst on the bike, then put the Decals on the covers and then clear coat them :-)

At this point it is looking like these decals will be amongst the last of the final finishing touches once it gets near the final stage of completion. At the moment its only about 15% done.

Also, the wheels are finished. Baked in gold then baked in clear coat

'89 K100LT >>> K100 CUSTOM CONVERSION - Page 2 DSCF2525


101Back to top Go down   '89 K100LT >>> K100 CUSTOM CONVERSION - Page 2 Empty 
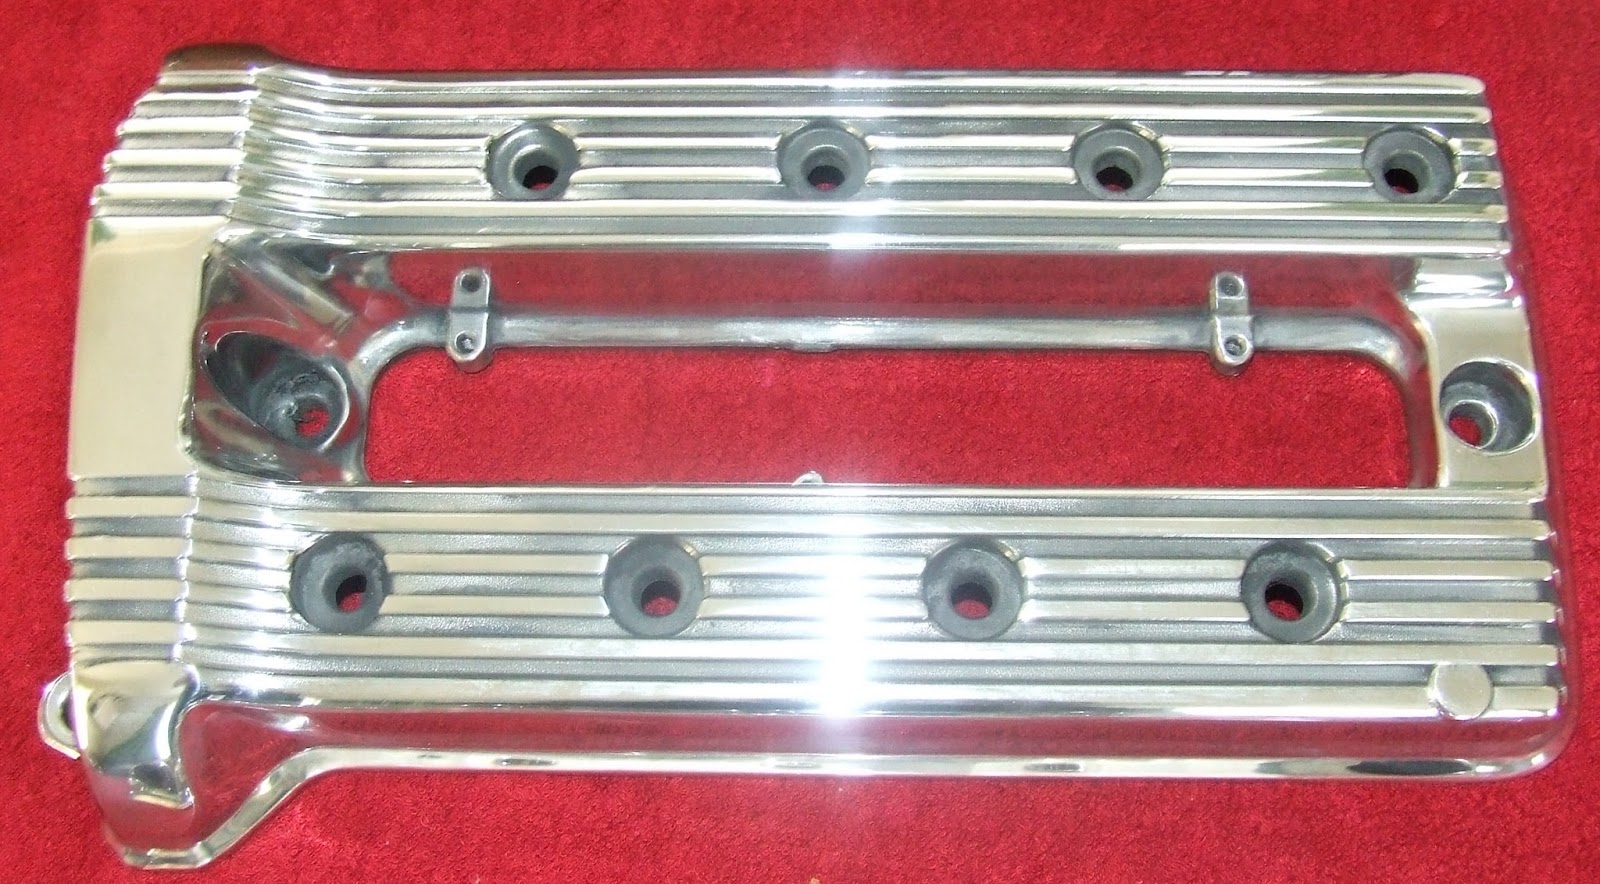
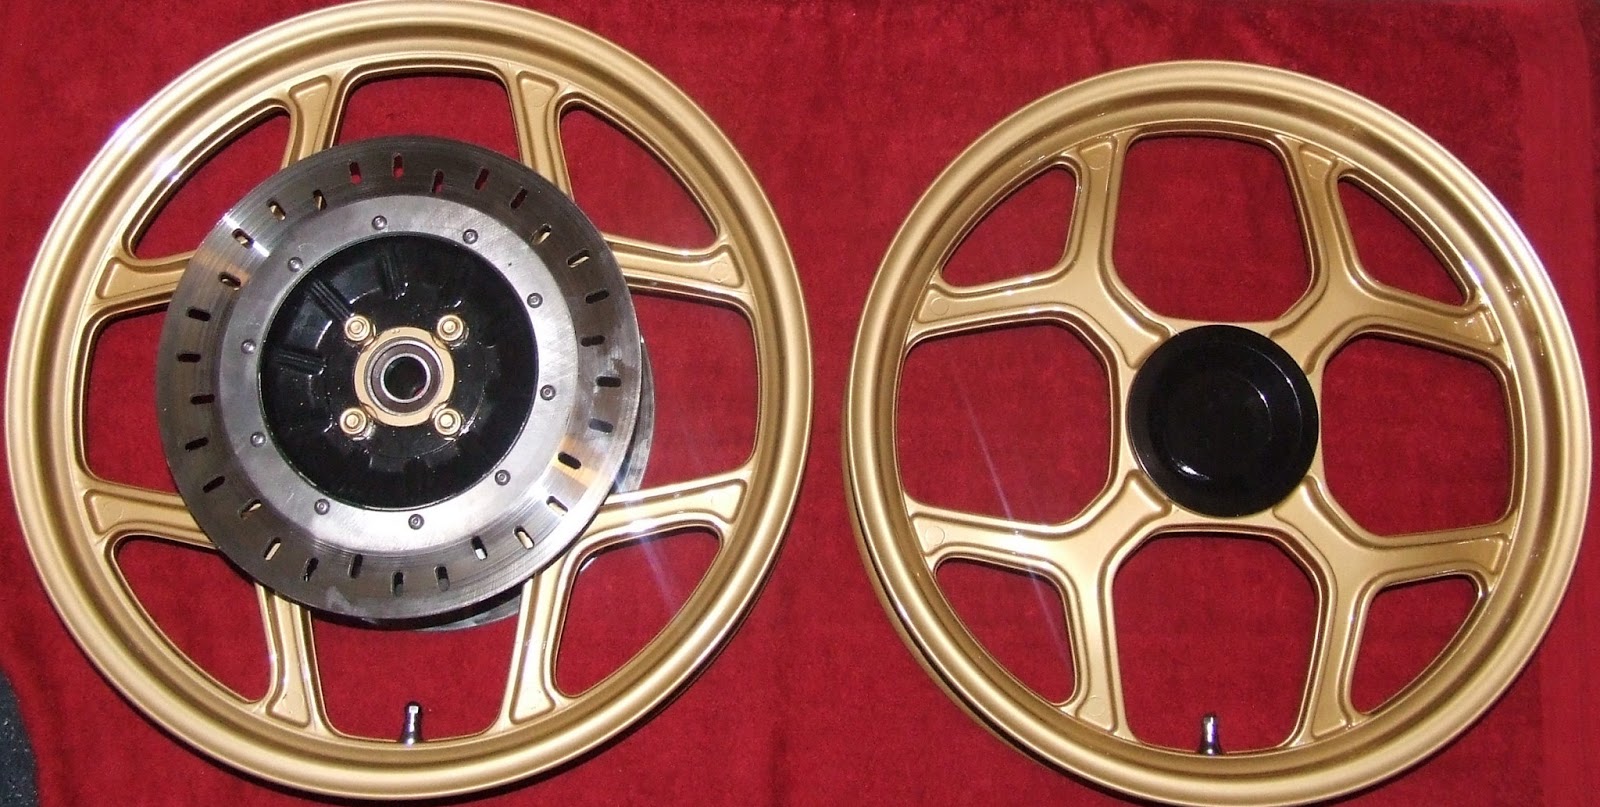
Re: '89 K100LT >>> K100 CUSTOM CONVERSION Wed May 01, 2013 10:13 pm

Be made

Be made
Life time member
Life time member


Sponsored content


View previous topic View next topic Back to top  Message [Page 2 of 6]

Go to page : Previous  1, 2, 3, 4, 5, 6  Next

Permissions in this forum:
You cannot reply to topics in this forum